Renovating our 1997 Fleetwood Mallard for Full-Time Living (Part 14)
This is the story of how my husband and I purchased a 20-year-old travel trailer and I DIYed the crap out of it to make it suitable for full-time living. In this series, I’m giving All of the details about the process step-by-step, as performed by me, a 26-year-old woman with No experience in construction. The first installment in this series details the purchasing process and the changes I planned to make. You can find that article in the link below and start at the beginning. Then, follow along in the series by clicking on the link for the next article at the bottom of each page.
Putting Up the Walls
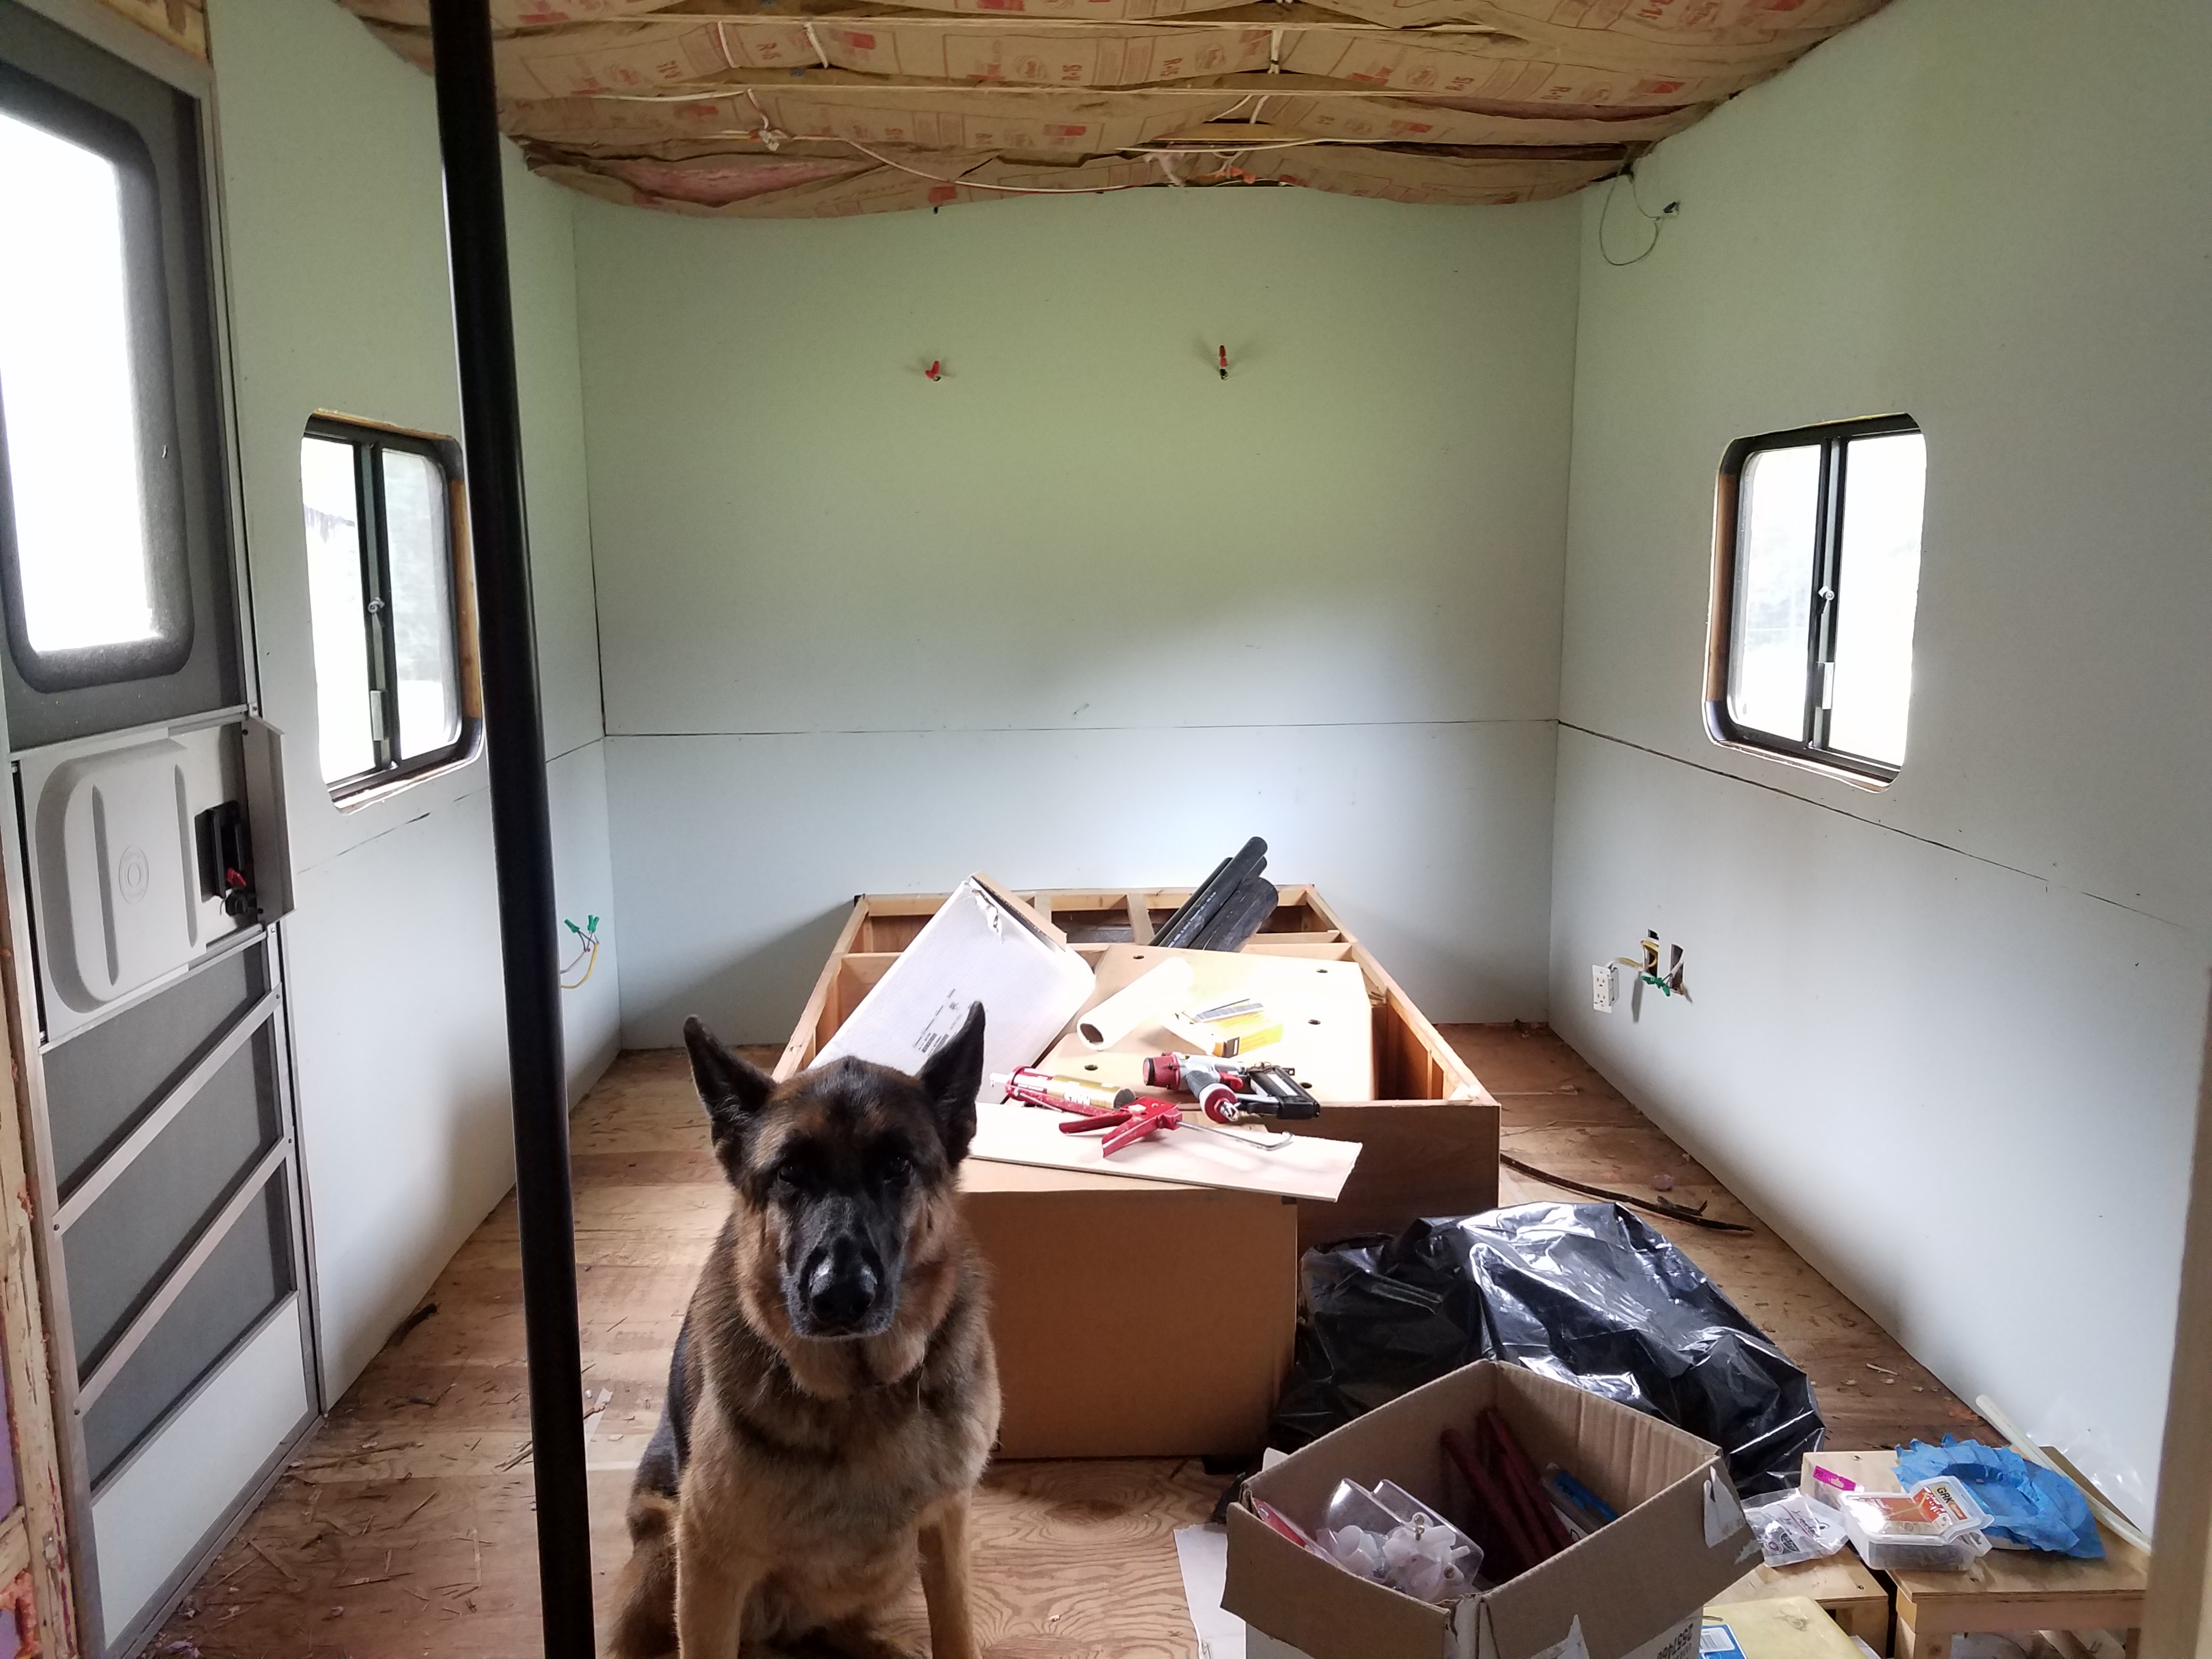
It’s time for that magical moment when the Wind Rose starts to look like a home again. I’m putting the walls back on! Although, they’re actually going to be brand new walls since I trashed the old walls and burned them on a bonfire. It was a very large, very hot bonfire full of the old travel trailer walls, cabinets, and framing. It was cathartic to watch them burn after spending so many hours tearing them out of the trailer with much sweat, frustration, and even some blood.
Moving on.
Choosing the Plywood
The old walls were 1/8″ luan plywood with a bonded layer of wallpaper on top. It was very thin and I had no trouble ripping it apart with my bare hands. When plywood is that thin it tends to bend and warp with the least bit of humidity. To prevent this warping the frame of the trailer has a lot of wide cross braces halfway down the walls. The plywood was glued and stapled to the studs and the cross braces to give it maximum support and rigidity.
It’s my opinion that the thin layer of plywood is an important structural feature of the travel trailer. Separately, each part of the trailer is so flimsy that it can’t stand up to traveling on the highway. However, when you combine the aluminum siding, the 2×2 framing, and the thin plywood, all glued and stapled together, their strengths combine and the whole structure is stronger.
The news walls are not going to be 1/8″ plywood. I found it very difficult to buy plywood that width since it’s not available in home improvement stores. It has to be specially ordered and shipped, which is expensive. I decided to go with 5mm (0.197″) plywood, which is more than 1/8″ but less than 1/4″. It was readily available at the Lowes to be used for cabinet making and other projects.
I bought the Revolution Ply which came in a 4’x8′ sheet, had one side already primed for painting, and was sustainable forestry certified to not contain any tropical hardwoods. Luan is traditionally made from tropical hardwoods, so I was glad to see that my replacement walls weren’t contributing to deforestation. I bought 20 sheets but I will probably need a few more since I forgot to account for the 20% extra most contractors recommend for mistakes and miscalculations.
The thicker walls are heavier than the previous ones, but they’re also more durable. We’ll be able to lean on them without punching a hole right through, hang things more easily, and the structure of the trailer will be sturdier and hopefully last longer. Remember, travel trailers are designed to be used an average of 20 days per year. Full-time living puts a lot more wear and tear on the interior than normal, so the flimsy standard build isn’t suitable.
We’re building things back heavier than before, but I think it’s an acceptable trade-off. We can compromise a little more on weight because we don’t plan to be constantly moving around in the trailer. Carrying Capacity and Gross Vehicle Weight is mainly important while on the road. Once we block up the frame where we plan to live for a while, the weight won’t matter too much.
Painting
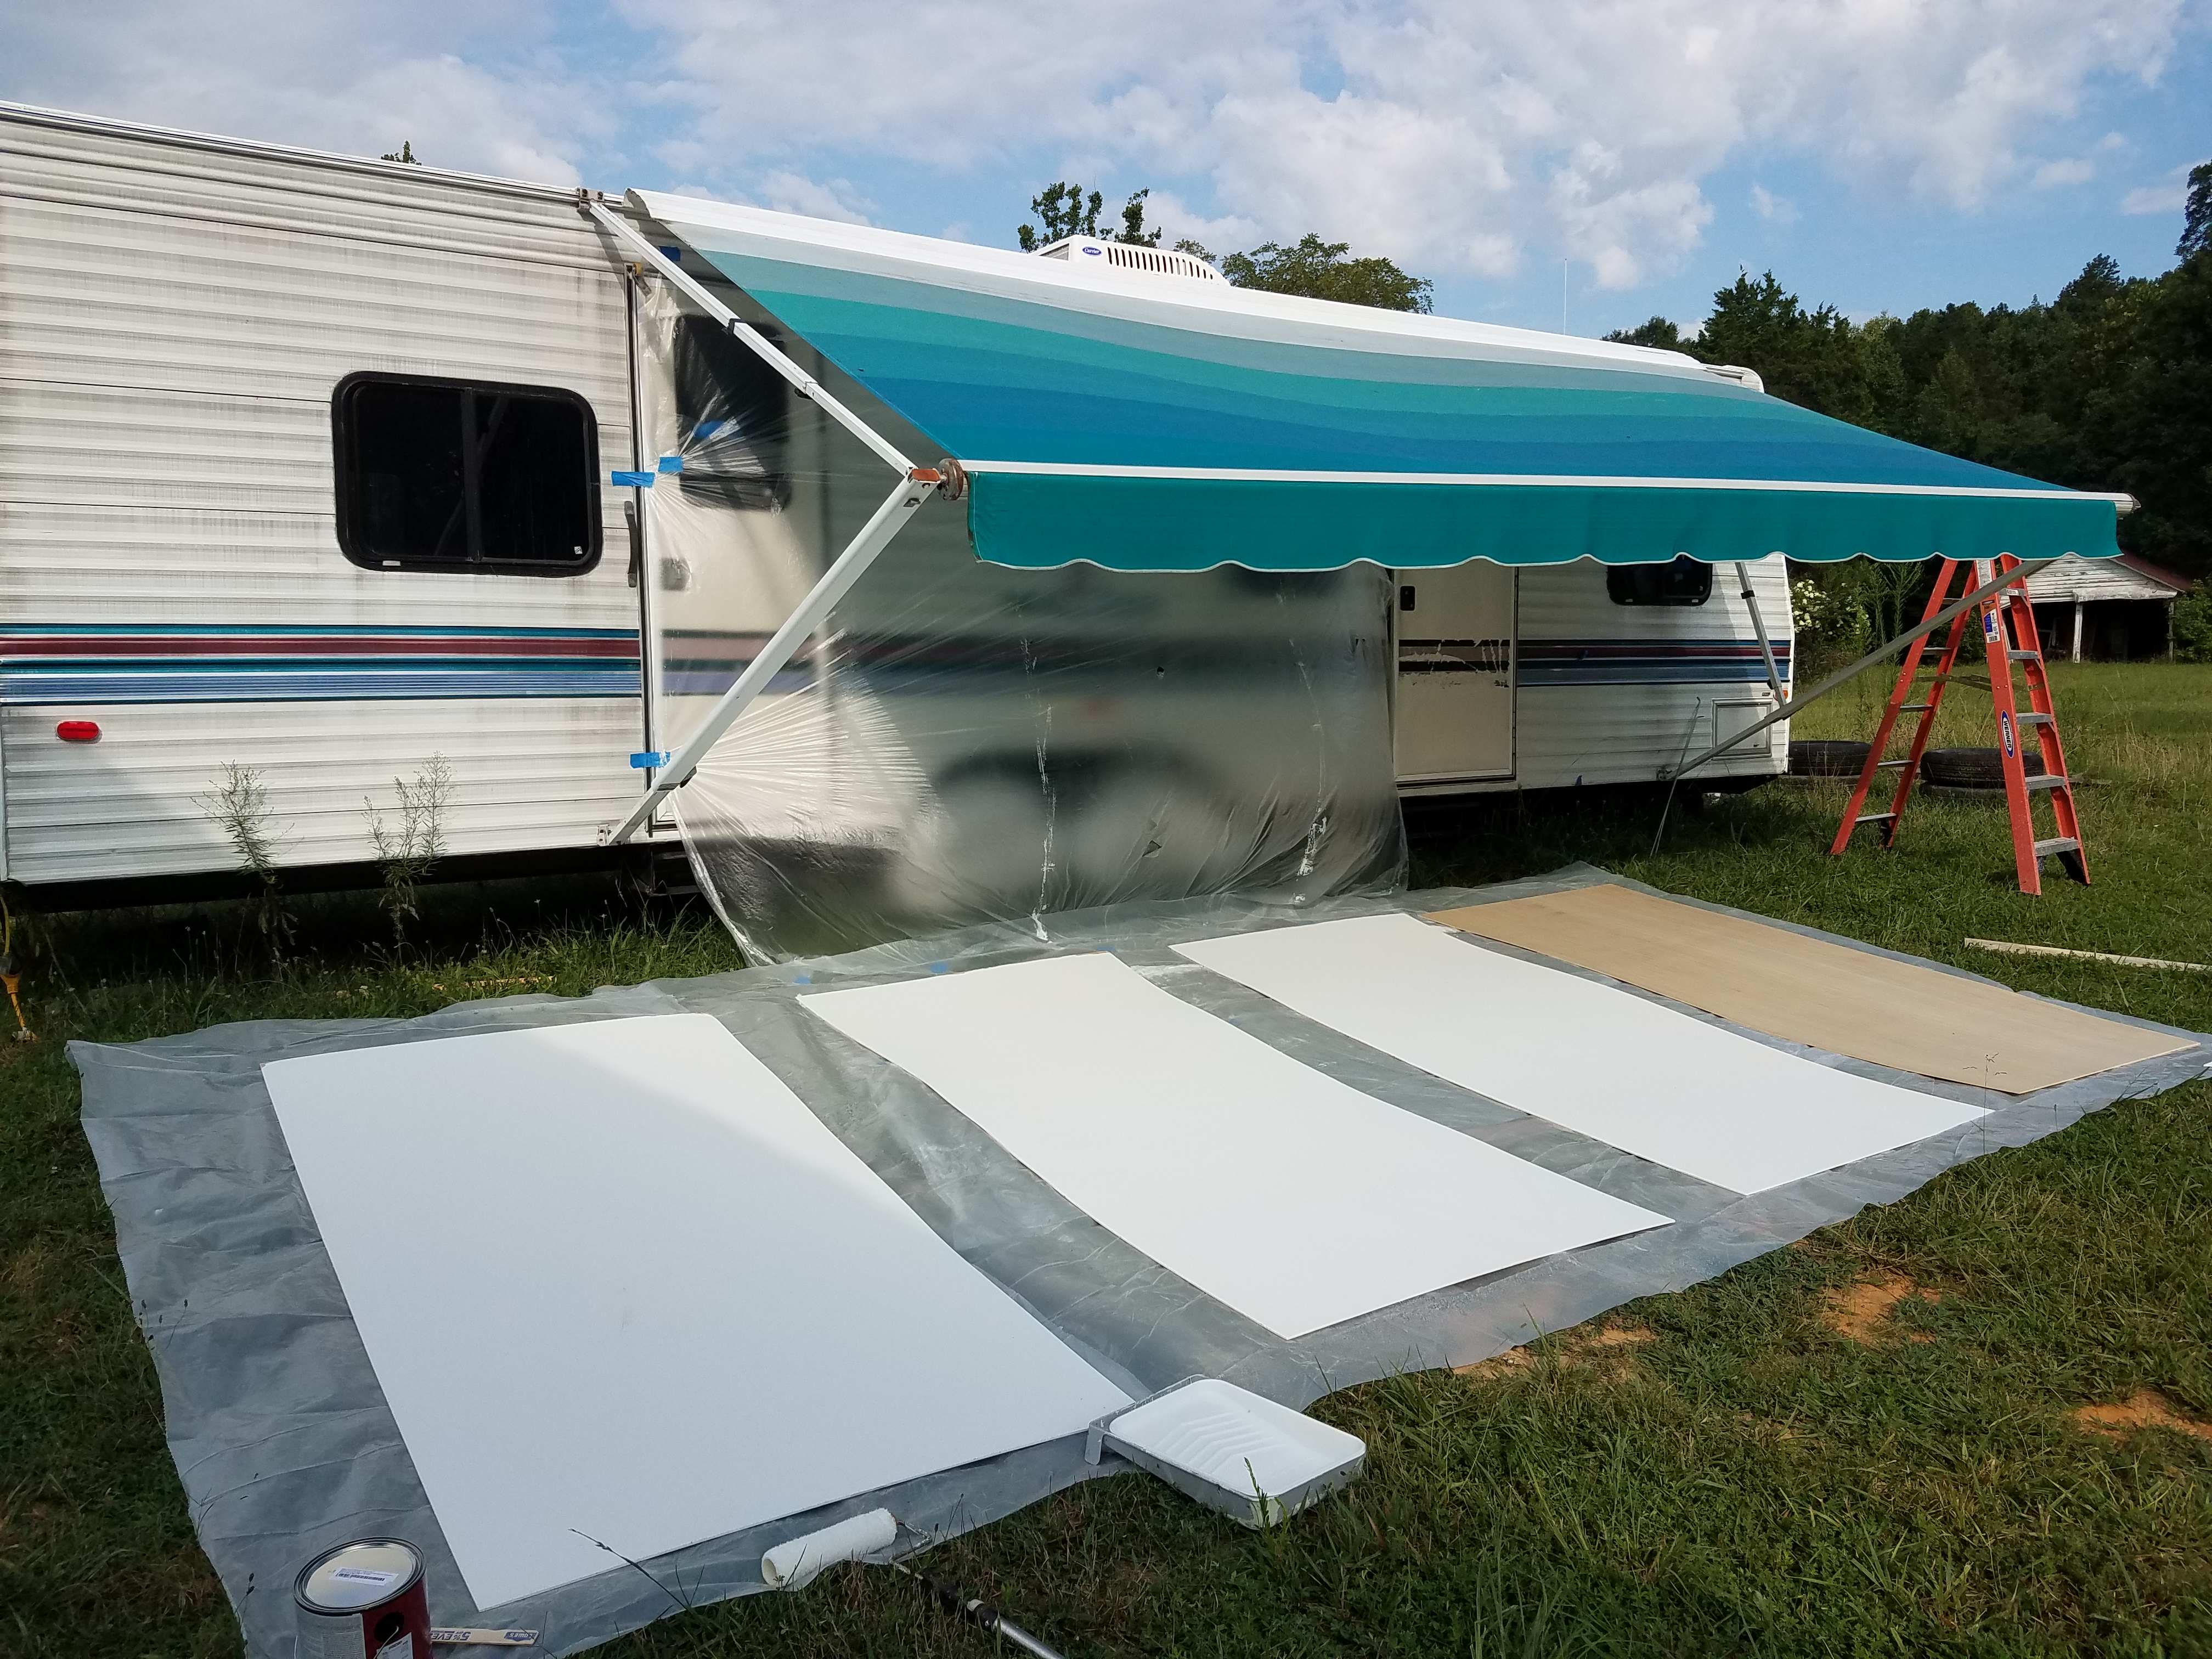
I’ve had many people advise me to paint the panels before putting them in the trailer. The interior of a travel trailer can be pretty cramped, which makes it hard to paint. By painting the panels outside the painting process can be a lot quicker and save me the frustration of banging my elbows into things and going around all the corners.
Choosing the Color
However, the first thing to do before painting is to buy the paint. I’ve been mulling over the color choice for months now, trying to imagine what the inside of the trailer will look like. I love the idea of forest colors like green and brown, but I know that the walls need to be painted a light color to make the small space seem open and airy. Light green shades never appeal to me, they always look like lime or 70s hospitals or sickly. I love vibrant jewel tones like teal and emerald and burgundy, but I can’t make the inside too busy and dark. With a large room with big windows and lots of light I could get away with it, but not in a little trailer.
So, I resigned myself to picking a barely colored shade that wouldn’t darken or overwhelm the small space in the trailer. I’m also aware that color multiplies its intensity when it’s on all of the walls because the color bounces around from wall to wall. So a barely-there color on the paint chip becomes more noticeable when it’s painted, sometimes looking as much as 2 shades darker. Painting everything white is very popular in travel trailer and RV remodels right now, but I don’t like the cold and sterile look of all white. Even with some golden wood to tone it down, it’s just too… white.
I dithered for a long time but it was finally time to just buy something. I got to the Lowes at 7 pm, I’d just got off work and hadn’t had dinner yet, and I just wanted to get the paint and get home. I knew I wanted HGTV Home by Sherwin Williams Showcase paint because Consumer Report listed it in the Top 5 best interior paint and it was available at the Lowes. You know Lowes is my favorite because it’s right on my route home from work, which makes picking up online orders really easy. I haven’t had to make a specific trip to the store except when I need my husband’s truck to get the big things, like the plywood sheets.
I ended up looking at the “Coastal Collection” of colors they had on display and choosing a very pale grey-green-blue (I have no idea what color it is) called Sea Salt. When I compared it to a very pale green color, I just couldn’t get over the yellow-green tint in the other choice which I don’t like. So, pale grey-green-blue it was. The grey tone made it so the blue could look almost green when held up next to green things. Also, blue and green are complementary colors so I know that my green shower won’t clash with the walls.
As for the gloss, I went with eggshell. Plywood walls are never as smooth as drywall, so I didn’t want a higher gloss that would highlight the imperfections on the surface. Eggshell provides a light sheen and some washability, so it’s a compromise. I bought 2 gallons of Sea Salt and 1 gallon of white ceiling paint. Ceiling paint is pretty much all the same, as long as you just want white.
Painting Outside
Painting the panels outside was something of a challenge. I had to lay down plastic over the grass and I didn’t have an area shady enough to work in. I know that paint is supposed to dry in the shade so that it doesn’t dry too quickly, but even with the awning of the camper pulled out, I wasn’t getting much shade. So, my walls dried mostly in the sun and that’s that.
I used a roller and the standard painting implements. I had a little trouble getting the hang of using the roller. If you press too hard you end up with lines and if you overload the roller it splatters as you roll. It takes a bit of skill, but I’m not too fussed if the walls aren’t perfect. Little bugs kept jumping on the paint and flying down and landing on the panels so, there’s that. And there may be some grass in there, too.
Luckily, there’s very little blank wall space in the camper. Most of the wall space is devoted to windows, doors, built-in furniture, outlets, switches, and other things. With the wall broken up in so many places, I don’t think small imperfections will be very noticeable. I’ll more than likely go over some spots again to touch up the walls after I put them in, such as by sanding down imperfections then repainting in highly visible spots. I’ll need to paint over the seam caulk and any edges I cut anyway.
Cutting the Panels
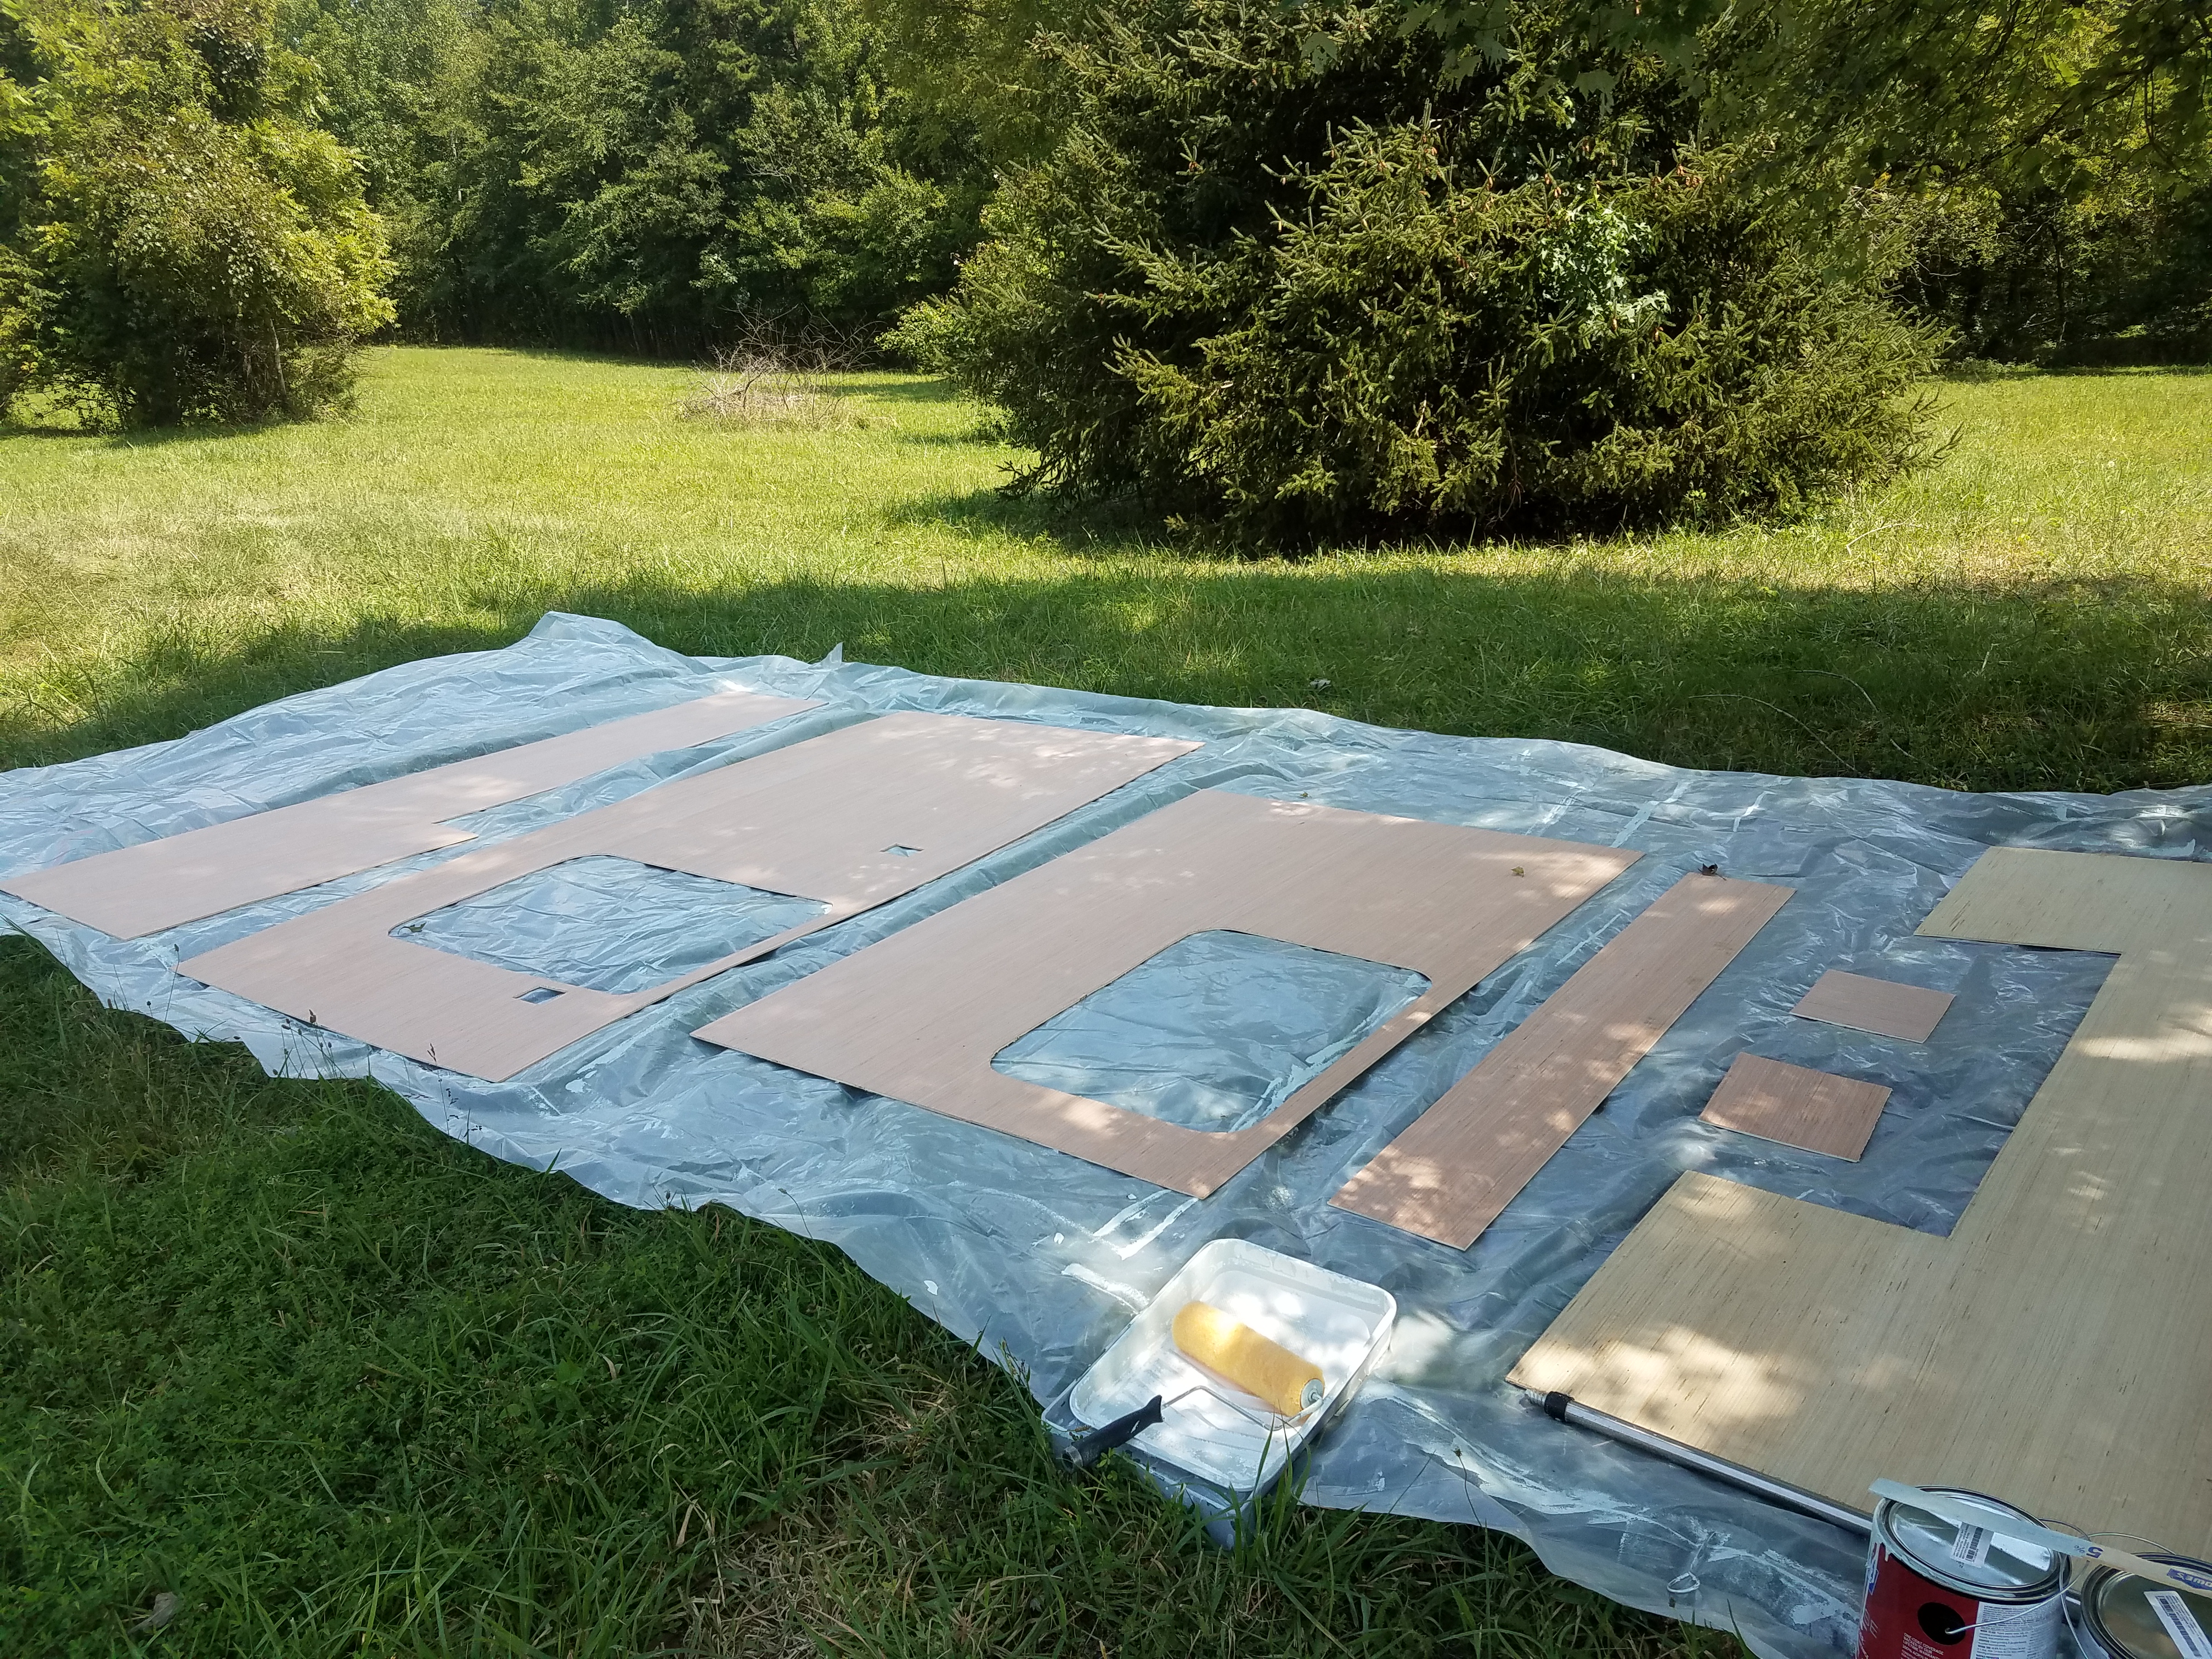
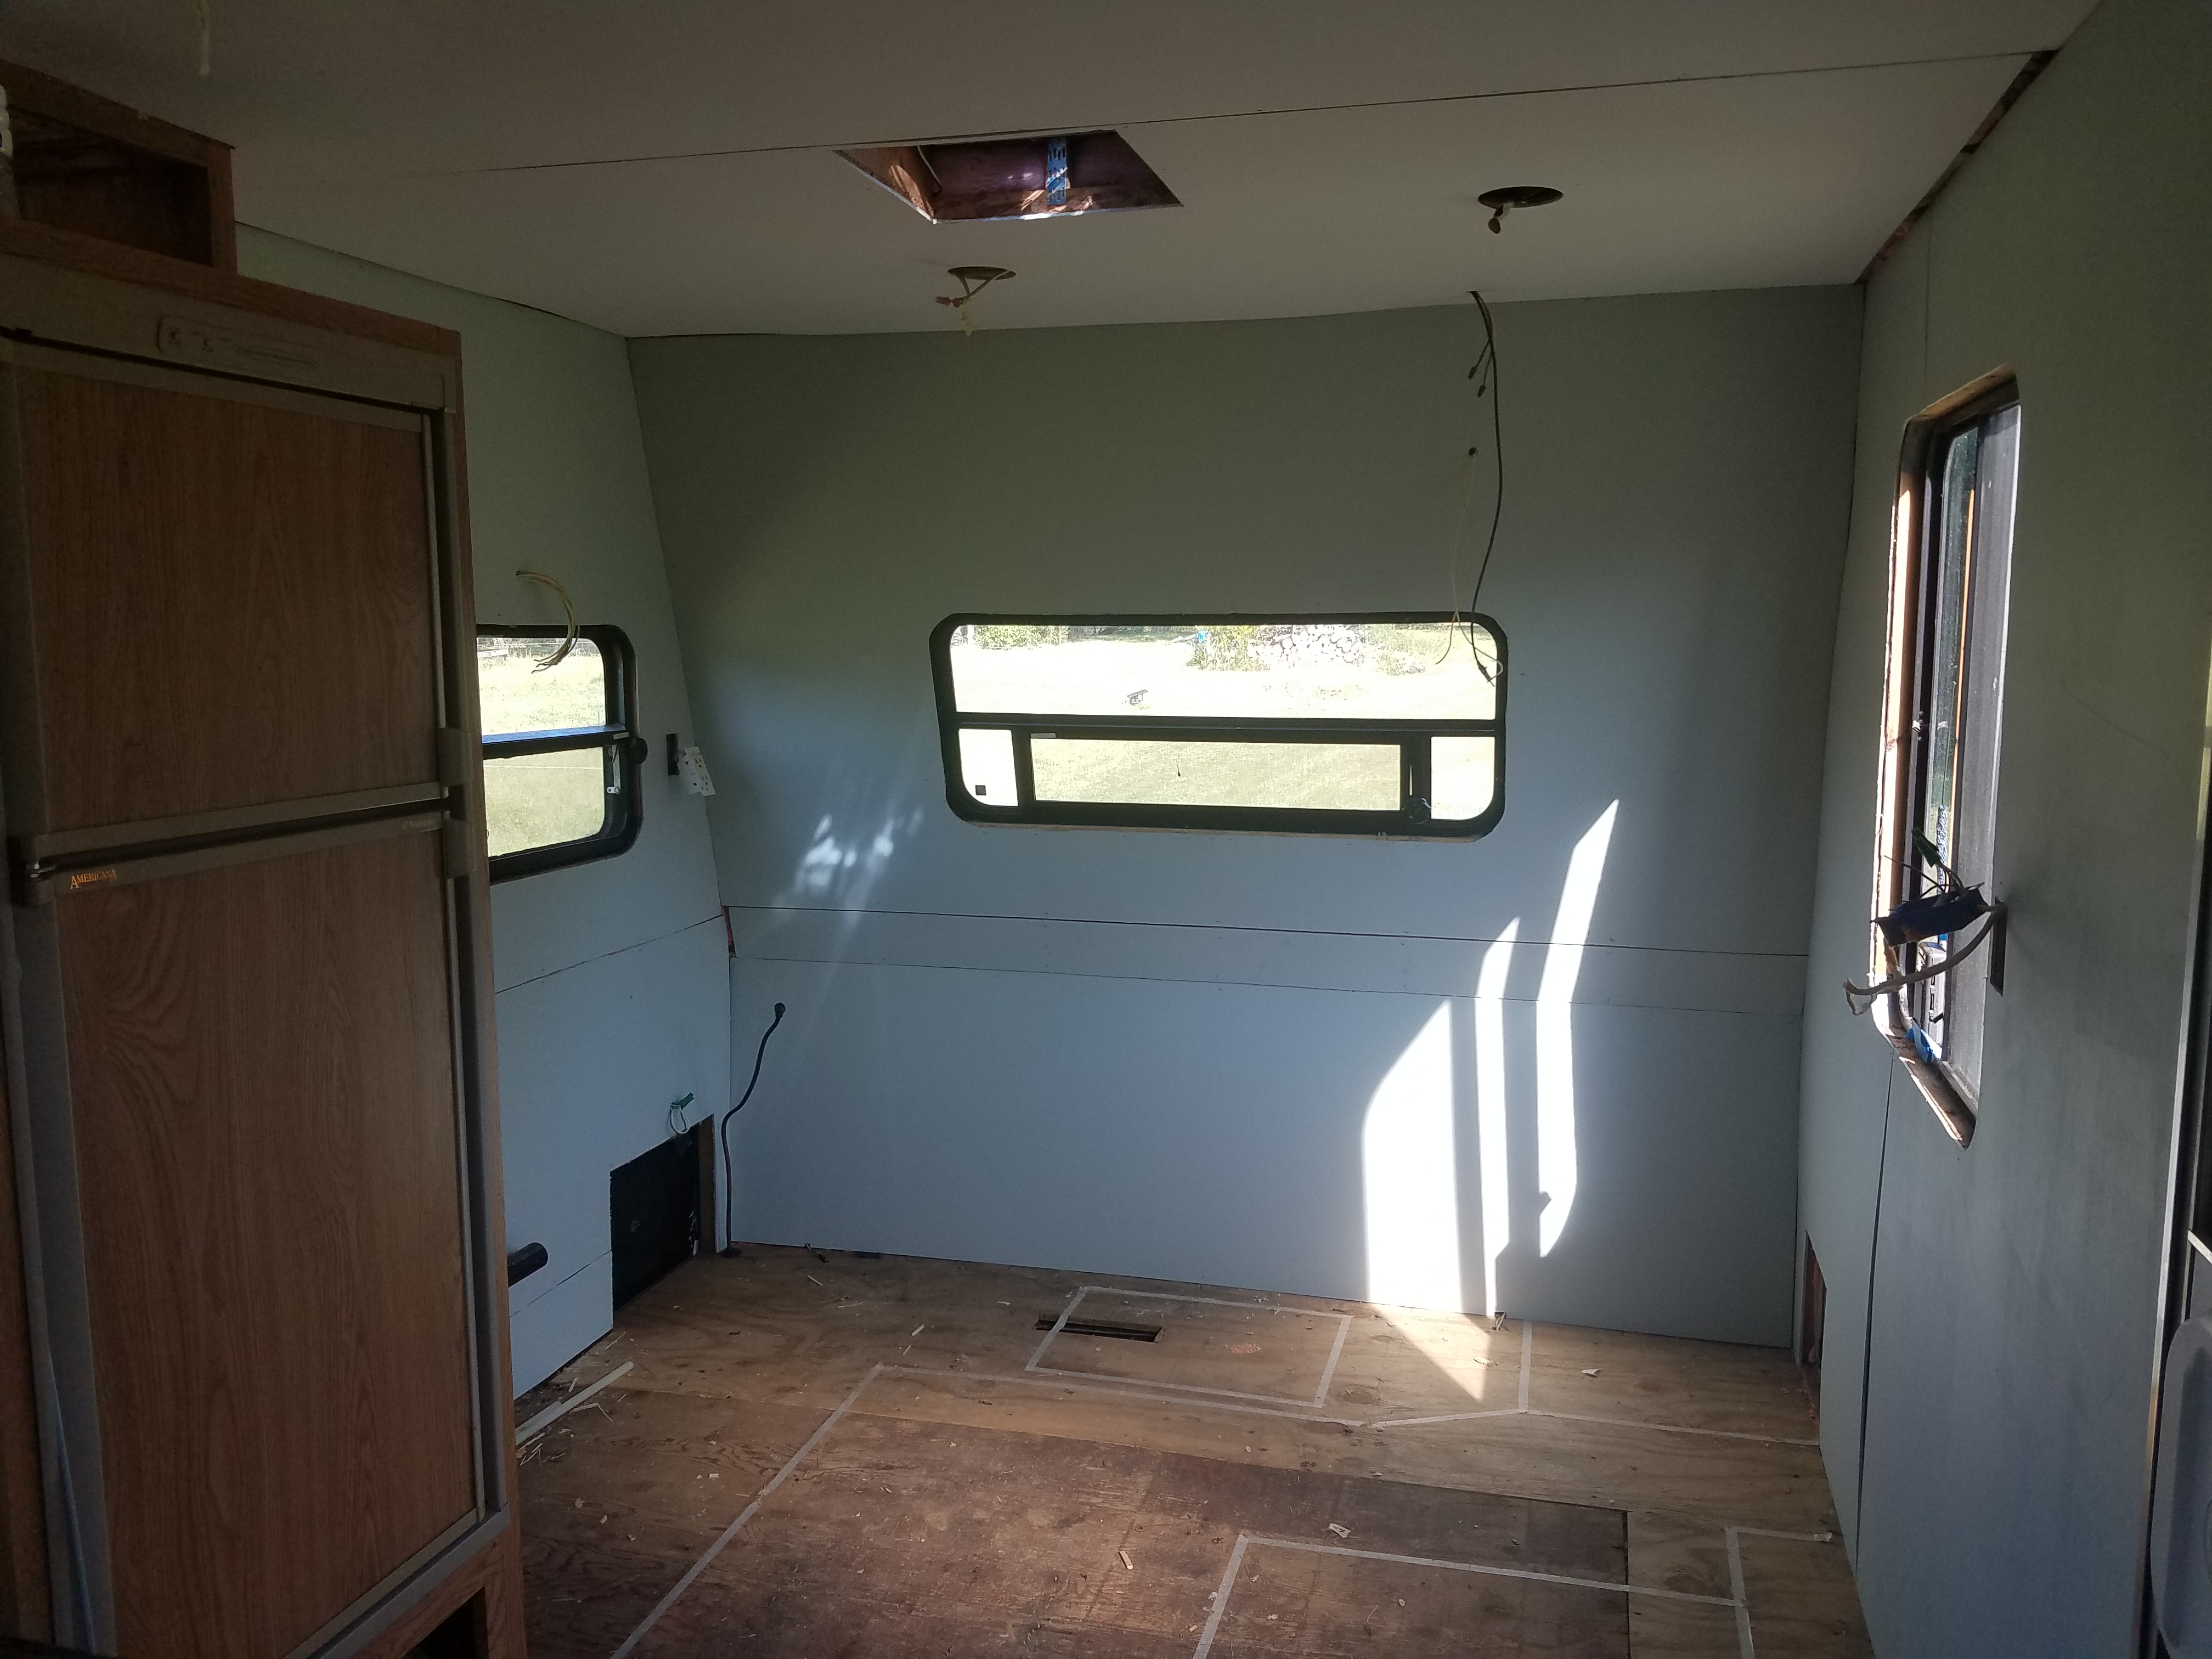
Once I had 8 panels painted I decided to start cutting and fitting them in place. I hunted down the jigsaw, a carpenter square, and a really long level/straight edge to use for marking. I started by measuring (and measuring again) each of the spaces in the trailer that would be covered by one panel. The panels in my trailer run lengthwise, making a sort of chair rail (wainscoting) line 2.5 feet off the floor. Originally the upper panel was covered with wallpaper and the lower panel was wood veneer. I’m planning to have both panels painted and I haven’t decided about having a chair rail yet.
In any case, I drew a little diagram in my notebook of each panel and wrote down all of the measurements I would need to cut the panels. Measure carefully, and leave yourself a little room. I like to leave 1/8″ space because it’s much more difficult and sloppy to try and trim bits off of edges that don’t fit than it is to cut ti right the first time. I kept trying to get as close as possible and ended up overlapping, which means it didn’t fit. Then I’d have to haul it outside and trim a tiny line off and try to fit it again. It was very frustrating and exhausting. I recommend just giving yourself a little slack and planning to fill it in with painters caulk during the finishing process.
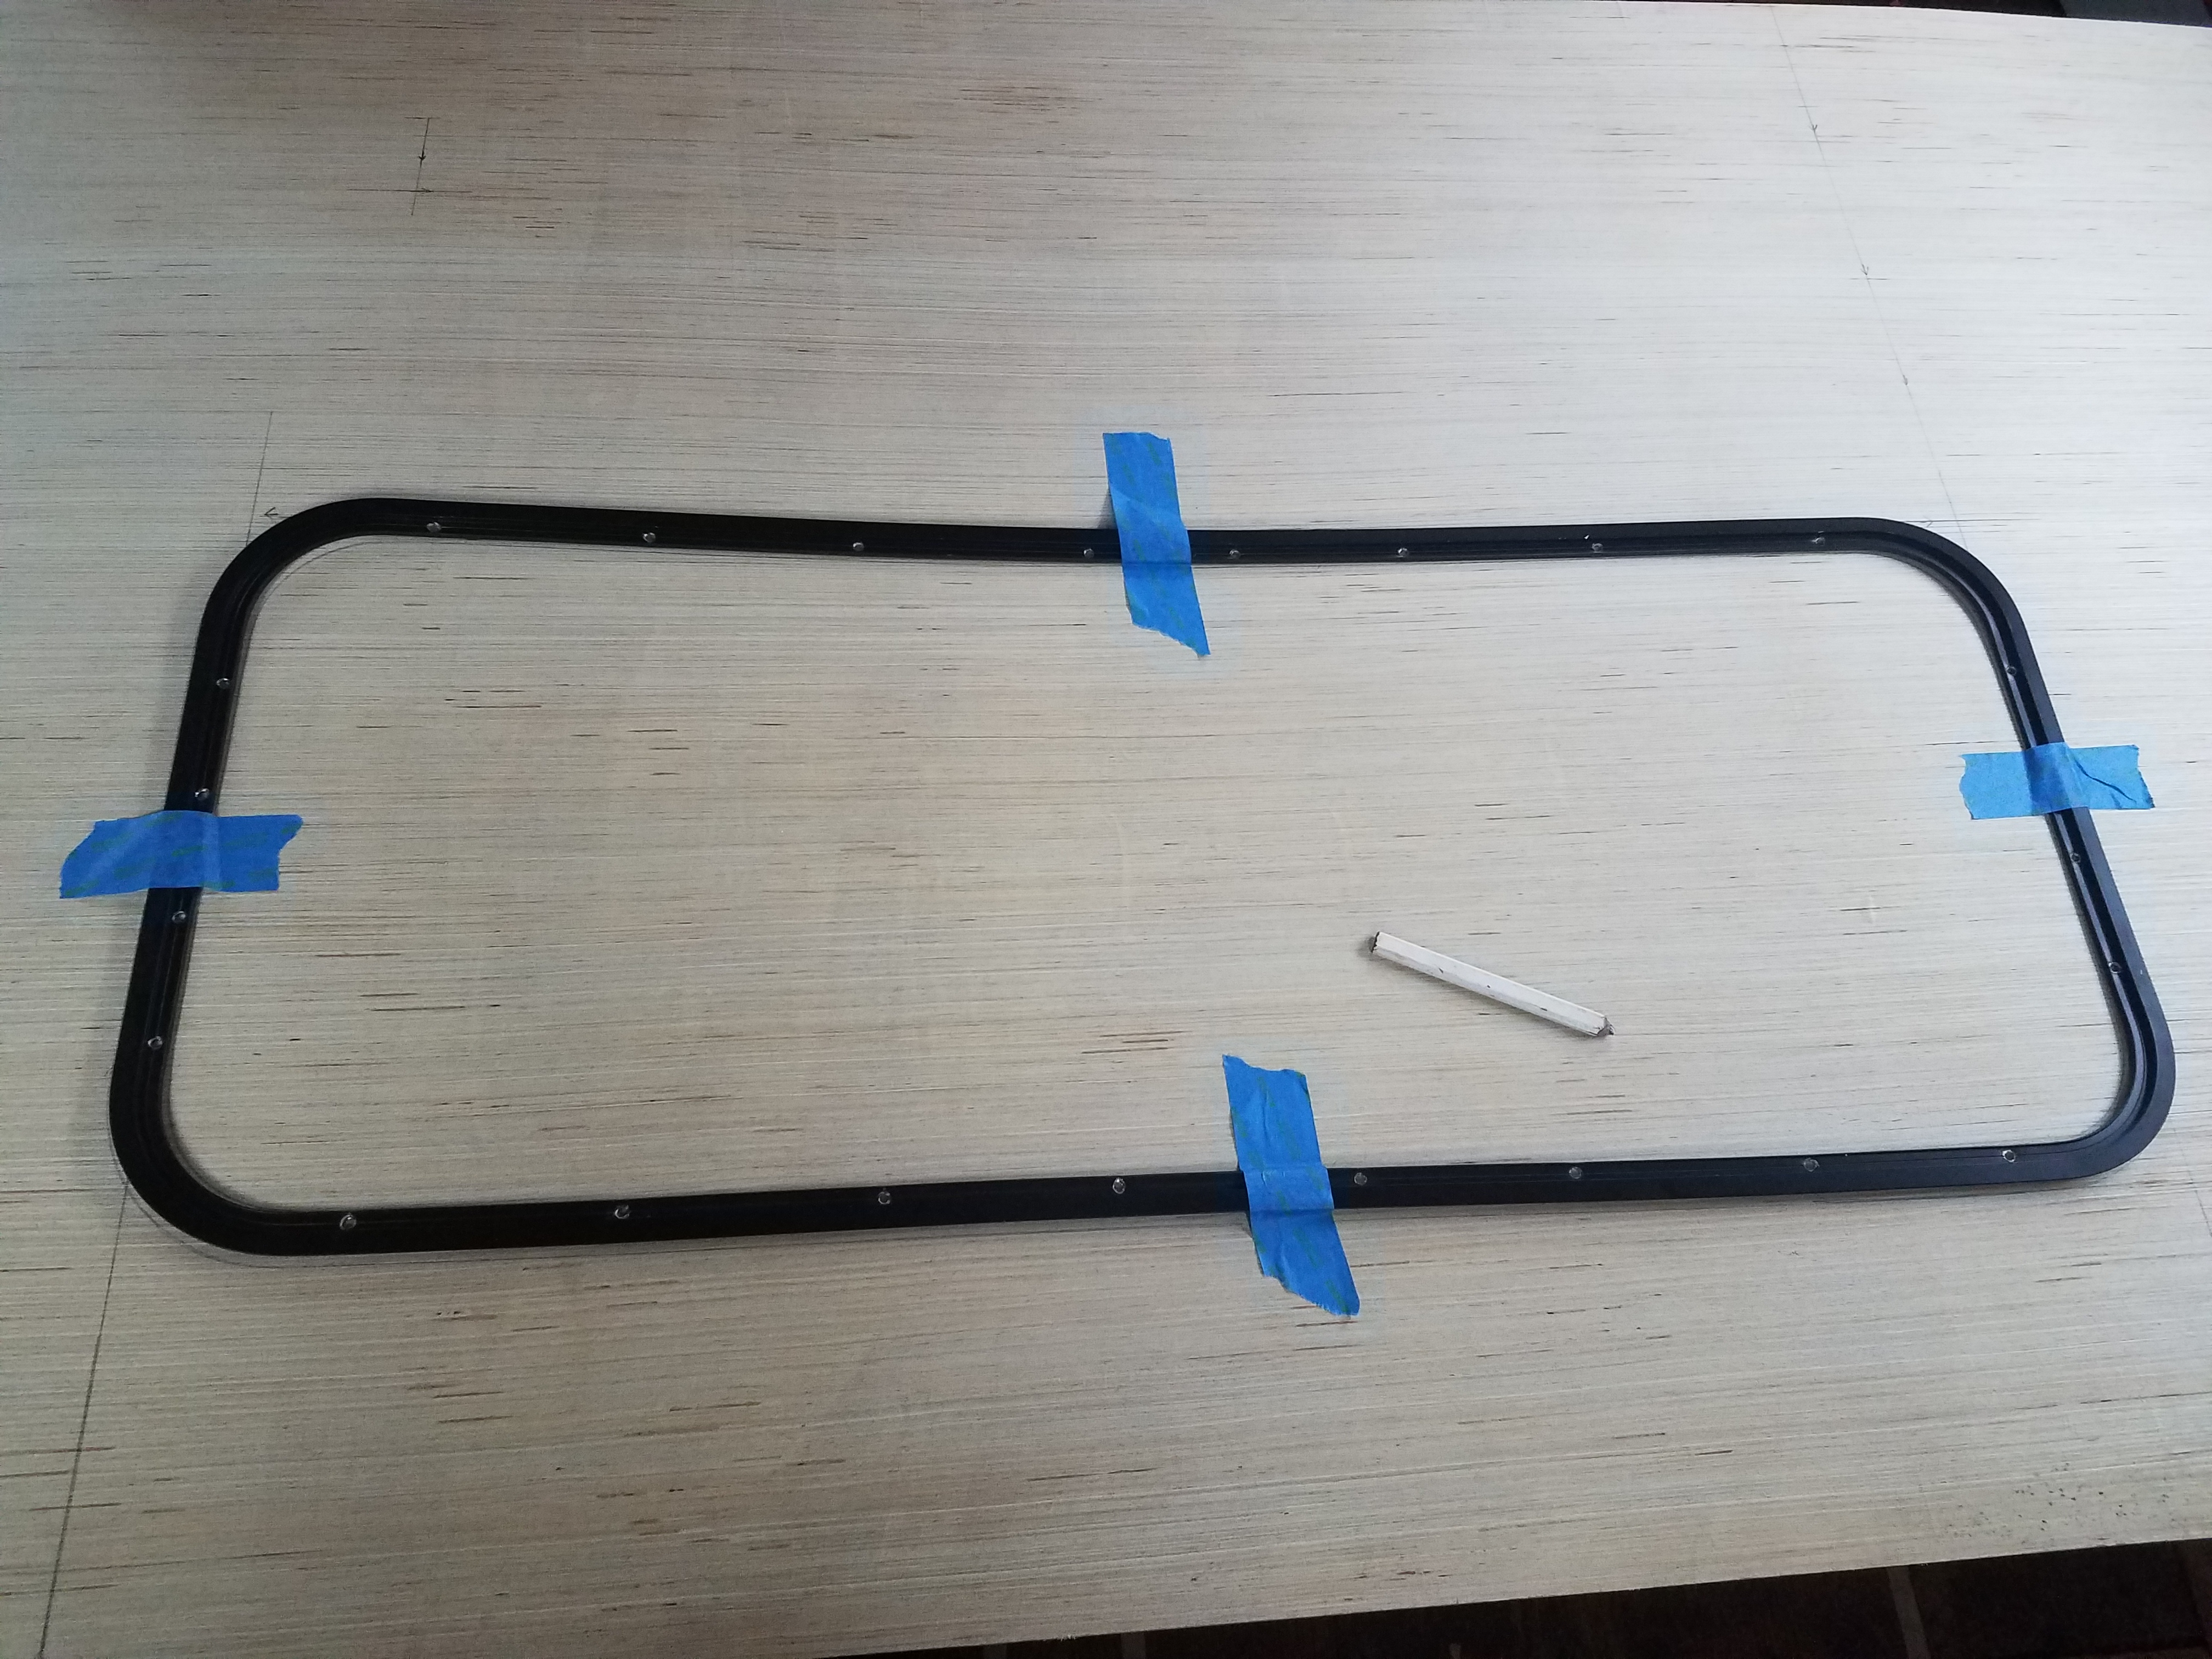
Cutting the panels was more difficult than I thought. I had to cut around built-in furniture like the bed platform and wheel well boxes. I had to measure and cut holes for the outlet boxes, measure and drill holes for light attachments and cut out the windows. The windows were difficult because there was very little room for error. I had to throw out an entire panel because I was 1 inch off my window measurement and the window trim wasn’t wide enough to hide my mistake. I used the window trim to trace the shape and size of the window, which made it a lot easier to get the radius corners right.
Once I had a few panels measured and drawn in my notebook, I went out in the heat to start cutting. My makeshift sawhorse (trailer tires stacked on top of each other and covered with plastic to avoid black rubber marks) are too low, but they’re all I have. I traced and marked everything out on the back of the panel to avoid scratching the surface with the jigsaw. Plywood is also prone to splintering while it’s being cut, so cutting on the backside helped keep the front face neat and nice. However, when you’re cutting from the back, you have to flip all of your measurements or the cuts will be opposite of where you need them. I found that out the hard way, unfortunately.

Figuring out the flip is a little tricky, but I wrote it large in my notebook to remind me. I decided against using masking tape to reduce splintering because it was hot and I was tired and I couldn’t figure out how I would redo all of the marks after putting tape on. Seemed like making work for myself. I’ll let you know if that was the right decision or not in the future.
Once it was marked, I used my corded jigsaw to make the cuts. When cutting out an internal square like a window you need to drill large holes in the corners and insert the jigsaw to cut. My advice is to drill from the front, as the splinters when you drill come out the back. So, the trick is to saw from the back, drill from the front.
After the first few panels, I realized that I should cut the panels Before painting them. Despite my efforts, the paint was getting marked and dirty from my gloves and from moving them back and forth from the trailer to the workbench. I started using unpainted panels to cut and I’ll paint them all before gluing them up on the walls.
I decided to get a good number of panels cut and dry-fit before affixing them to the wall. I was getting the hang of cutting the panels with all of the practice and I wanted to keep going while I was doing well. Also, gluing and stapling would require a whole different set of tools and the trailer is too small to have multiple large tools in it at once, like an air compressor. Affixing the panels will be a lot easier with another set of hands to hold up the panels while I staple them. I’m sure I could do it alone, but if I wait until the weekend when my husband can help me then it’ll be faster and easier.
Surface Prep: Walls
I managed to get 10 panels cut and painted by the weekend so my husband and I spent Saturday gluing and stapling them all up. I had to do 16 panels to cover all of the walls, baring a few little pieces here and there. 10 out of 16 felt like really good progress. We had to make a few changes to some of the panels before putting them up, mostly adding a few holes and cuts that I’d forgotten about.
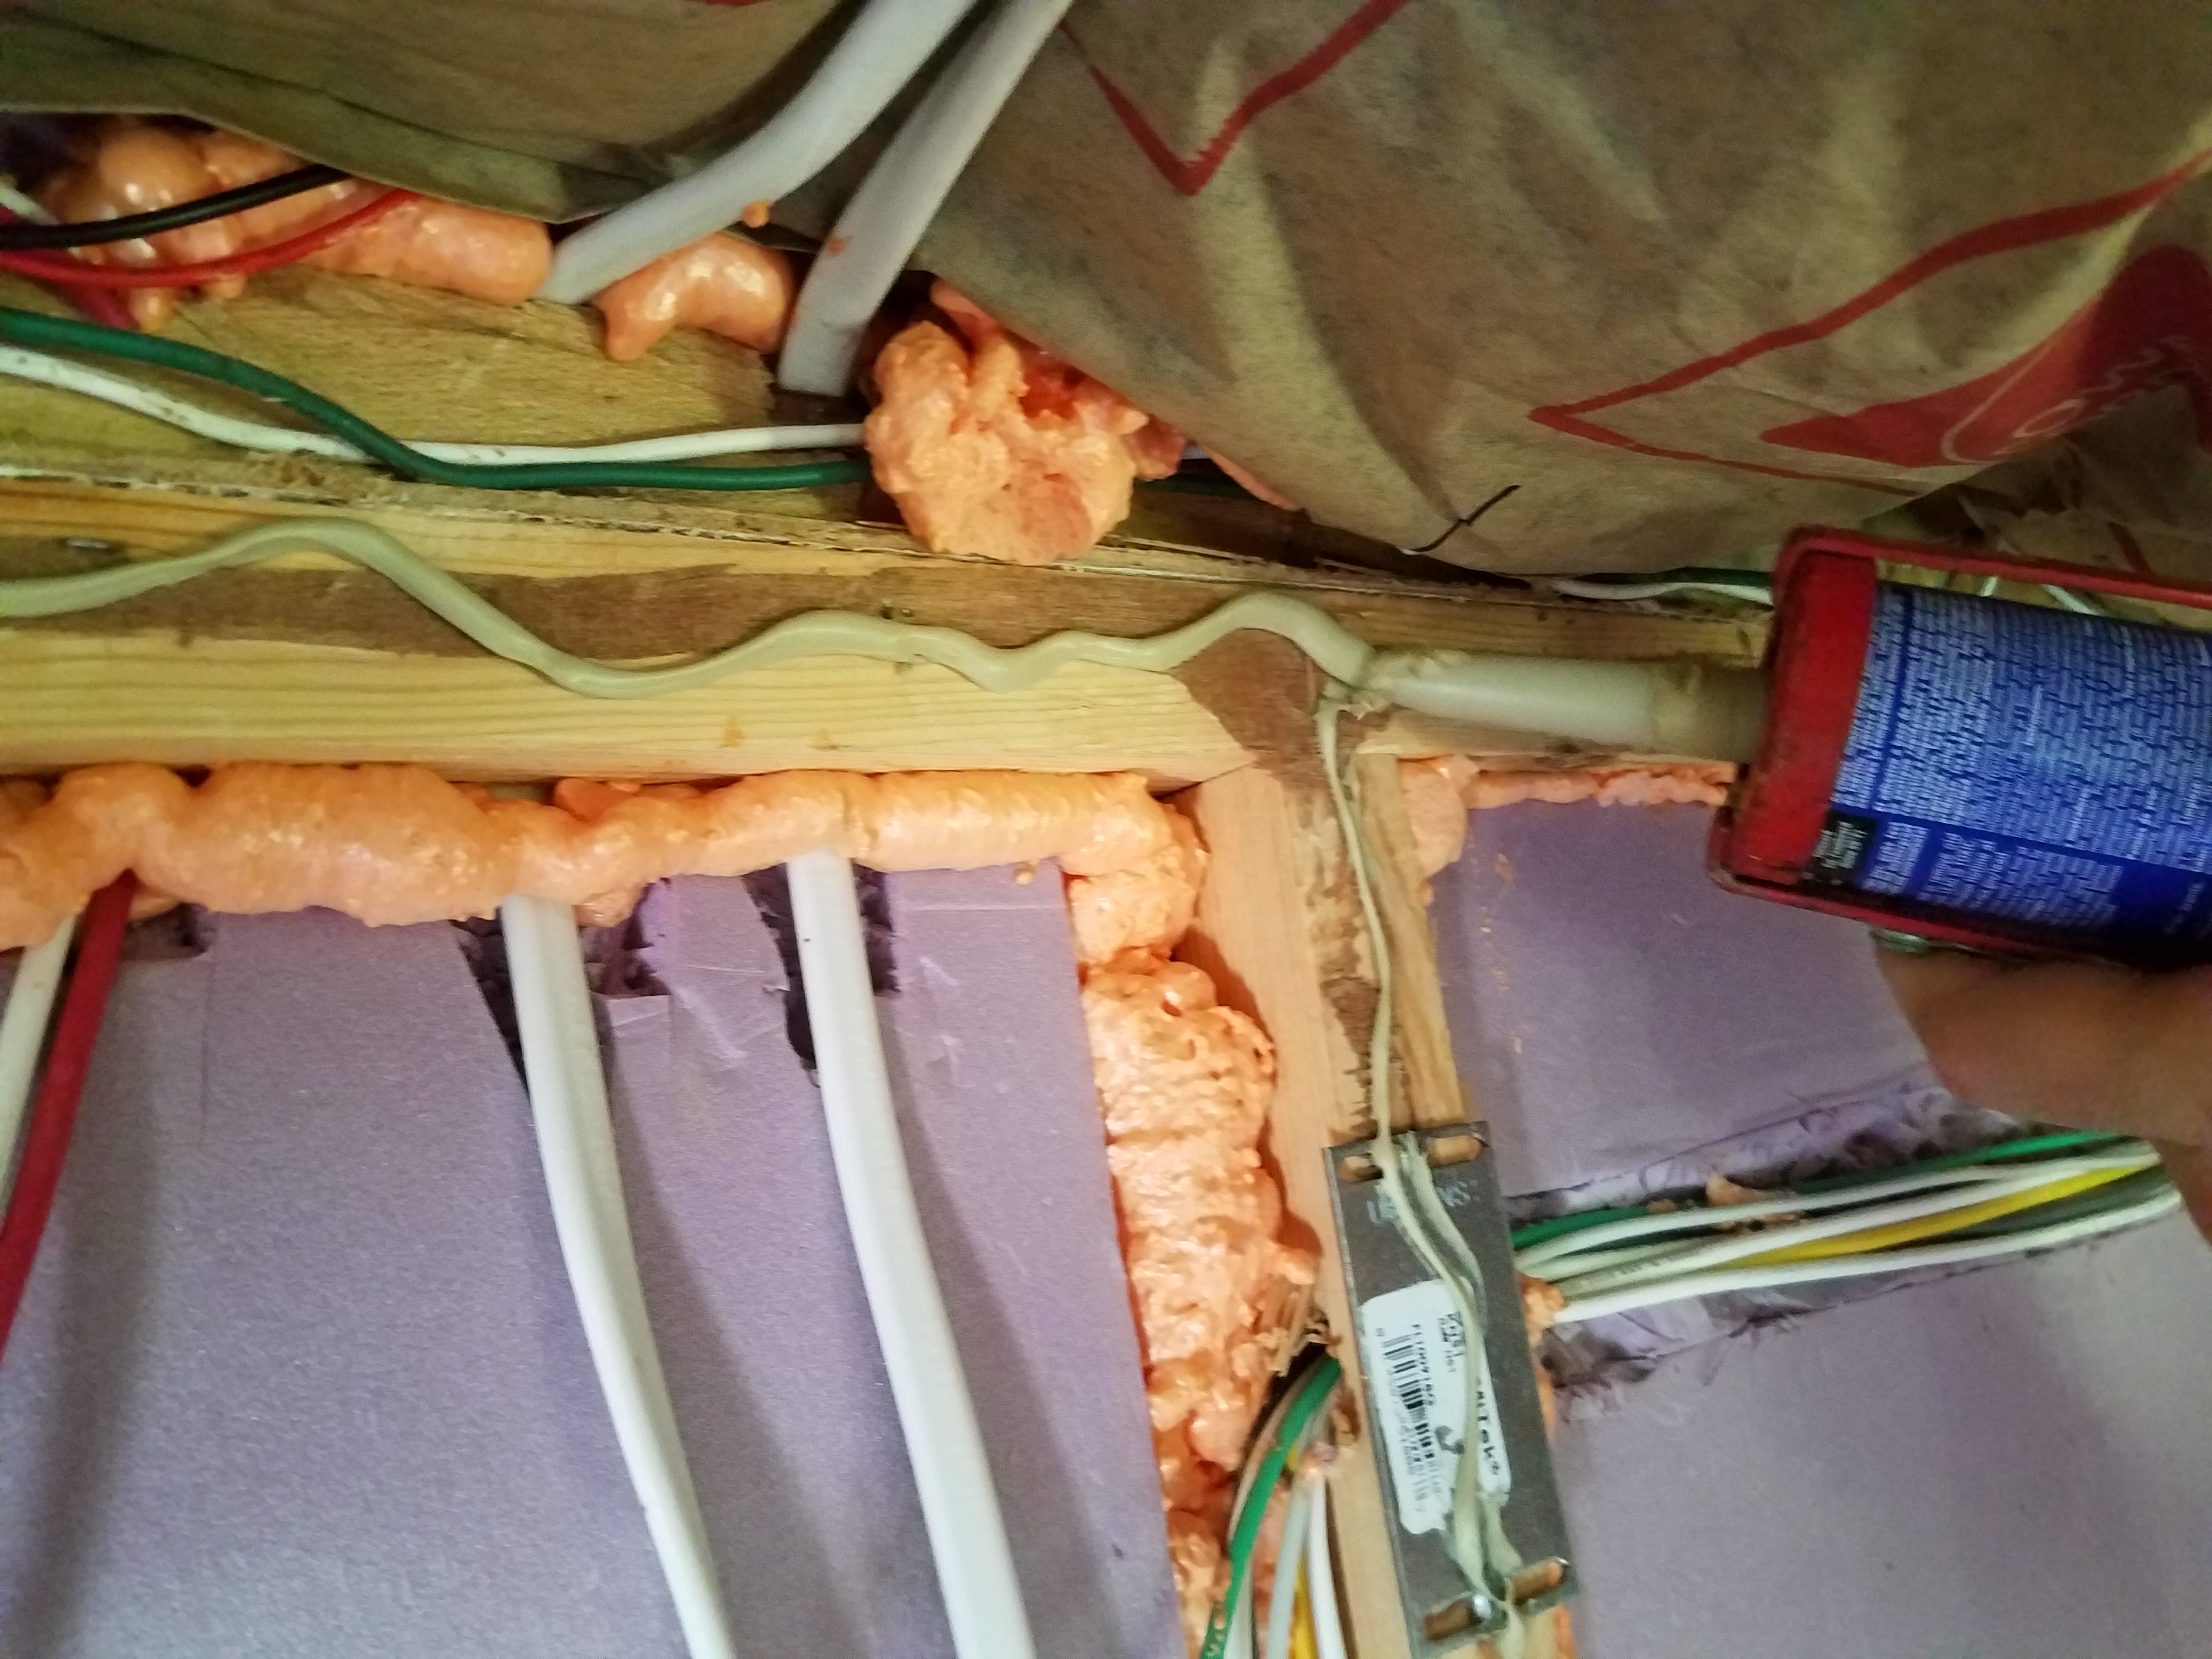
I have a few places in my wiring where I had to splice in a new wire to add an outlet or a light fixture. Those connections are required by NEC (electrical code) to be placed in an electrical box and accessible from the interior. That means cutting a hole as if you’re putting an outlet there and covering the box with a blank faceplate. Well, I didn’t include those in my measurements so we had to add a few cuts on the fly. Same with a few odd wires I forgot to account for, such as the TV antenna wire, which are coming out of the wall to be connected to future devices.
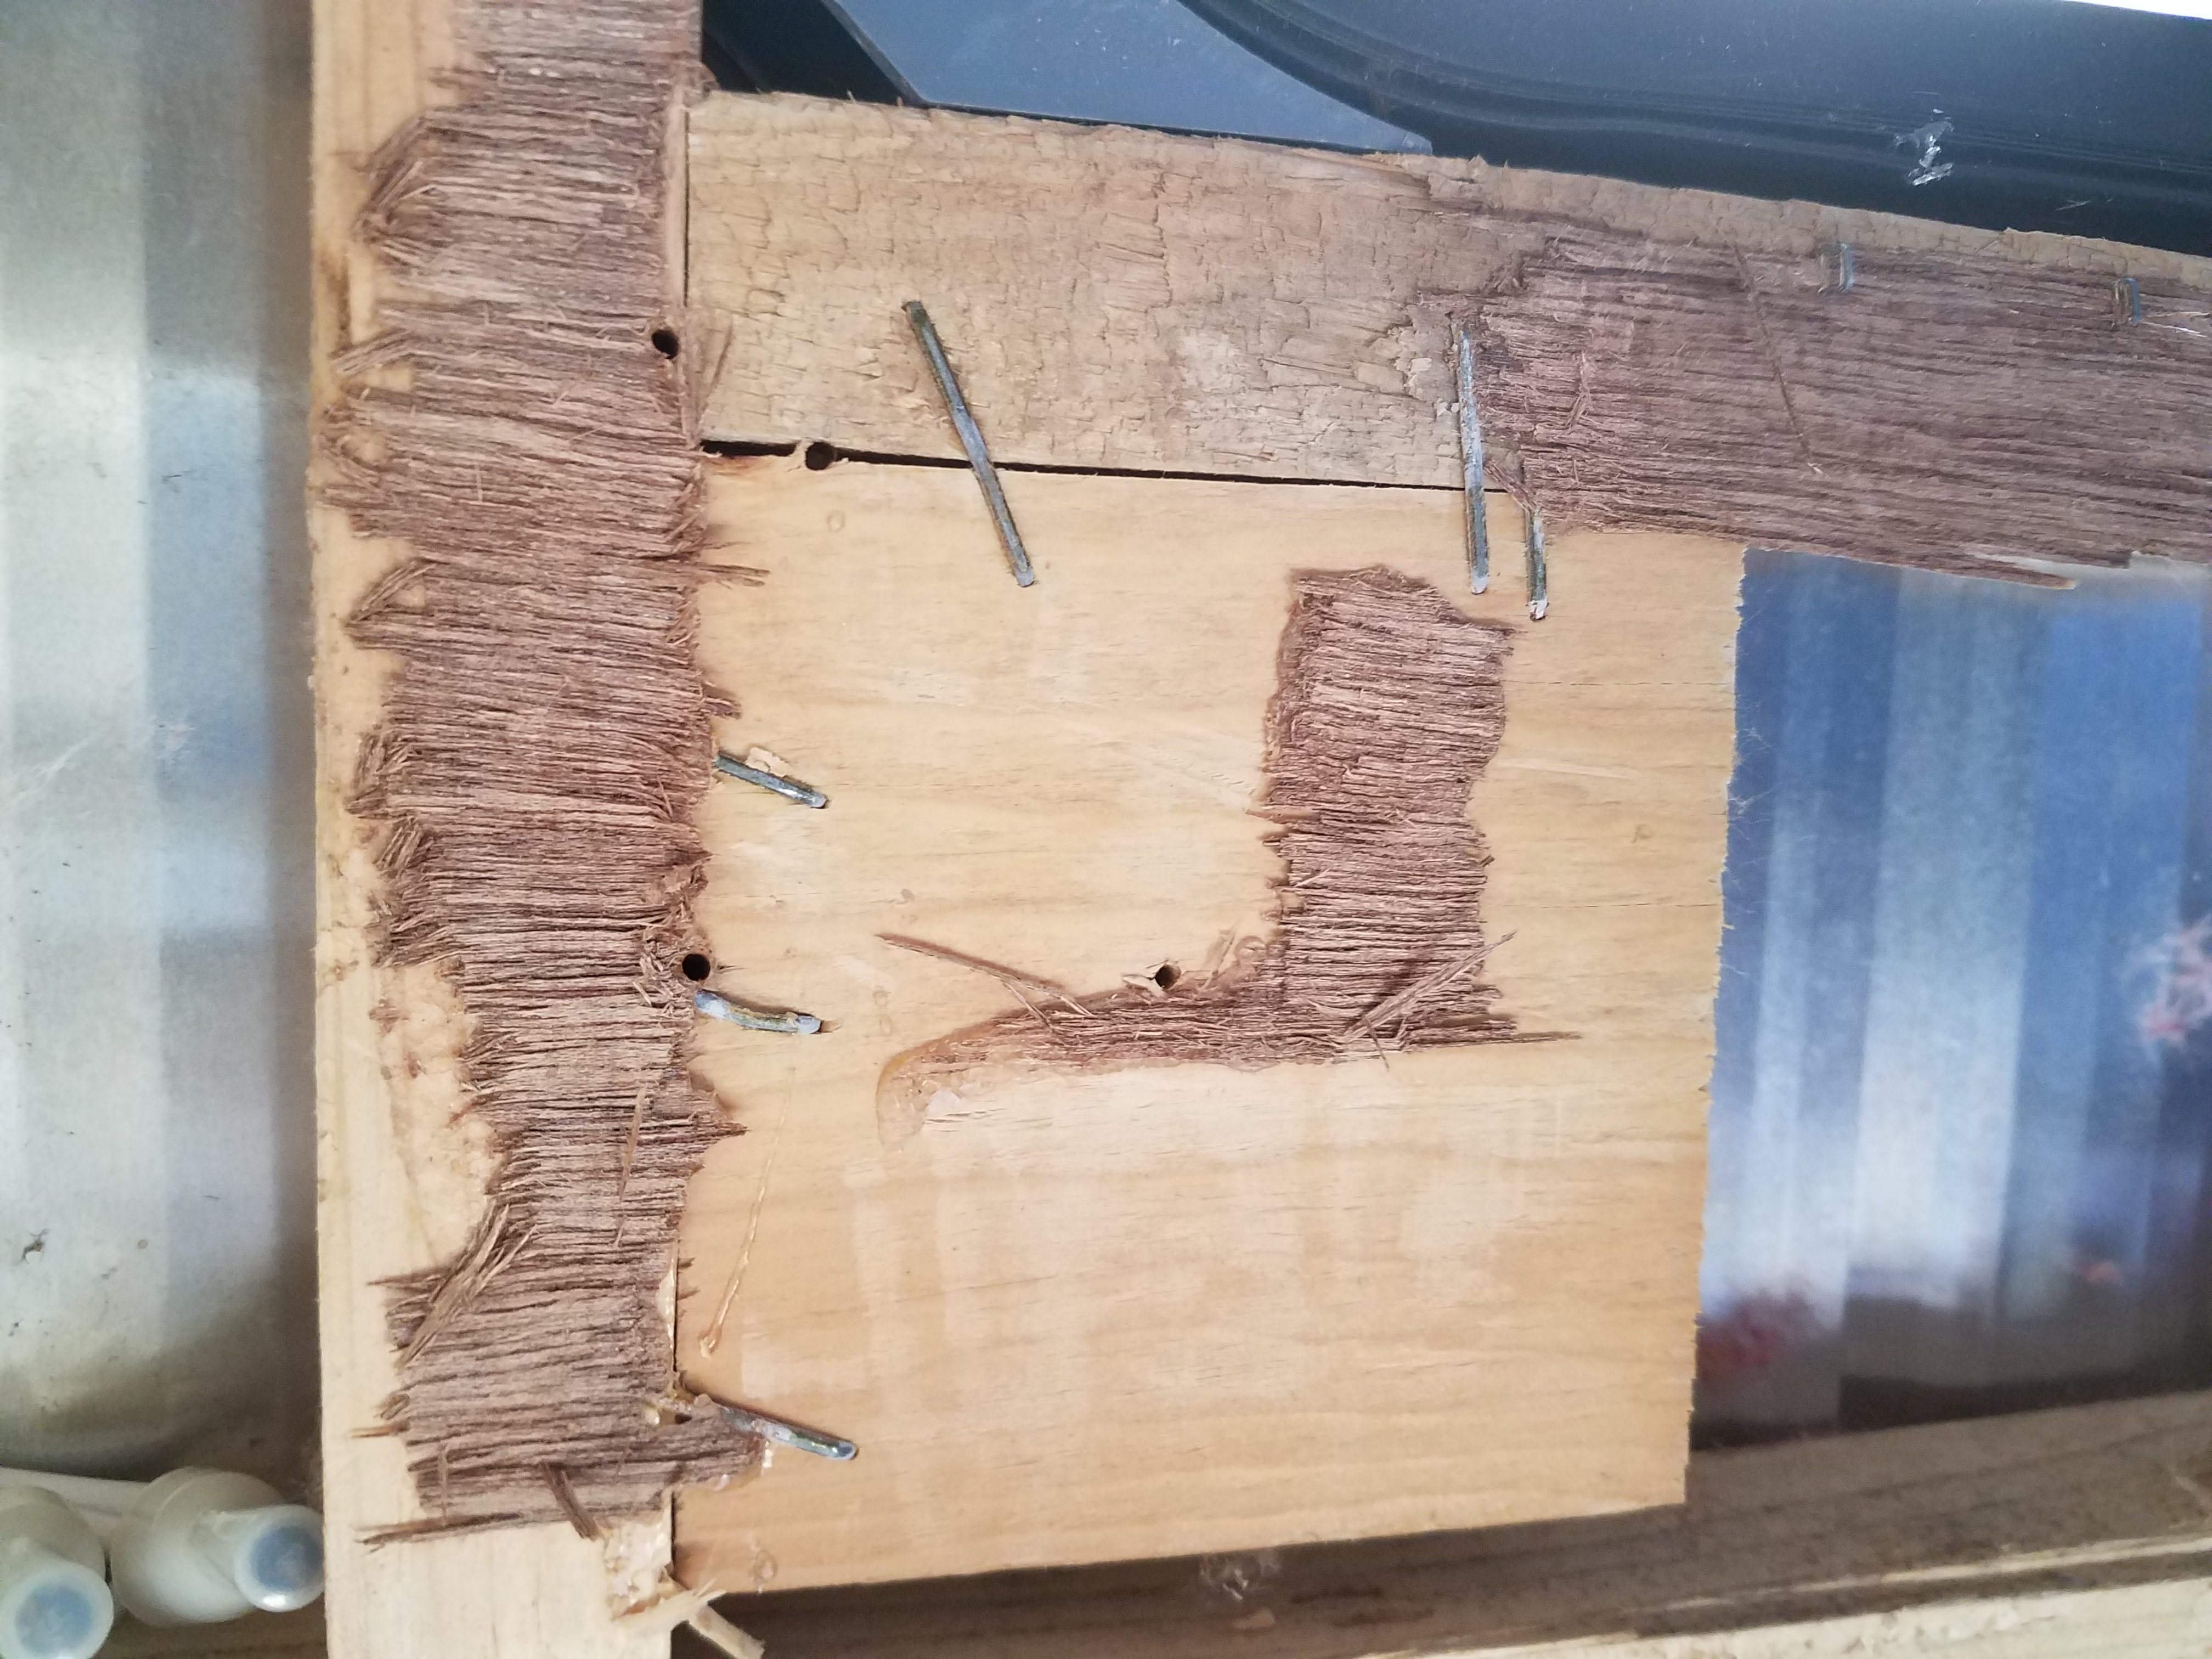
There was also some surface prep to do before we affixed the panels. Renovation always leaves you with more work because you have to undo a lot of older work. In the case of my trailer, I’ve already spent many hours here and there scraping old glue and luan off the studs and pulling out the staples the original manufacturers used to attach their luan. Since the luan was so thin, the staples mostly ripped through rather than pulling up.
However, there are Always more staples. Now that it was finally time to put new panels on the walls, I had to get serious about getting Every staple and loose piece of luan off the studs. So, with a pair of plyers and a catspaw ready to hand, I started pulling out staples. Lots of staples. Tiny staples. So many of them.
A nice thick set of pliers was a much easier tool than the catspaw. I just grabbed the top of the nail and then rolled the pliers sideways to get some leverage. I usually had to grab a second time and roll again to get them completely out. The catspaw almost always slipped off, but it was useful for getting under some staples that were too tight to grab with the pliers. For some of the tight staples, I just hammered them in. As long as they aren’t sticking out enough to damage the panels or push the plywood away from the studs, it works.
We also discovered that the manufacturers had used plastic/rubber spacers on the ceiling to help keep the ceiling panels in place. These were fixed to the trusses with many, many staples. So I started pulling out the staples and pulling the plastic off the ceiling.
Some large screws had been screwed in from the outside to affix the cupboards and shelves I took out. These we cut off with the angle grinder or the multi-tool as close to the studs as possible. The angle grinder is faster but it puts out a lot of scary sparks. The multi-tool is slow and it damages the blades, but there aren’t any scary sparks. I hate using the angle grinder, but I also hate having to buy new blades (they’re only like $5 but such a pain). I usually ended up using both.
Gluing on the Panels
Once we had inspected the wall for staples and screws and other unacceptable things, we were ready to glue. I bought Liquid-Nails Heavy Duty Off-White Interior/Exterior Multi-Purpose Construction Adhesive, but there were a lot of construction adhesives to choose from and I mostly couldn’t tell the difference between them. Liquid Nails is a brand name, and it was a lot cheaper than the Gorilla Glue brand. I did a little research and looked at reviews online, but mostly I just bought whatever was at hand. Construction adhesive does come in a few specialized versions, but “multi-purpose” is a good word.
We followed the directions on the tube, cut a 45-degree angle into the tip at the 1/4 inch line (handily marked on the tip), and used the caulk gun to do zig-zag lines down our studs. Now, many of our studs were a little too thin for a real zig-zag but we did gentle waves when we could and just went with a straight line everywhere else. The Liquid Nails has a 30-minute set time, which means it won’t harden too quickly and gives you time to get your panel into place. Don’t cut the tip too much or your glue will come out too thick and won’t stick to the stud under its own weight.
After gluing we stuck our panel in place, gave it a few good (gentle but firm) kicks and whacks to make sure it was sitting flush to the corner and the wall. Then we fired up the pneumatic staple gun and sunk a few staples into the top and bottom edge. My husband insisted on doing a few more down the studs, though I didn’t think it was necessary. After all, every staple is a hole for me to caulk and repaint.
We used a small pneumatic nail/staple gun with narrow crown 1″ staples. These appear to be the same size staples that were originally used by the manufacturers. Luckily, we had the staple gun and the air compressor on the farm already so we only had to borrow them, not buy them. Un-luckily, we can’t use the air compressor and the A/C at the same time without tripping the breaker, so we had to keep swapping them on and off while we worked. It was 96 degrees outside with a heat index of over 100 degrees, so there was no way we were going to work without A/C.
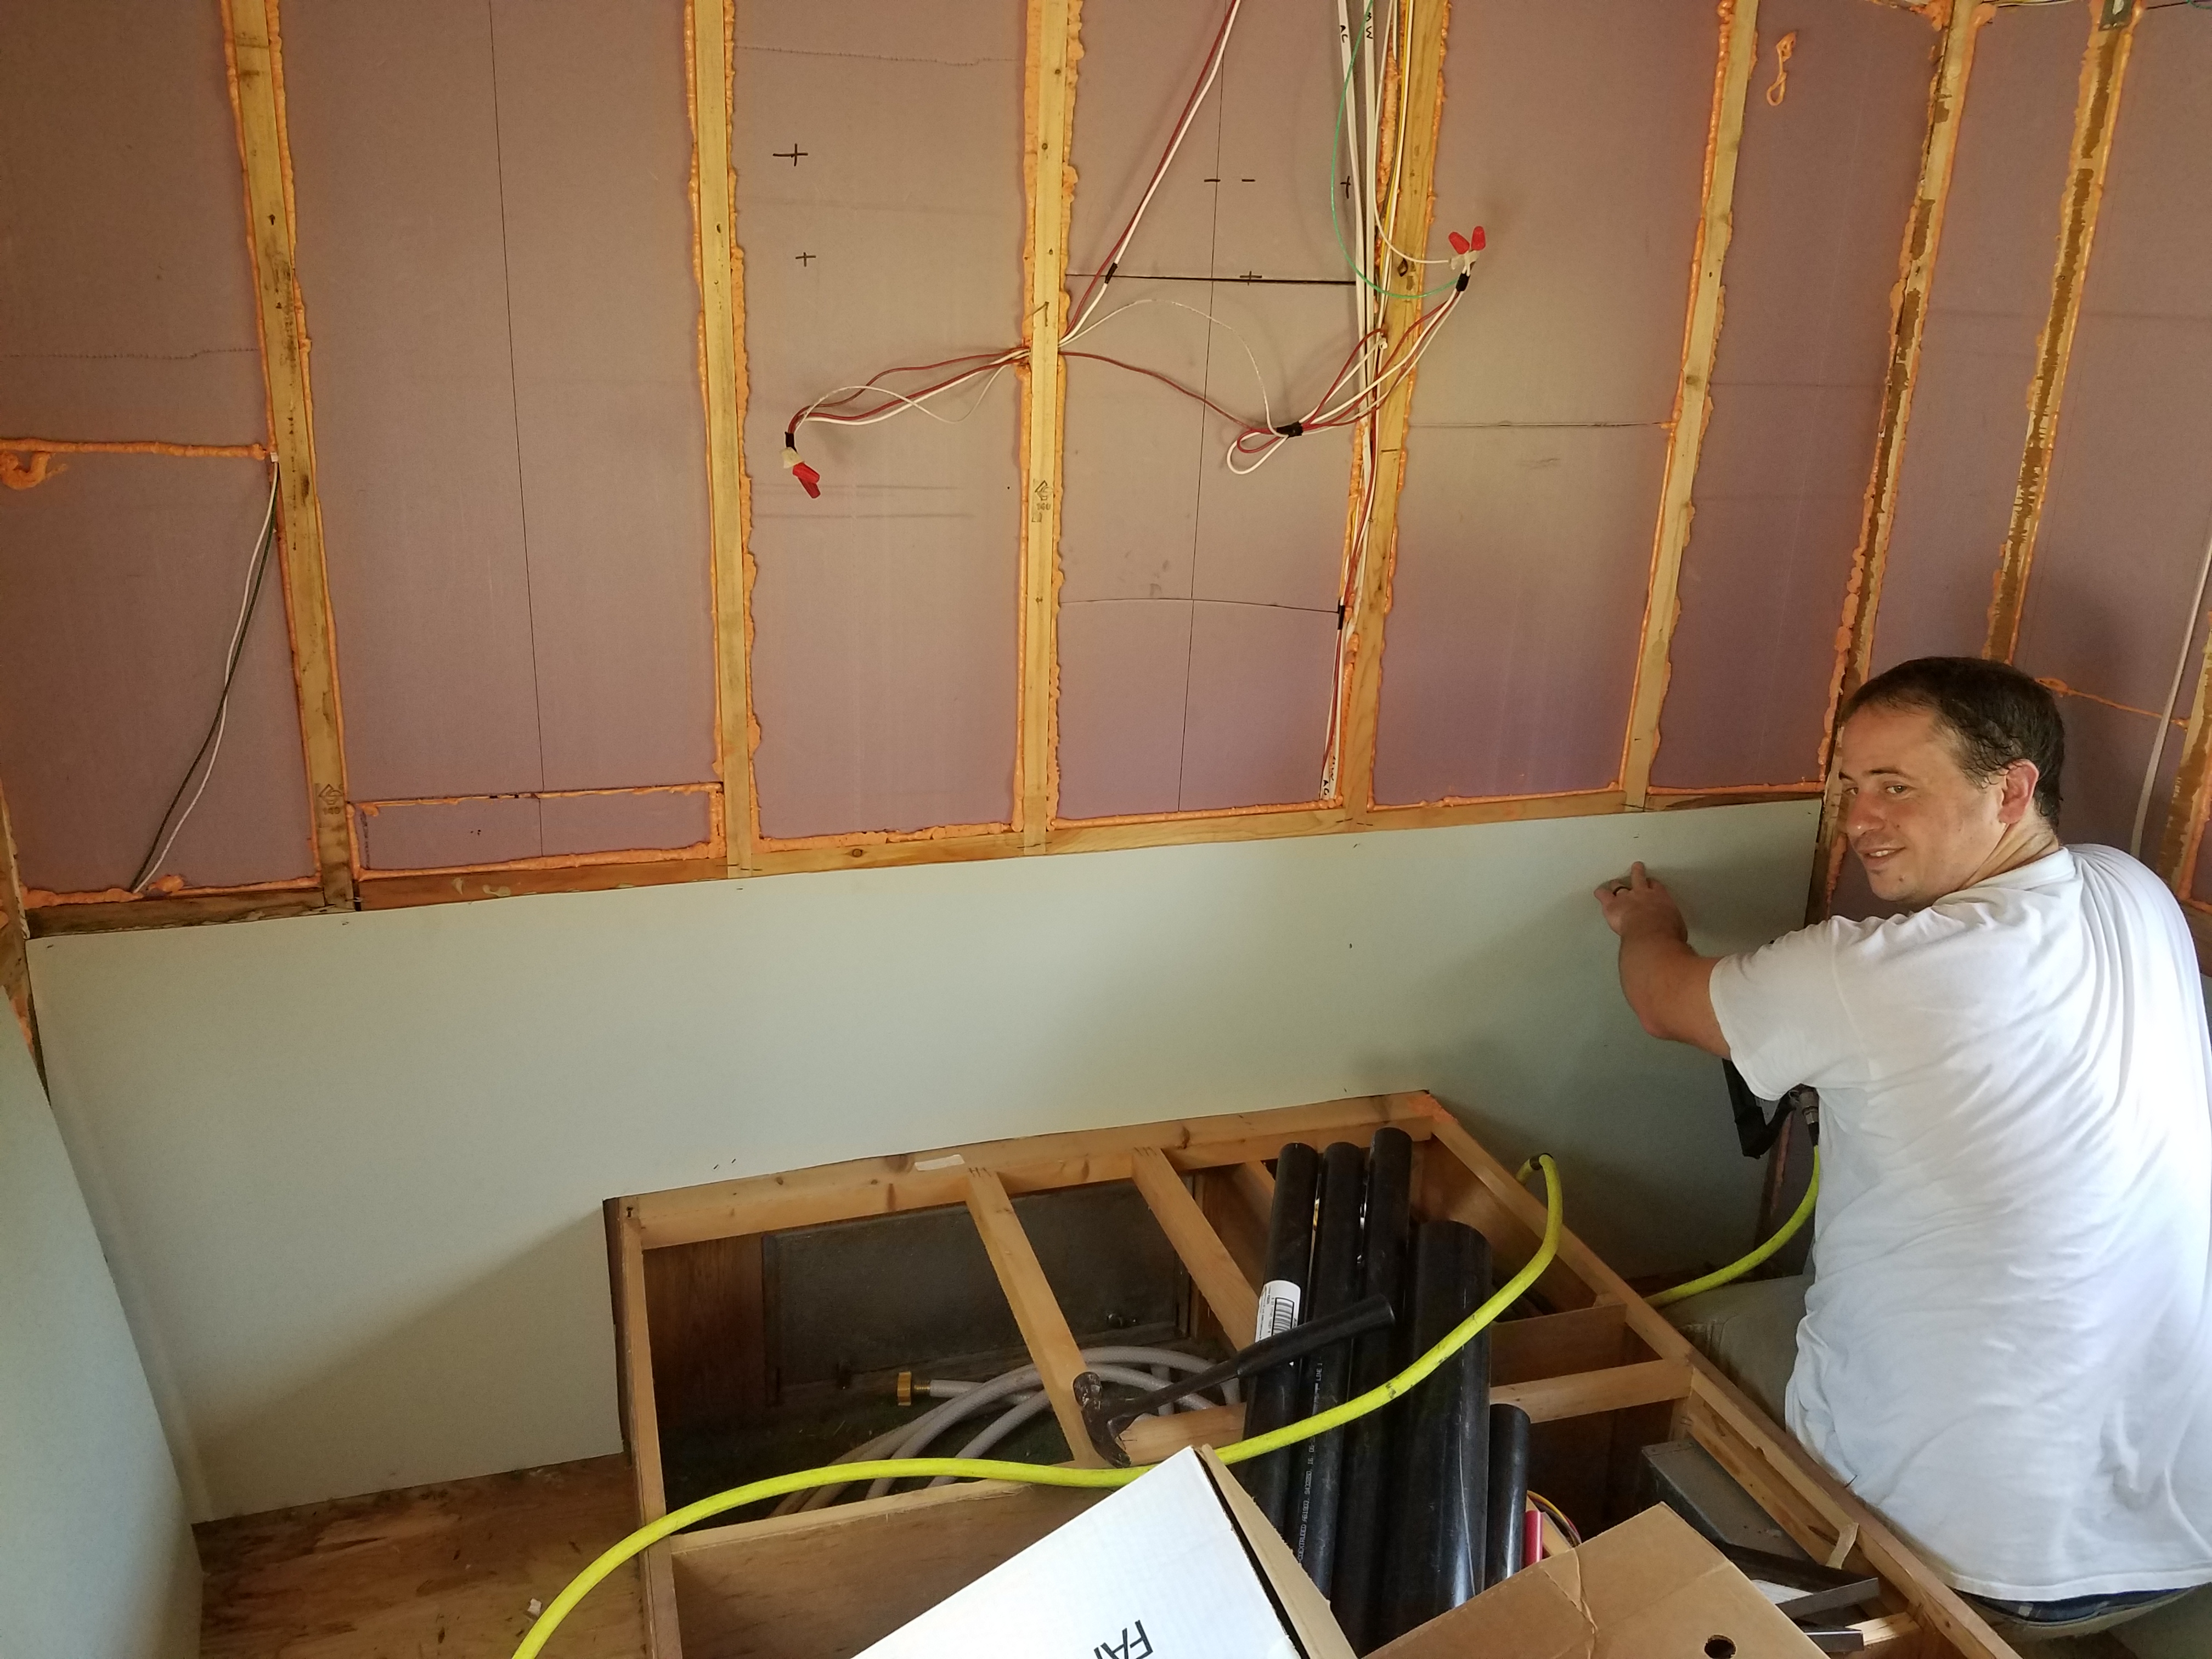
The hardest part of the whole process was finding the studs. We marked their location on the insulation on the ceiling and on the sub-floor with markers most of the time, but sometimes we forgot. Our studs are so narrow and many of them are crooked. It’s annoying making useless holes in your walls. A stud finder will be useful for the next round.
There were a few times when we gave up on the studs after putting too many holes in a useless circle around the general area we thought it would be. Luckily, that occurred in the wall that will be inside a closet, not right across from the couch or something more visible.
The 1/8″ gap I left in my measurements did create some pretty wide seams between panels. I’m not worried because many of these seams are going to be concealed behind furniture or shelving. I’m going to caulk all of the seams (and staple holes) with paintable latex caulk and then paint over them. I’m also considering doing a chair rail where the two panels meet, which is what they did when they in the original design. That will disguise the seam further and also add a little style and interest to the wall. That’s going to be a finishing step, though, so I’ll decide later.
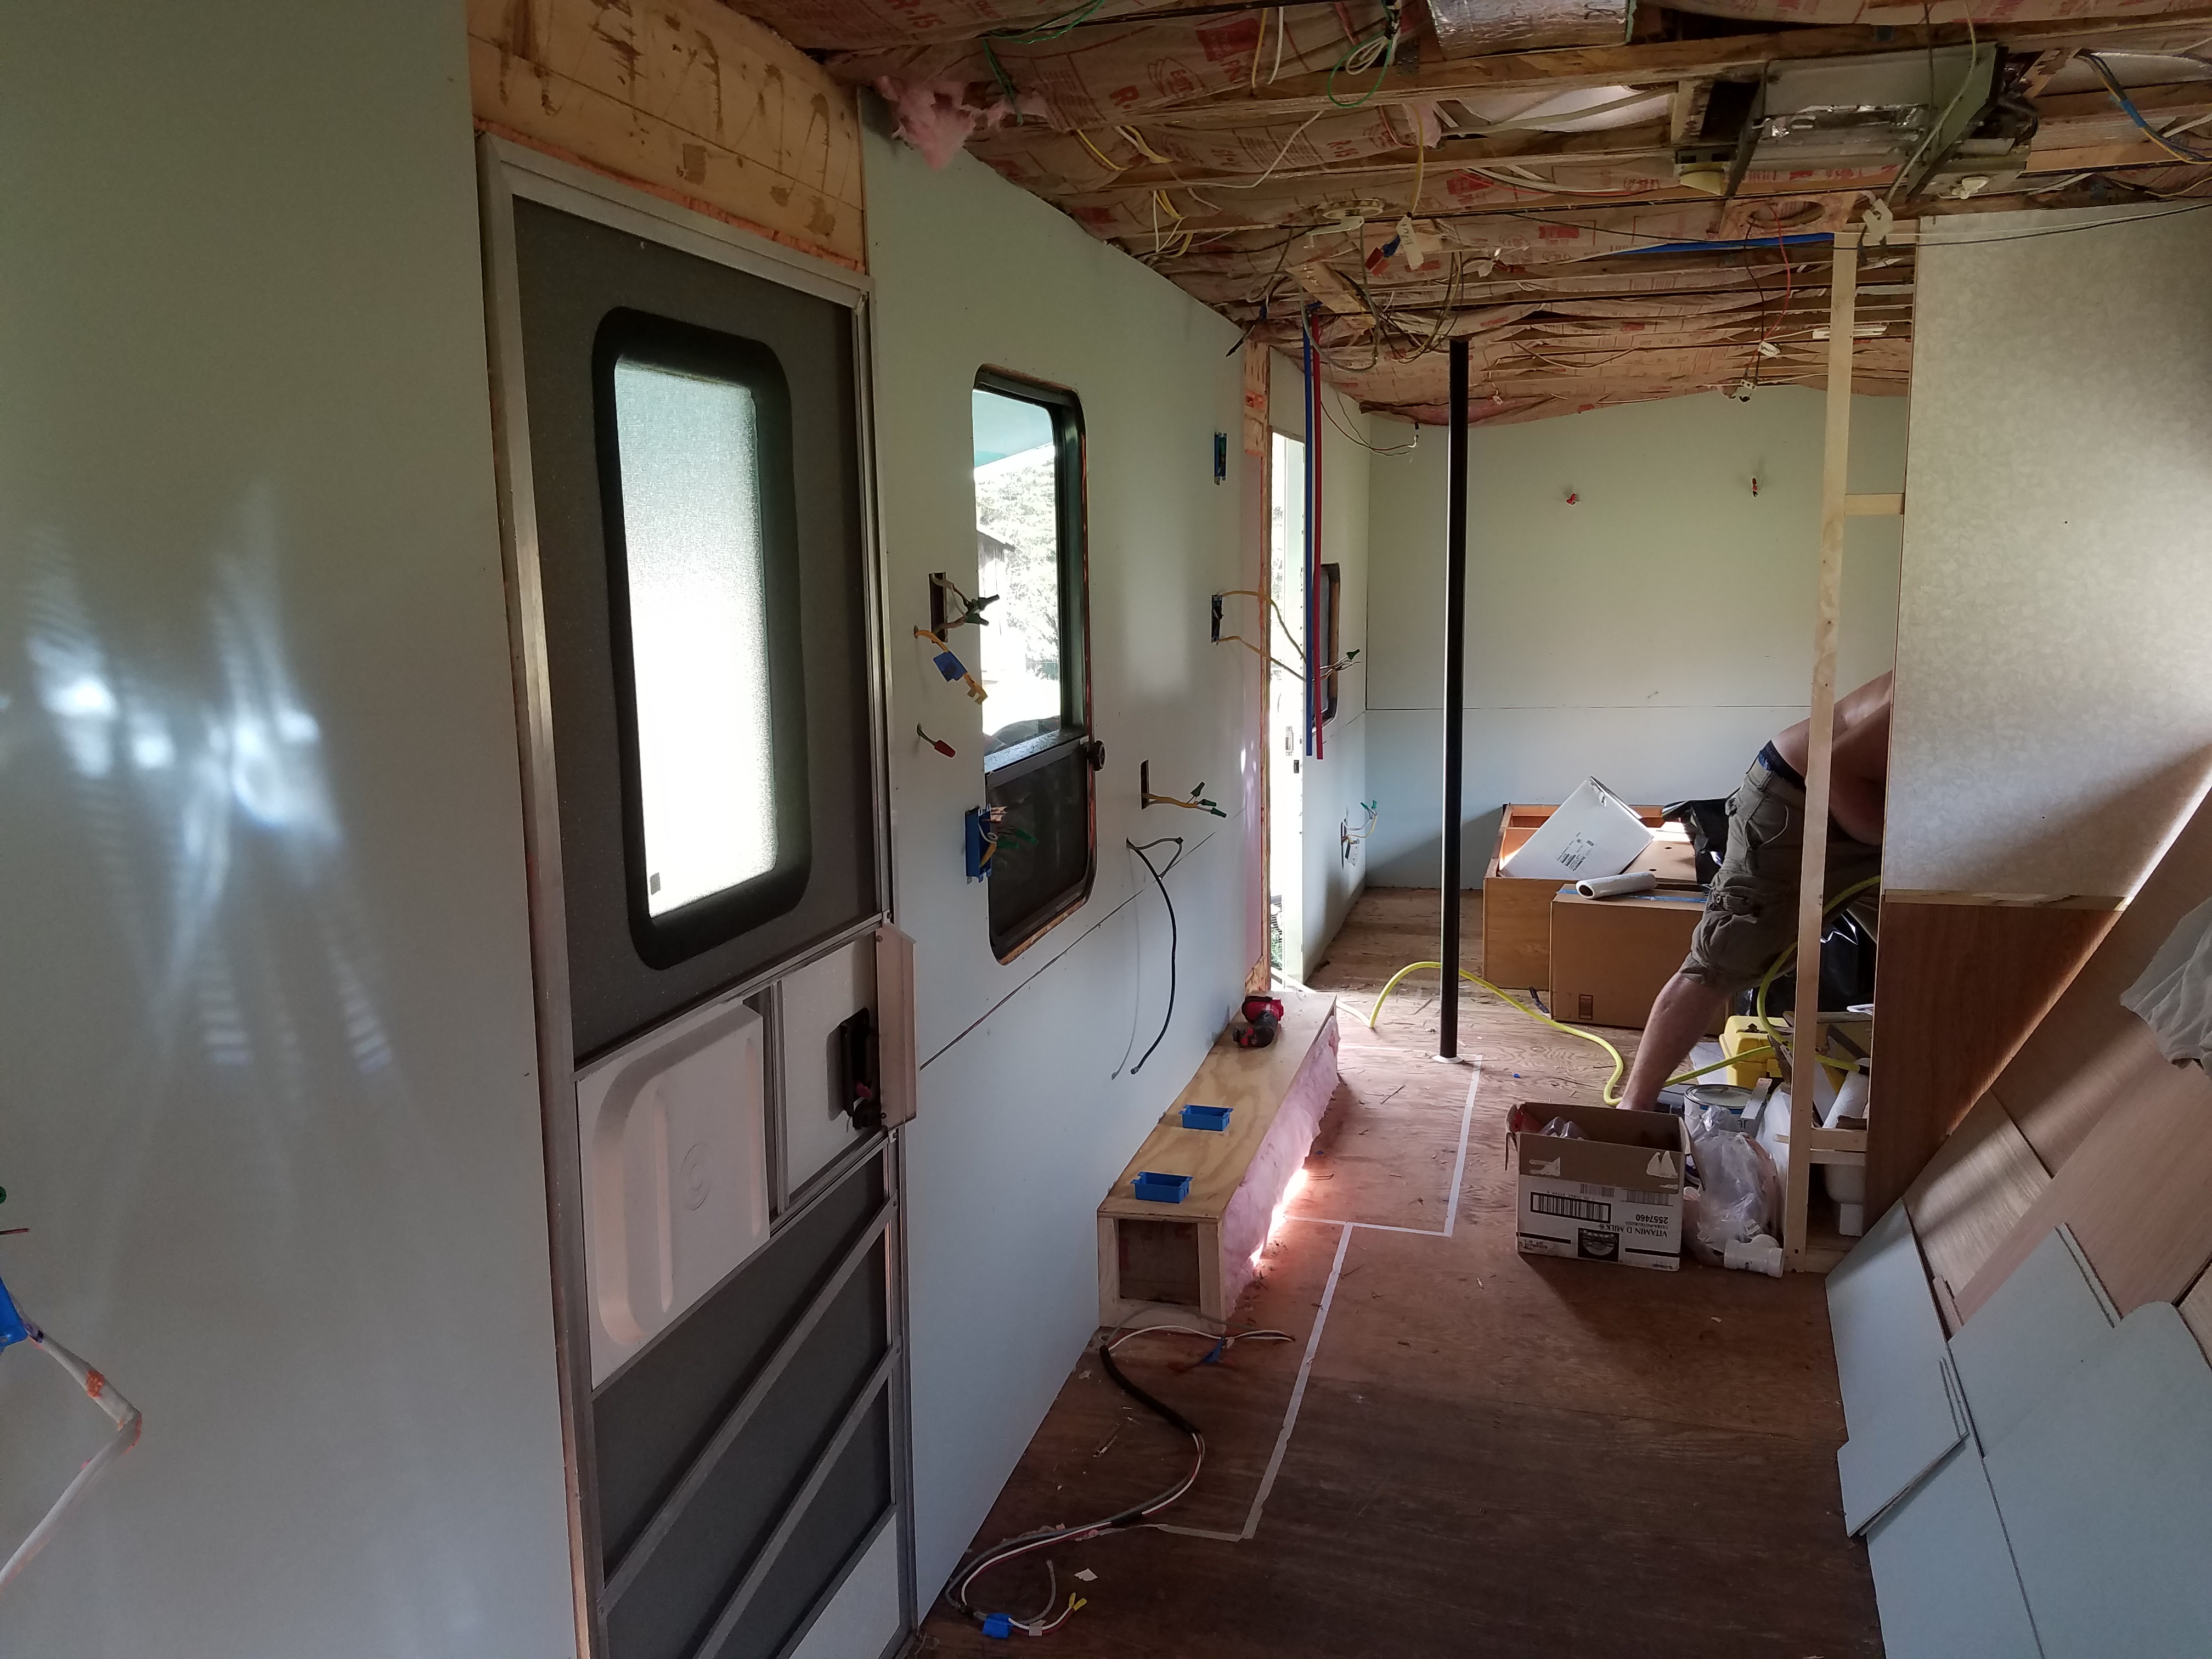
Paneling the Ceiling
With all of the wall panels cut, painted, and glued/stapled on, I started on the ceiling panels. With only 8 ceiling panels to do, the work went fairly quickly. The ceiling panels were also a bit simpler, with only some holes for the lights, square vents, and a few other things. No complicated windows or finicky outlets! However, nailing down the spacing of the lights was a little tricky.
When I did the wiring I put the lights in roughly the right place, with length left in the wires to figure out their exact location later. Before cutting holes for the lights I needed to know exactly where I wanted them on the ceiling. I tried to make their spacing somewhat symmetrical while also providing general and task lighting in the kitchen and bedroom areas.
Cutting the Panels
I used a 4.25″ hole saw attachment for my power drill (borrowed) to cut the holes for the recessed lighting, according to the installation directions on the packaging. This seems to be a standard size for recessed lighting and it was easy to find a hole saw of the right size. Unfortunately, while cutting, I forgot to account for the spacing of the trusses! When I put up the panel over the kitchen, both light holes were partially obscured by trusses. So frustrating! I need to shift the holes over by a few inches and then cover up the old hole.
When I complained to my uncle (a professional painter) about how many mistakes I’d made and how terrible all the seams looked, he said;
“A little caulk, a little paint, make a job what it ain’t!”
I’m now repeating that to myself every time I make a stupid mistake and have to cover it up somehow and hope it doesn’t look too bad later. Apparently, even the professionals mess things up! I was doubly glad to have this sage advice when I discovered that I’d inaccurately measured the holes for the black and grey water tank vents as well. It was a real hassle trying to measure things over my head, with a tape measure that kept falling, trying to find the center of a hole.
Luckily, I was able to correct these errors before putting up the panel. We made sure to dry-fit each panel before doing the final staple and glue. By putting it up against the ceiling and making sure everything lined up and fit where it was supposed to, we saved ourselves a lot of grief when the panels almost always needed adjustments.
My advice is to measure twice. I was usually too impatient to measure twice, and I paid for it later by having to make a lot of little adjustments and cover up a lot of mistakes. Take the time beforehand, no matter how sure you are that your measurement is right because you’ll regret it if you don’t. It’s even better to have 2 people measure and compare the measurements and keep remeasuring until you both agree.
Making Holes and Fixing Them
Fixing the misplaced hole required sawing out the right placement for the hole and then covering up the old one. My husband suggested gluing and taping a piece of cardboard to the back of the misplaced hole, then inserting the plug from the new hole into the old space and gluing it to the cardboard. Then I can just use caulk to fill in the gap and paint over it. I used a piece of pipe to check the fit and the placement of the hole. The 2″ hole saw seemed just perfect for a 1.5″ vent pipe.
For the dome lighting (typical in every RV and trailer) I only needed to drill a small hole, using a paddle drill bit, for the wires since the lights are mounted to the ceiling panels. I used recessed lighting with a switch in the kitchen and living room areas and again in the bathroom. When you come in the front door at night you want to be able to flip a switch and not have to stumble around in the dark feeling for lights on the ceiling. I think the same is true for a midnight trip to the bathroom.
The square holes I cut for the vents matched up very closely, but will still need a little trimming before putting in the plastic sidewalls that come with the vent. The hole for the A/C was more tricky, but only because it required removing the part of the A/C that is bolted to the ceiling, fitting it through the square vent hole without pulling the wires out, and then bolting it back in while holding the ceiling panel in place over our heads. It was exhausting and made even more unpleasant by the fact that the A/C had to be turned off while we did it, so we were sweating.
I don’t have any pictures of the process because it’s difficult to take pictures while holding 4×8 sheets of plywood over your head. I didn’t want to ask my husband to please hold the panel up long enough for me to take a picture when we were both exhausted and in pain from barely holding it up long enough to staple it on.
Using the caulk gun to squeeze Liquid Nails onto the ceiling beams was tricky. It takes some trial and error to get just the right size bead to stick to the beam without falling on your head (or in your mouth, yeah, that happened), or just sticking to the tube, and the right speed to not skip parts and also not clump up parts that will just fall off. It’s frustrating, but you can get it.
One thing I learned doing the wall panels is to staple in a certain pattern to avoid creating bubbles in the plywood. If you’re not careful, you can make the plywood bulge by stapling on both edges and not accounting for the slight sag in the middle. In order to avoid this, you either have to go across evenly from one edge or start in the center and work out.
I usually decided to start at the end and go across the sheet to the other end, pushing the plywood flat with each staple. Another tip: make sure you pull all the wires through the holes before you staple it up there because trying to fish out wires after the panel is already firmly attached is a real pain.

Once all of the ceiling panels were up the whole trailer had a new look. It’s amazing how light and bright it felt after we covered up all of the brown, dark purple, and orange from the construction materials. It’s also amazing how many dirty handprints, smudges, scuffs, and smears of construction adhesive had gotten all over my white ceiling panels during the installation. I’ll need to go over everything with a magic eraser, a sanding block, caulk, and some touch-up paint before it looks good. That’s definitely going to come later though.
Click on the link below to see the next stage of the rebuild!