
Renovating our 1997 Fleetwood Mallard for Full-Time Living (Part 13)
This is the story of how my husband and I purchased a 20-year-old travel trailer and I DIYed the crap out of it to make it suitable for full-time living. In this series, I’m giving All of the details about the process step-by-step, as performed by me, a 26-year-old woman with No experience in construction. The first installment in this series details the purchasing process and the changes I planned to make. You can find that article in the link below and start at the beginning. Then, follow along in the series by clicking on the link for the next article at the bottom of each page.
What’s So Exciting About Insulation?
The next big improvement we made to the Wind Rose was new insulation!!! I’m so excited about this insulation!!
So, what’s so exciting about insulation? Imagine a cozy, warm, draft-free travel trailer surrounded by snow and wind on a dark holiday evening. It smells like Christmas and you’re watching the snowfall from your comfortable couch with some hot chocolate and a good book. Or… Imagine a cool, refreshing travel trailer as a refuge from the burning sun on a hot summer day. You burst inside and sigh in relief as the A/C blasts you in the face and you shut out the punishing heat of the desert and get some iced tea. Or… imagine looking up your utility bill online and thinking “Oh, not bad this month,” no matter what month it is.
That’s what insulation does for you. It’s like magic.
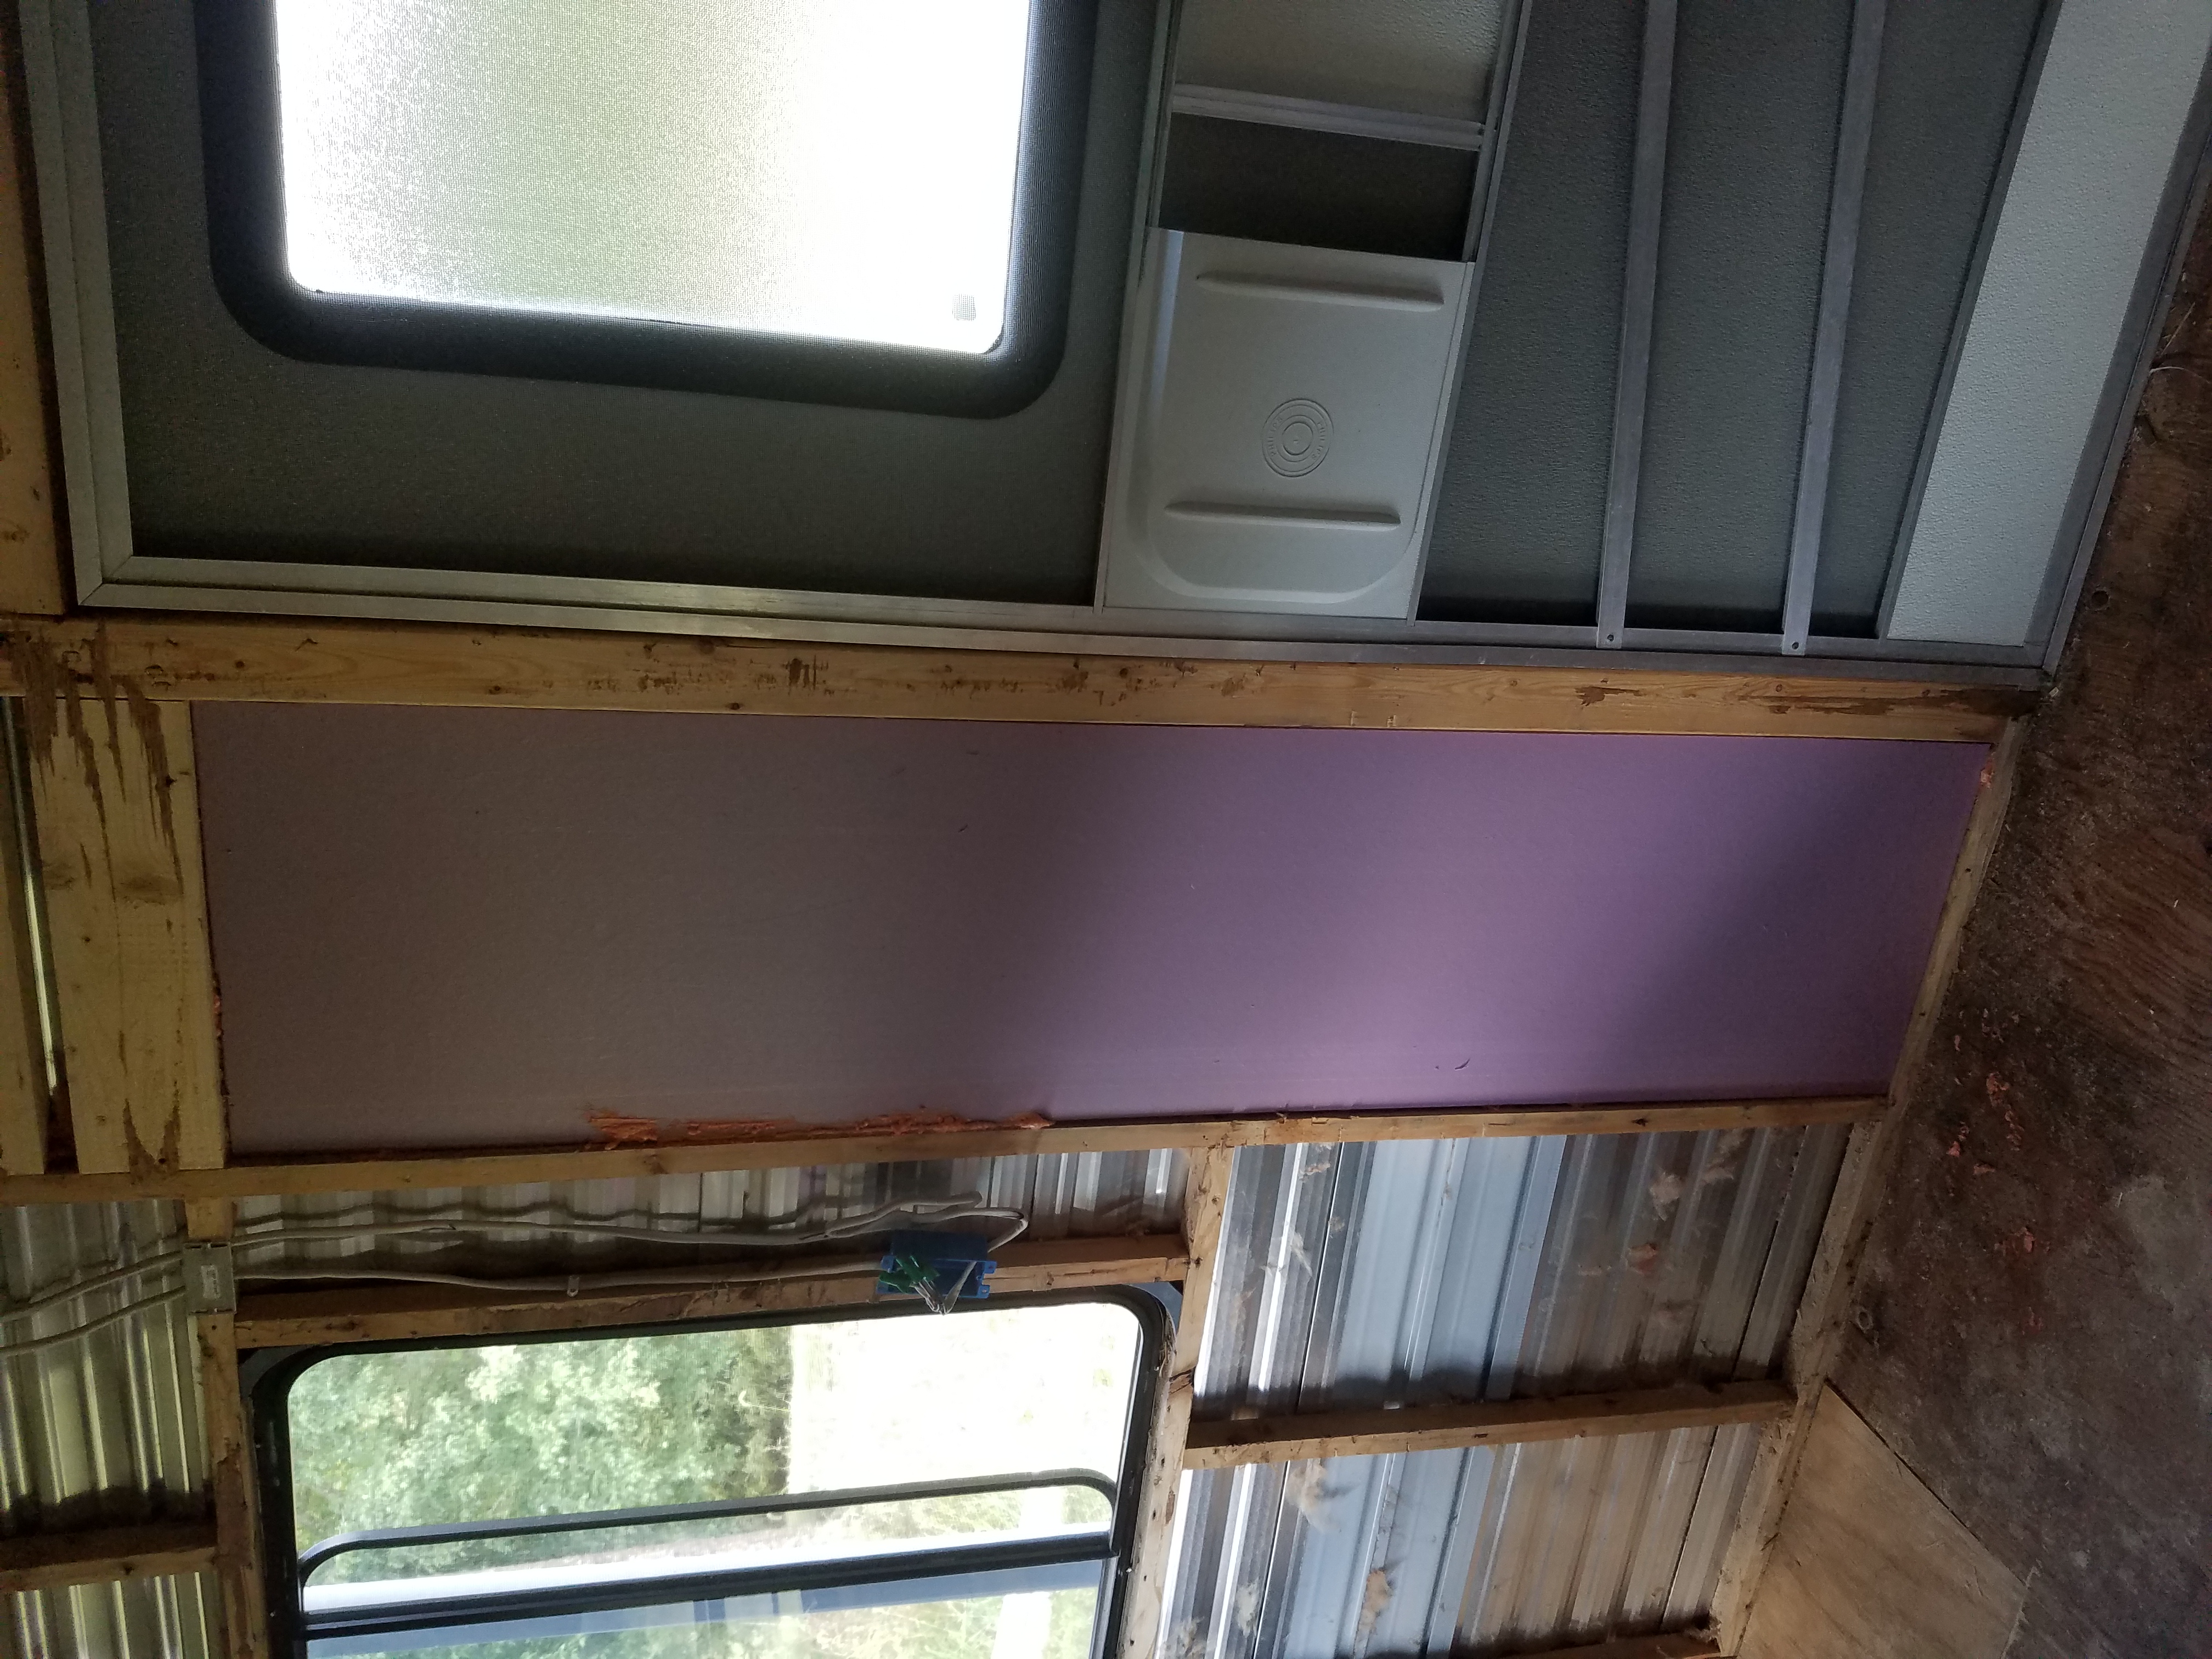
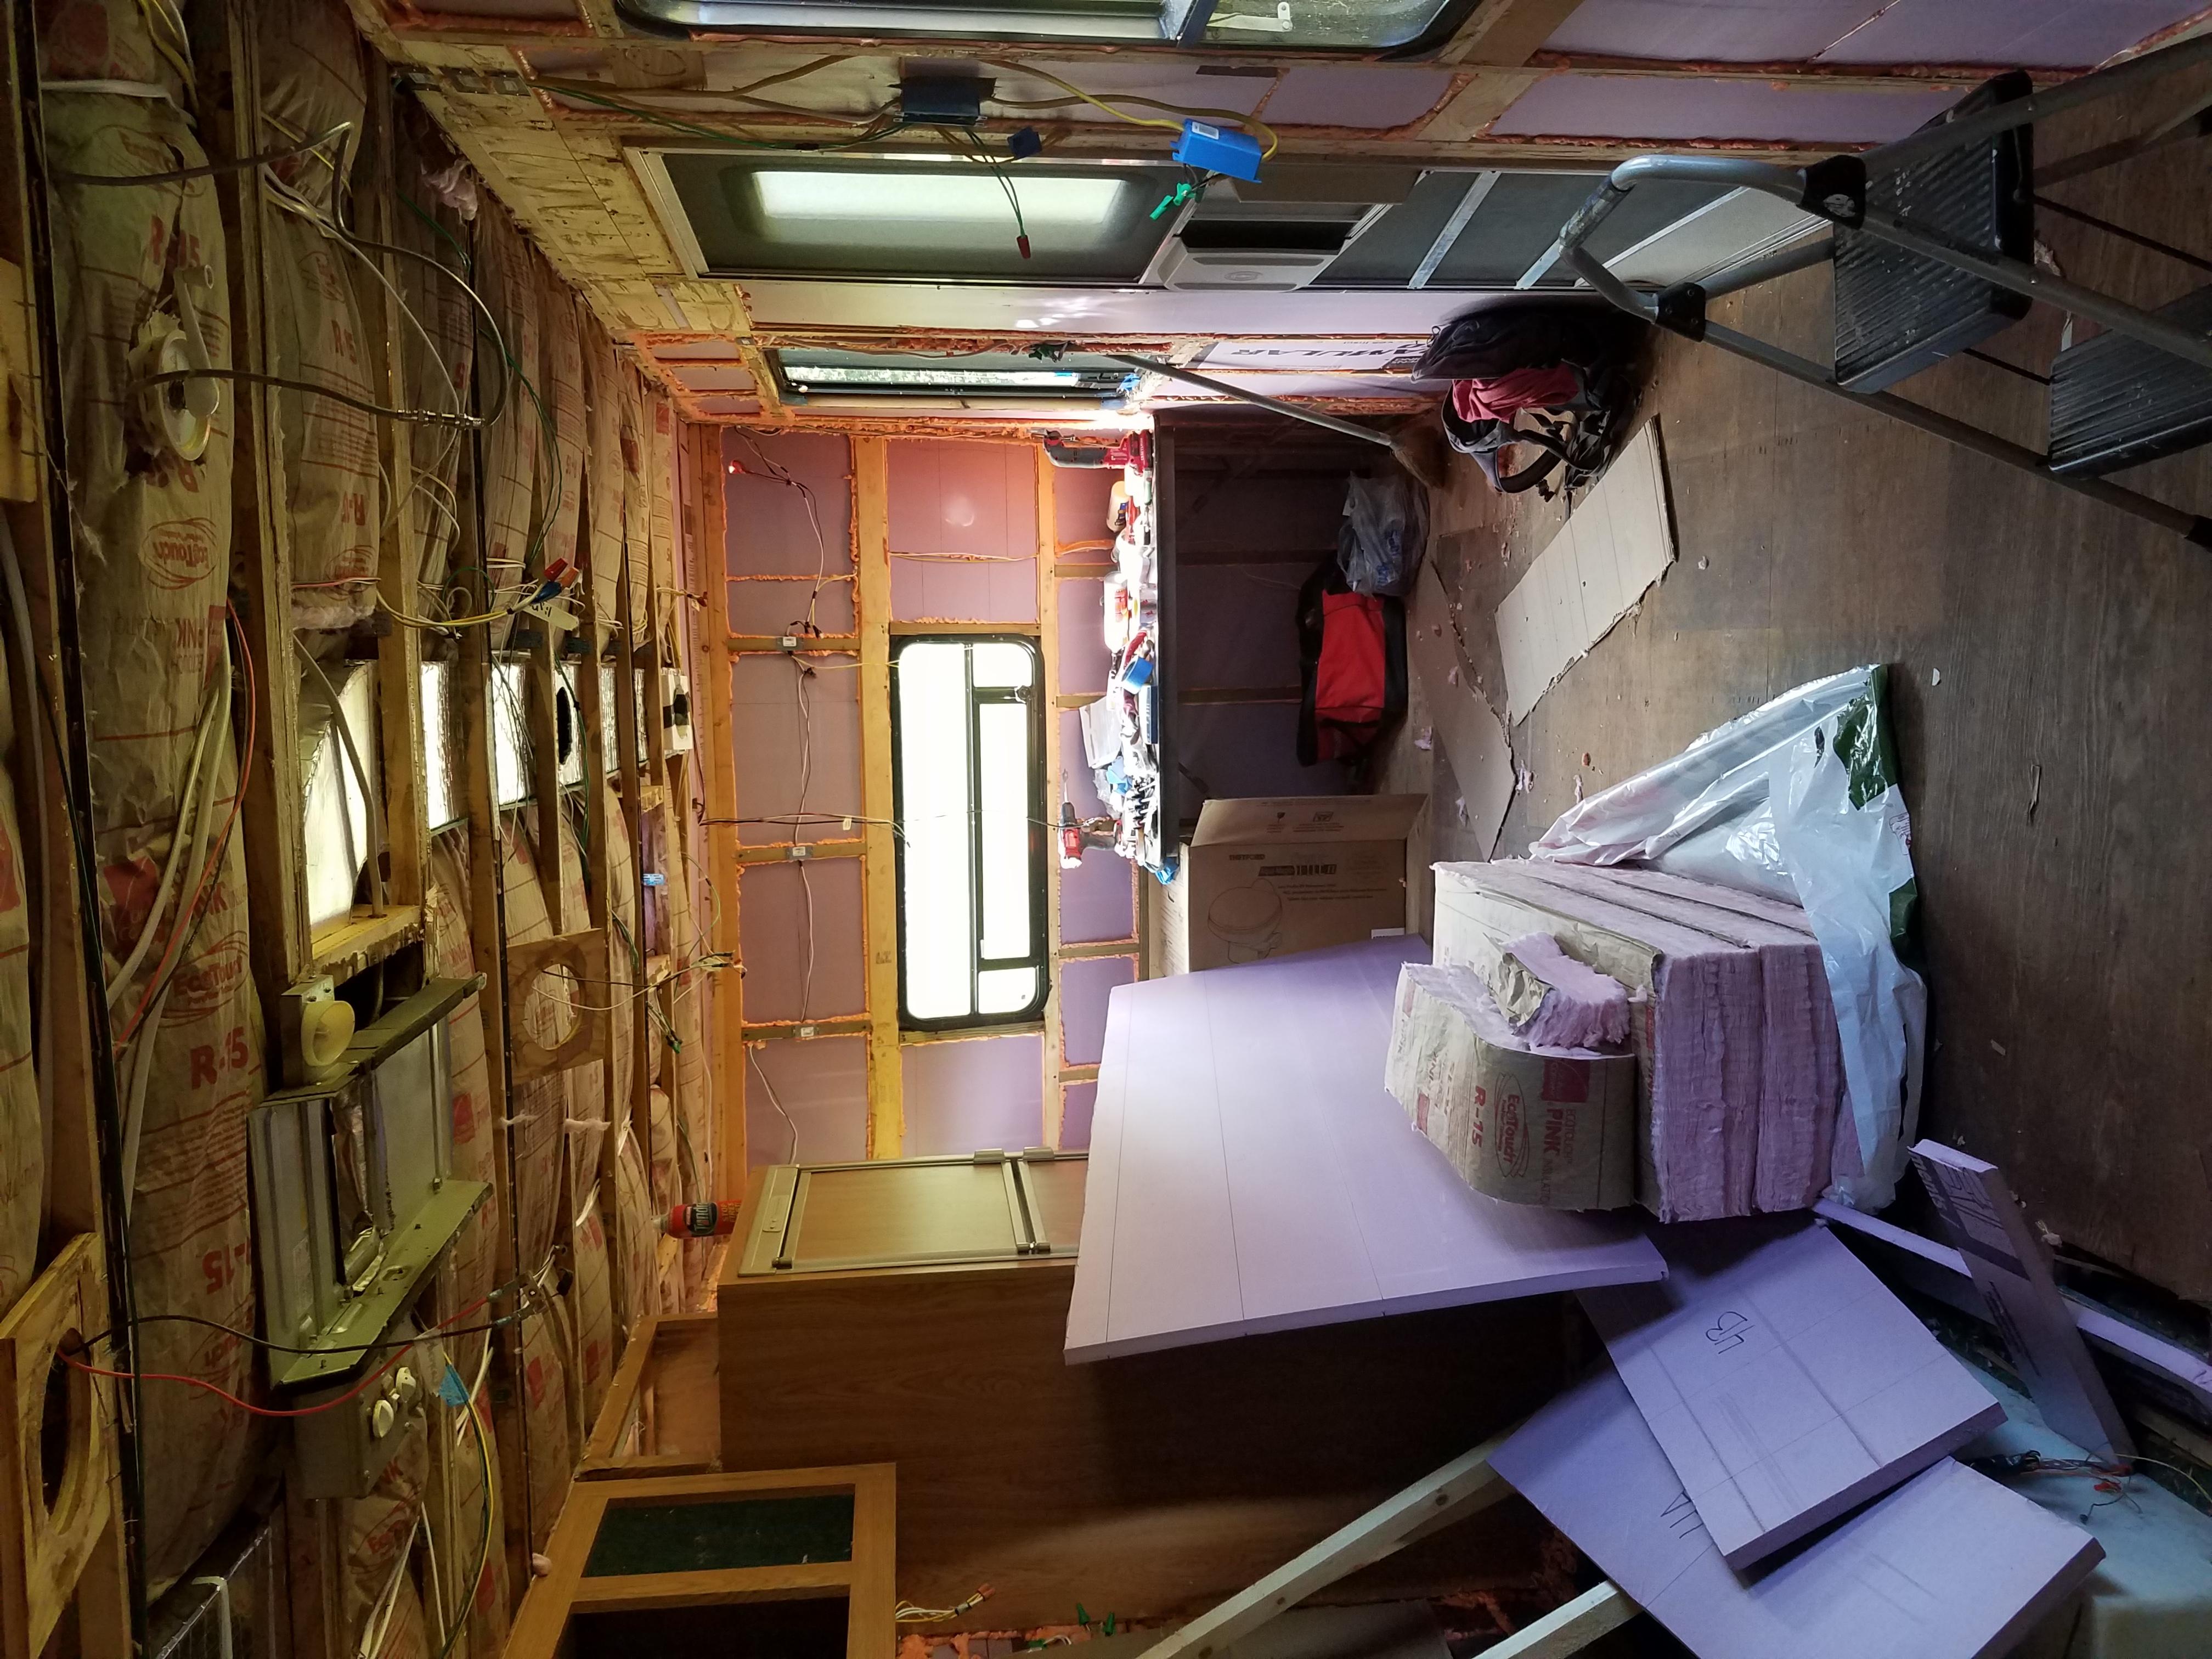
The insulation that I pulled out the Wind Rose was 1″ thick fiberglass batting (unfaced) that rarely covered stud to stud or the full length of the wall. It seems to have been done in a slapdash manner. Although I don’t have personal experience with the insulation in the Wind Rose, I have it on good faith that standard travel trailer insulation falls very short for full-time living. One of the main reasons I decided to pull everything out down to the studs was for the chance to replace the insulation with something more effective.
Different Types of Insulation
There are several different kinds of insulation to choose from when insulating your RV or travel trailer. The ability of insulation to prevent temperature changes is measured by “R-value.” A higher R-value means more insulation power. Different types of insulation provide different R-value for their thickness.
The travel trailer came with a very thin layer of fiberglass batting. Fiberglass batting relies on thickness to provide insulation and it’s what you’ll find in most houses. In houses, you get it 4″ thick and it does a pretty good job of keeping the cold out. However, it doesn’t work very well when it’s compressed or wet and at 1″ thick, the R-value it provides is very minimal.
You’ve probably also seen the “bubble-wrap” type of insulation, which is usually reflective on both sides and has many small air bubbles between the layers. This type is often used to temporarily insulate windows in the winter. It’s also the type that’s used for your car’s windshield in the summer. The reflective exterior and air bubbles provide a pretty low R-value. It’s thin, flexible, and inexpensive, but not very durable or long-lasting.

Another type of insulation is rigid foam board insulation. Rigid foam board comes in 3 different types based on how it’s constructed. After much deliberation, I chose to use XPS (extruded polystyrene) rigid foam board insulation. This type of insulation provides a relatively high R-value for its size and thickness. Additionally, the rigidity of the boards will add to the structural integrity of the travel trailer by supporting the somewhat flimsy 2×2 framing. Finally, the rigid foam board is water-resistant. Moisture is the enemy, people! Water infiltration is the great destroyer of travel trailers and RVs! It must be resisted at all costs on all fronts!!
Insulating the Walls
I chose to use XPS rigid foam board instead of the other two types of rigid foam board; EPS (expanded polystyrene) and polyiso (polyisocyanurate). XPS is more durable and easier to work with than polyiso, and it has a higher R-value than EPS. Honestly, I’m no insulation expert. I read a lot of reviews, analyses, and comparisons and made my best guess. Anything will be an improvement over the scanty fiberglass that was in the walls previously.
Before buying any insulation I did a rough (very rough) calculation of the square footage of all 4 walls. After getting that number, I added 20% to account for mistakes and waste. I ended up ordering 20 4×8 sheets of 1″ thick XPS rigid foam board.
I chose the 1″ thick board because I wanted to be sure to leave room for the wiring on top of the insulation and to avoid having the insulation bulge out of the 1.5″ deep cavity. After receiving the insulation I could tell that I chose correctly and there would be just enough room for the wiring to pass between the insulation and the walls. The 1″ XPS board has an R-value insulation rated of R-5. This is far less than what you normally find in the walls of homes (usually around R-15 or R-19) but houses have 4″ thick wall cavities, and my travel trailer only has 1.5″ inches of space for insulation.
To compare to the other types of insulation I considered, the more expensive and more delicate polyiso rigid foam board only provides insulation of R-6. I couldn’t find any 1″ thick fiberglass batting or even 2″ thick. Wherever the RV and travel trailer people buy the stuff, it’s not Home Depot. 3.5″ thick fiberglass is the thinnest stuff I could find, and trying to stuff that into a 1.5″ deep cavity would be difficult, possibly make the luan bulge or pop out, and would reduce it’s R-value anyway. It’s just not advisable, at least not in my opinion. The 1″ thick XPS board was the best choice.
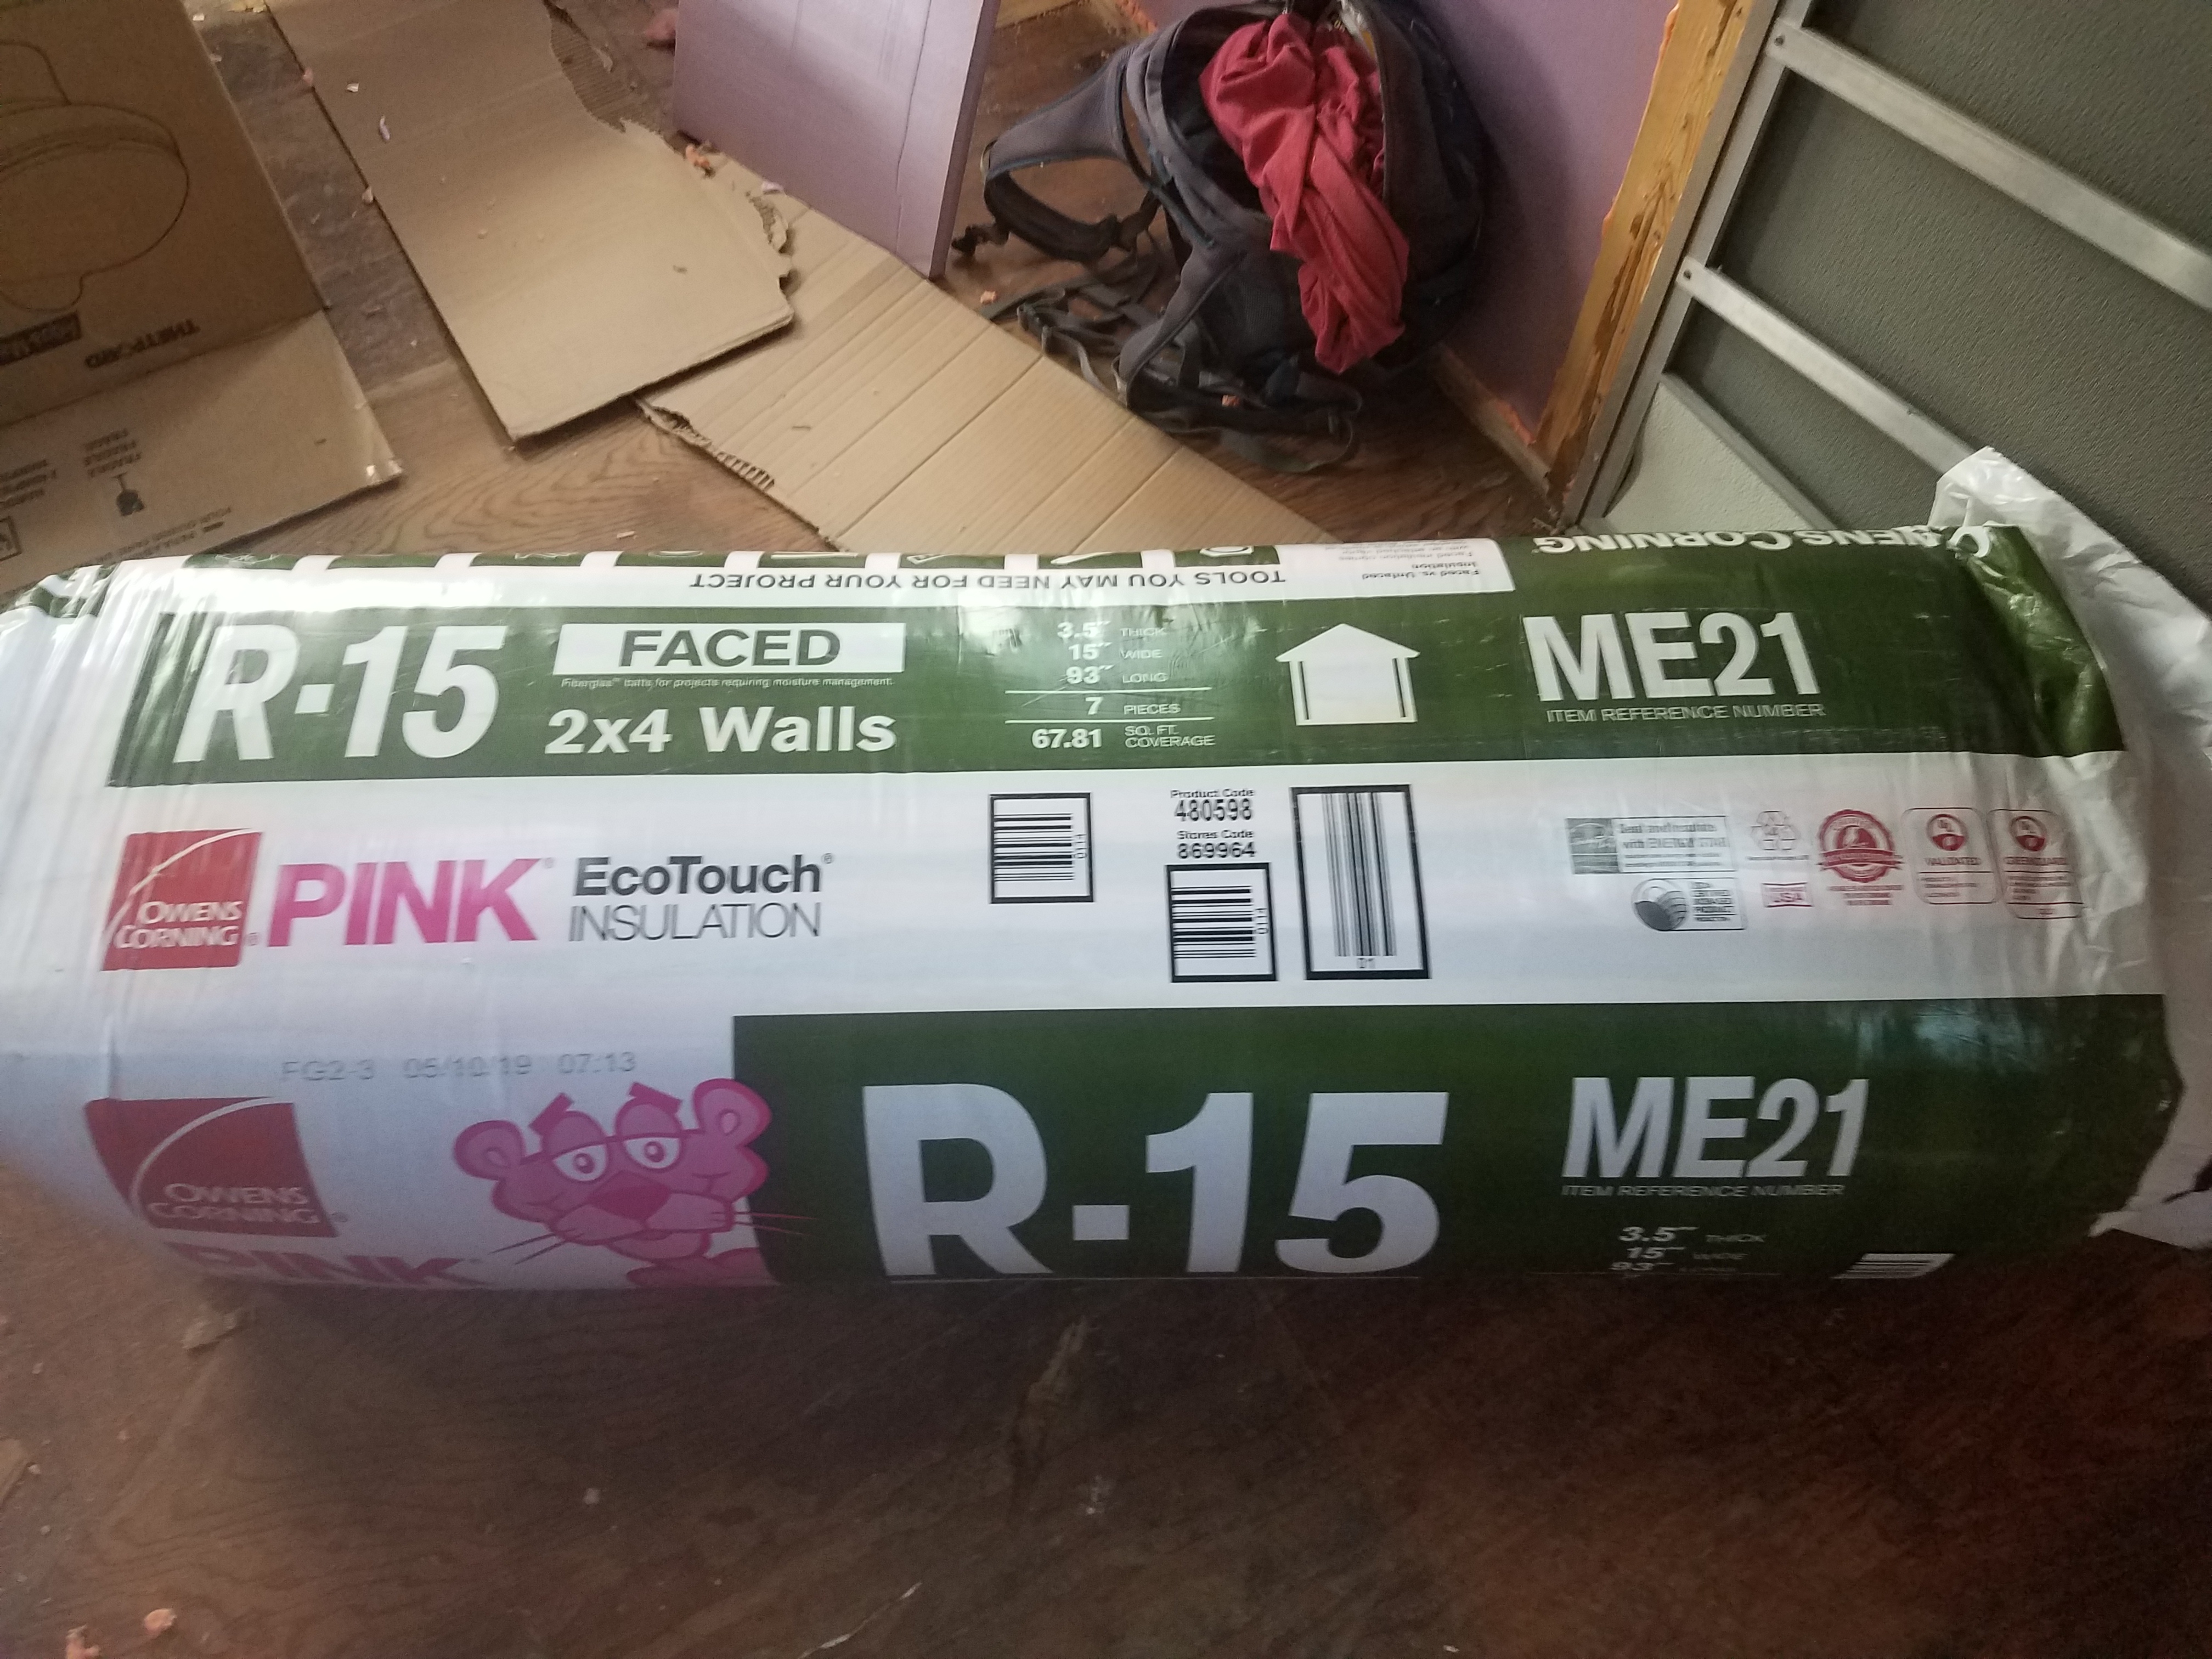
For the ceiling, on the other hand, we decided to order some 3.5″ thick, faced, R-15 fiberglass batting. The ceiling, at the highest point of its curve, is about 5″ deep, narrowing at the edges to only about 1″. That leaves plenty of room for some nice, thick fiberglass insulation like you’d find in a standard house. The fiberglass batting is cheap, easy to install, and has a high insulation value. On the other hand, it’s prone to absorbing moisture and then losing its insulation value. We decided to take advantage of the deeper roof framing to add more insulation where it counts most.
Consequently, with a value of R-15, the roof will be the most heavily insulated part of the trailer, but that’s all to the good. In regular houses, the roof is the most heavily insulated part of the house, usually 2x as much as the walls and floor. Hot air rises and the sun beating down on the roof warms up your A/C as well. We need to take advantage of the extra thickness available up there to keep our comfort level up and the energy bill down.
When using rigid foam board insulation it’s important to make a plan for sealing the cracks and gaps. We decided to use Great Stuff spray foam insulation (Gaps & Cracks) to glue the foam boards to the aluminum skin and seal any cracks where it meets the wooden frame. This stuff really is great, as it fills the gaps with thick foam that rapidly turns solid, adding insulation and also sticking the boards in place. I purchased 8 cans of the foaming sealant, an off-brand spray gun to make the application quicker and easier, and one can of cleaning spray to keep the gun from clogging up.
Installing the Insulation
Rigid foam board is pretty easy to work with. You can break it at the seams or cut it with a box cutter and then snap it. We needed to fit each space between the framing with the foam board to provide good, consistent insulation throughout. The trick with the travel trailer is that every space between the studs is slightly different. They all needed to be individually measured and each piece of insulation board cut specifically to size.
We wanted the insulation boards to fill the spaces as close as possible, but we soon realized that if they fit too closely, then we had to spend a ridiculously long time trimming them. Trimming the edges takes a lot longer than cutting them right in the first place. With that lesson under our belts, we decided to cut them all ever-so-slightly small so that they would be easier to fit in.
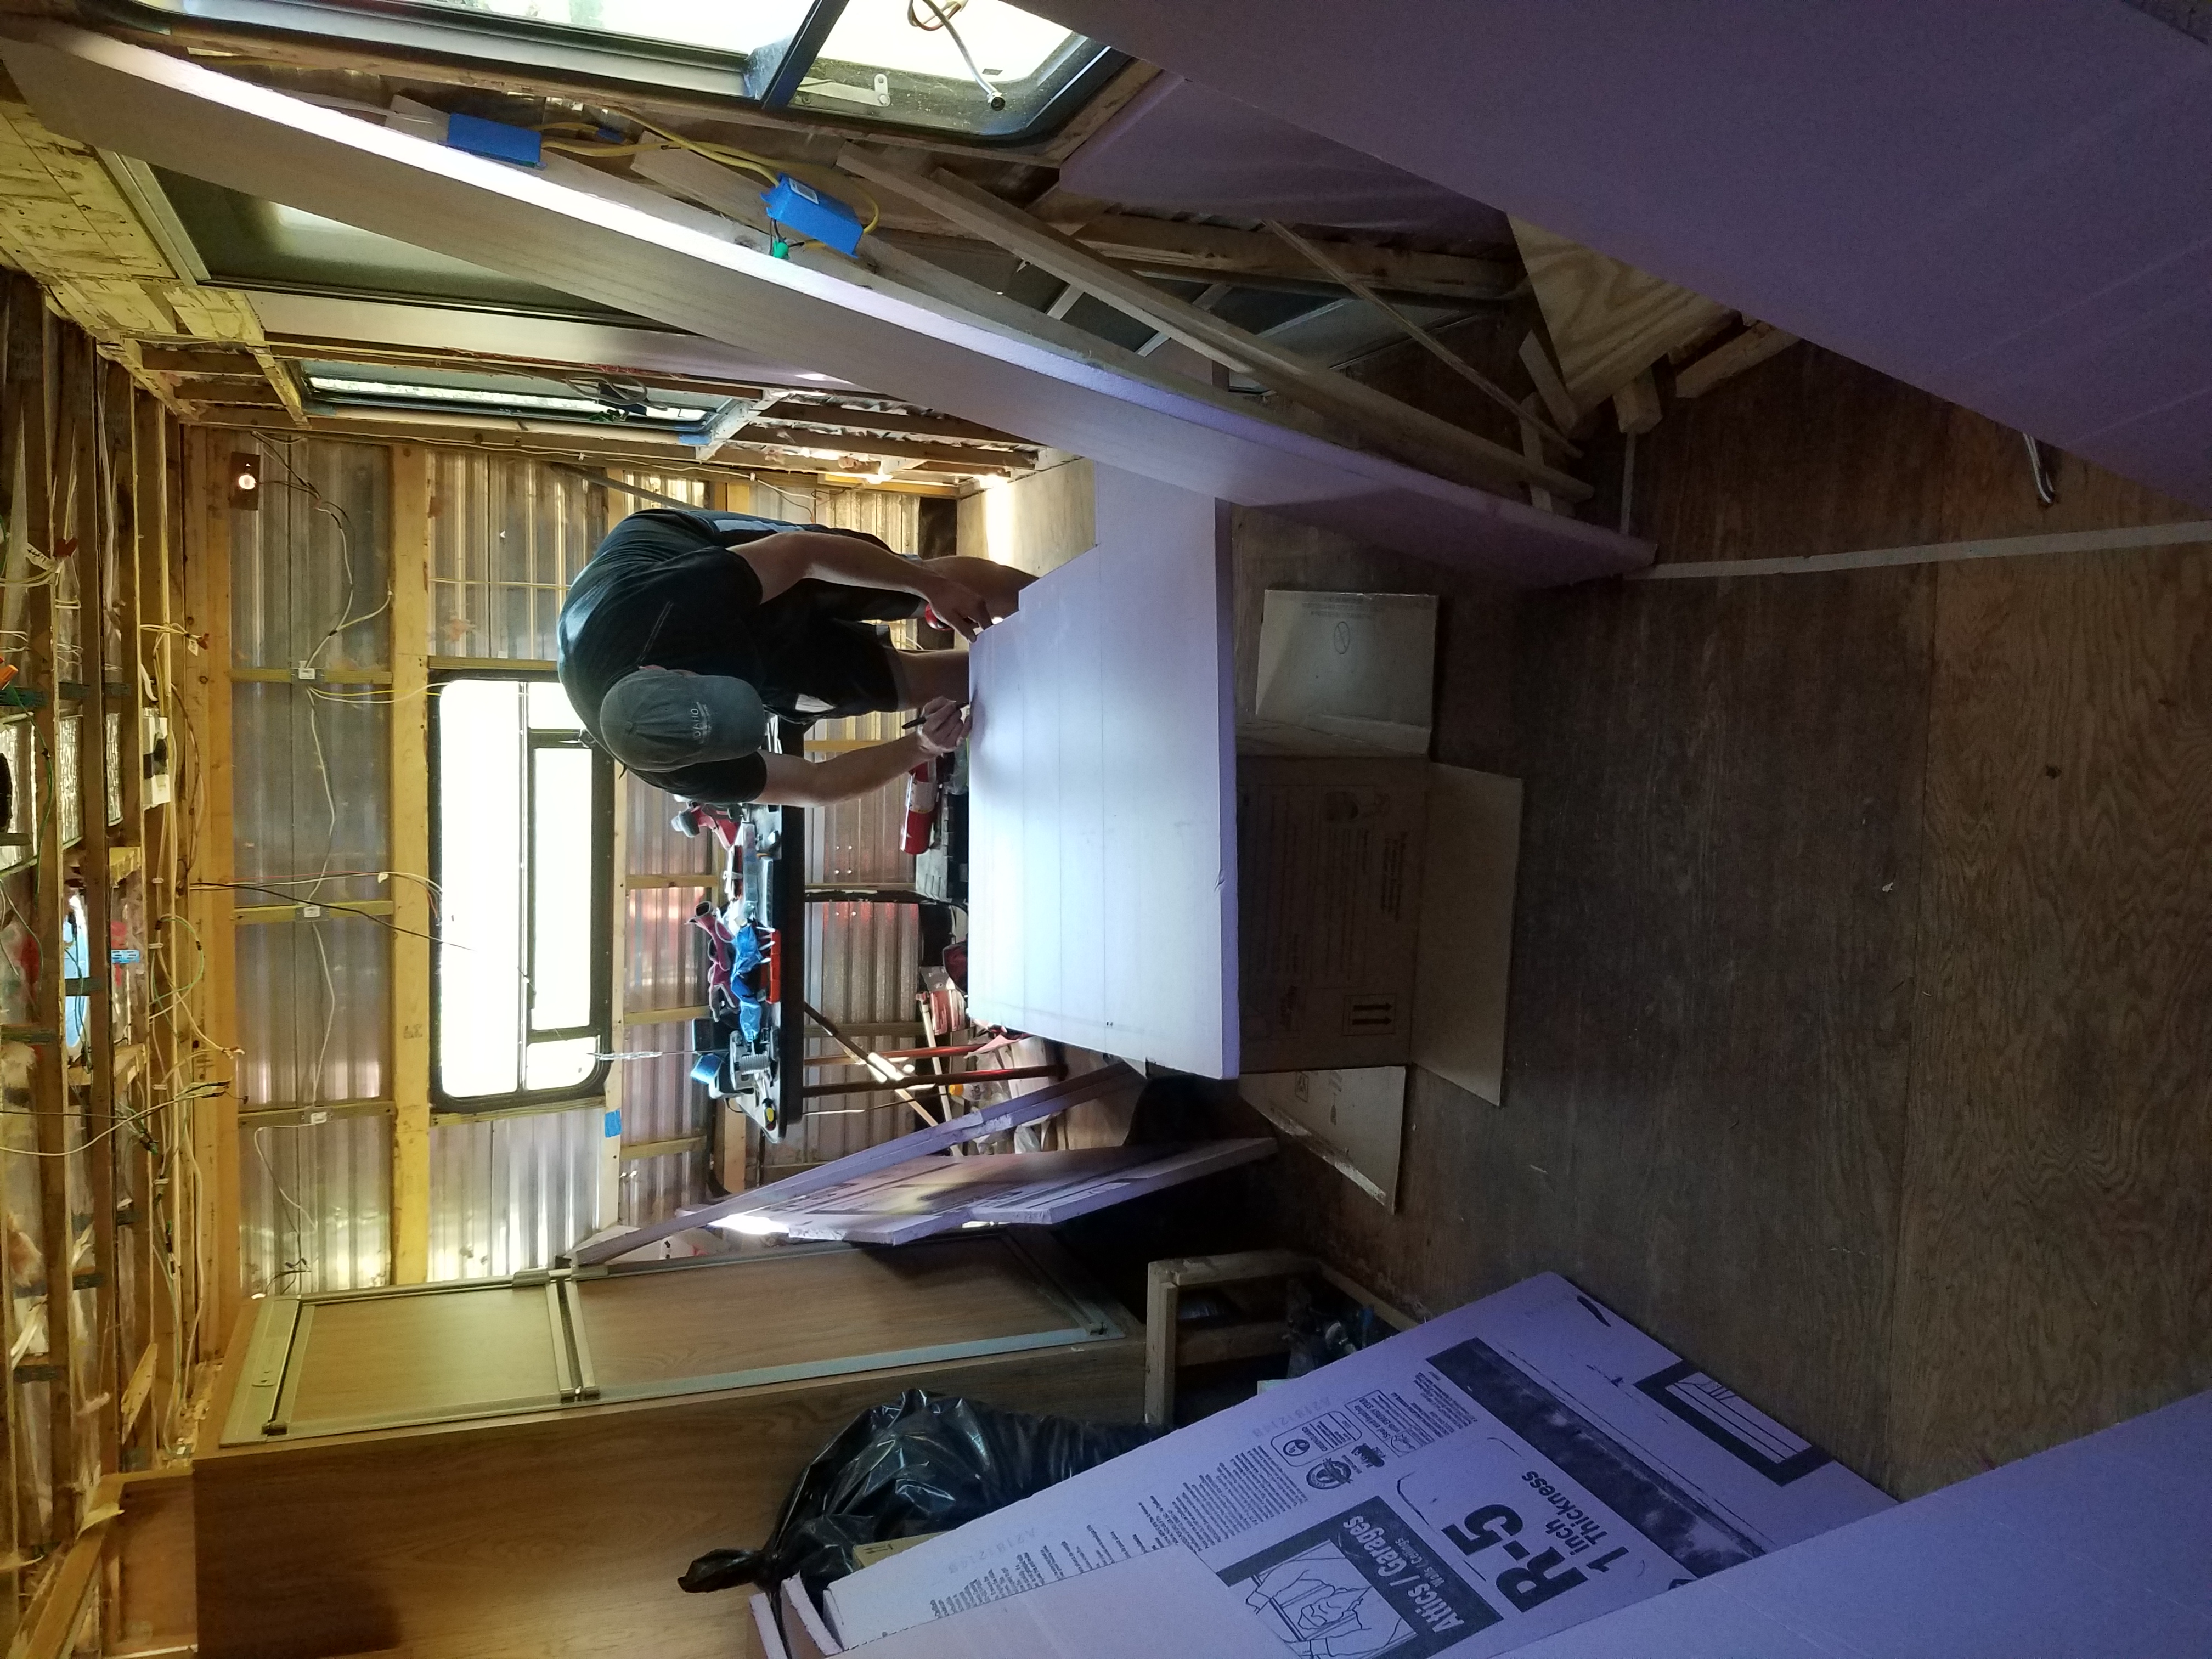
I had my wonderful husband’s help on this project and it went quite quickly with both of us working on it. Cole measured each cavity and cut the large sheets to size, then brought the large piece in and placed it by its intended location. My job was to dry-fit each sheet, trim anything that didn’t fit, and figure out how to work around the wires, lights, outlets, and other oddities.
My advice is to cut your boards into as many jigsaw pieces as necessary to make them easily fit around obstructions. The edges fit back together almost seamlessly and it’s so much easier than trying to carefully force a board under a bunch of wires or into a corner.
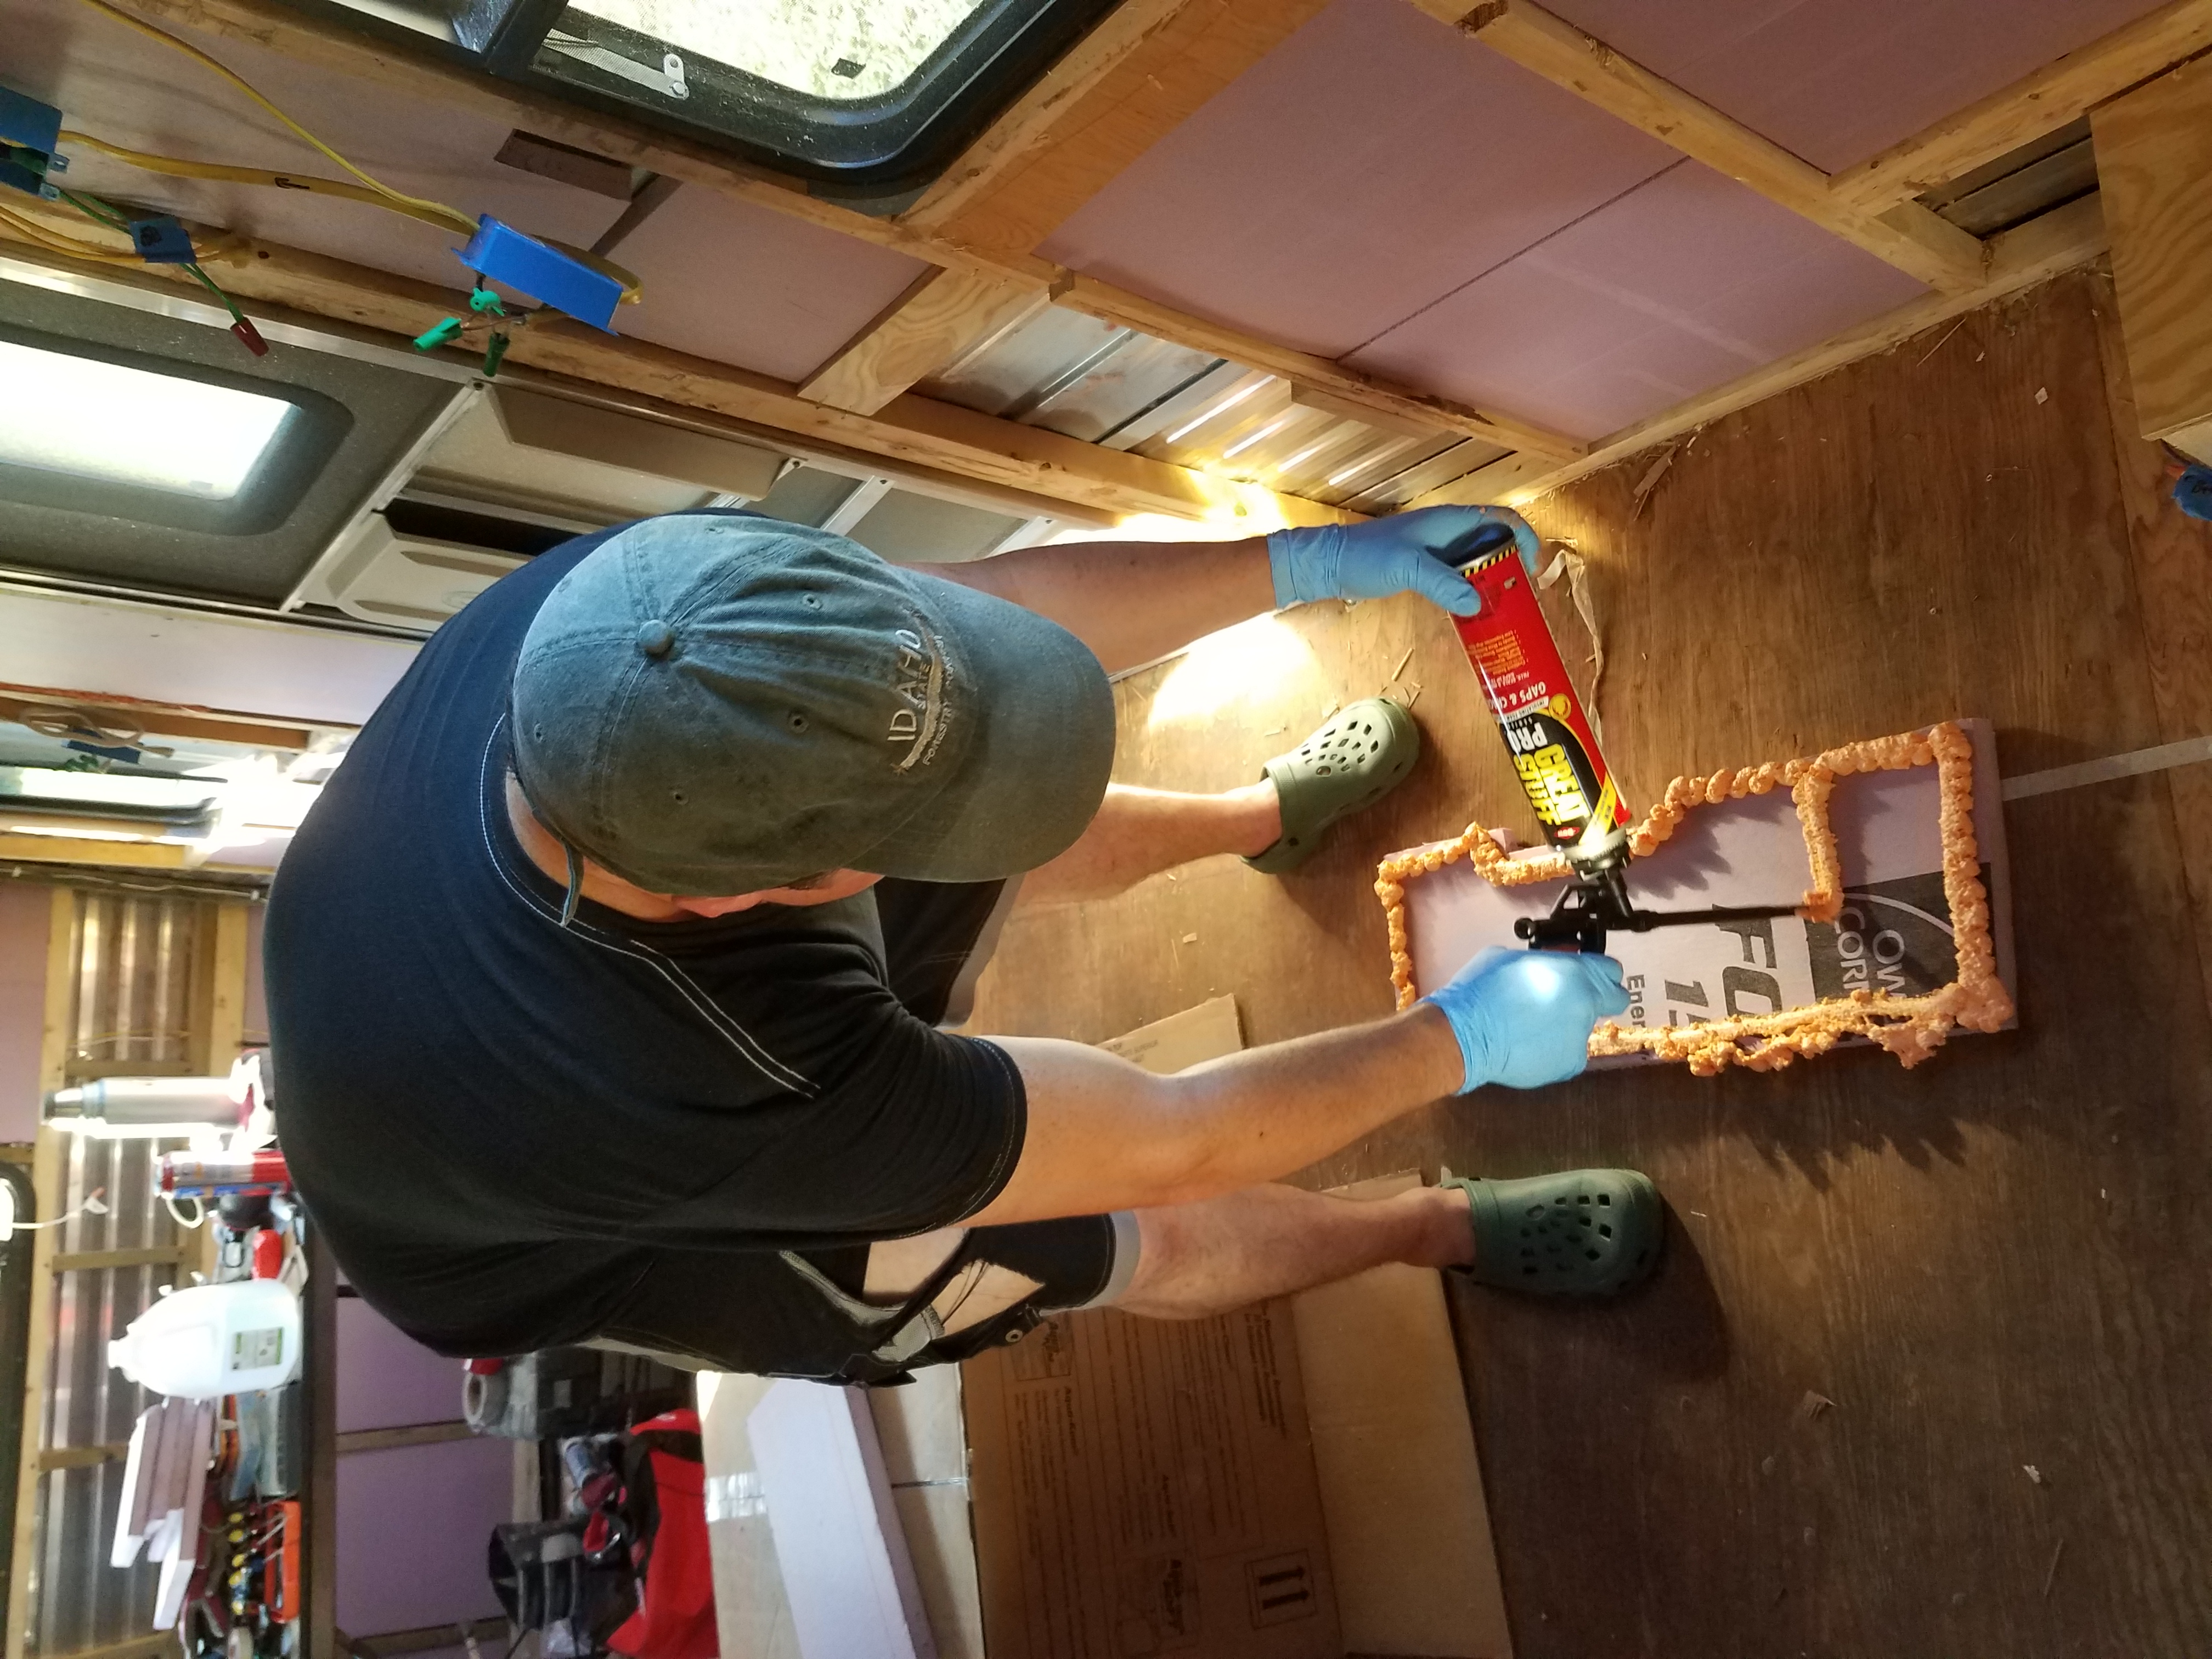
Once I had the pieces trimmed, shaped, and dry-fitted into their cavities, we applied the Great Stuff to their backs and stuck them to the aluminum skin. We decided to apply a nice line around the edges of each piece and then a few lines across the middle, depending on how long or wide the piece was. The Great Stuff won’t really have to hold the insulation up since the luan walls do that. However, we believe the foaming sealant will fill in the corrugated (wavy) aluminum siding, and help keep out any drafts.
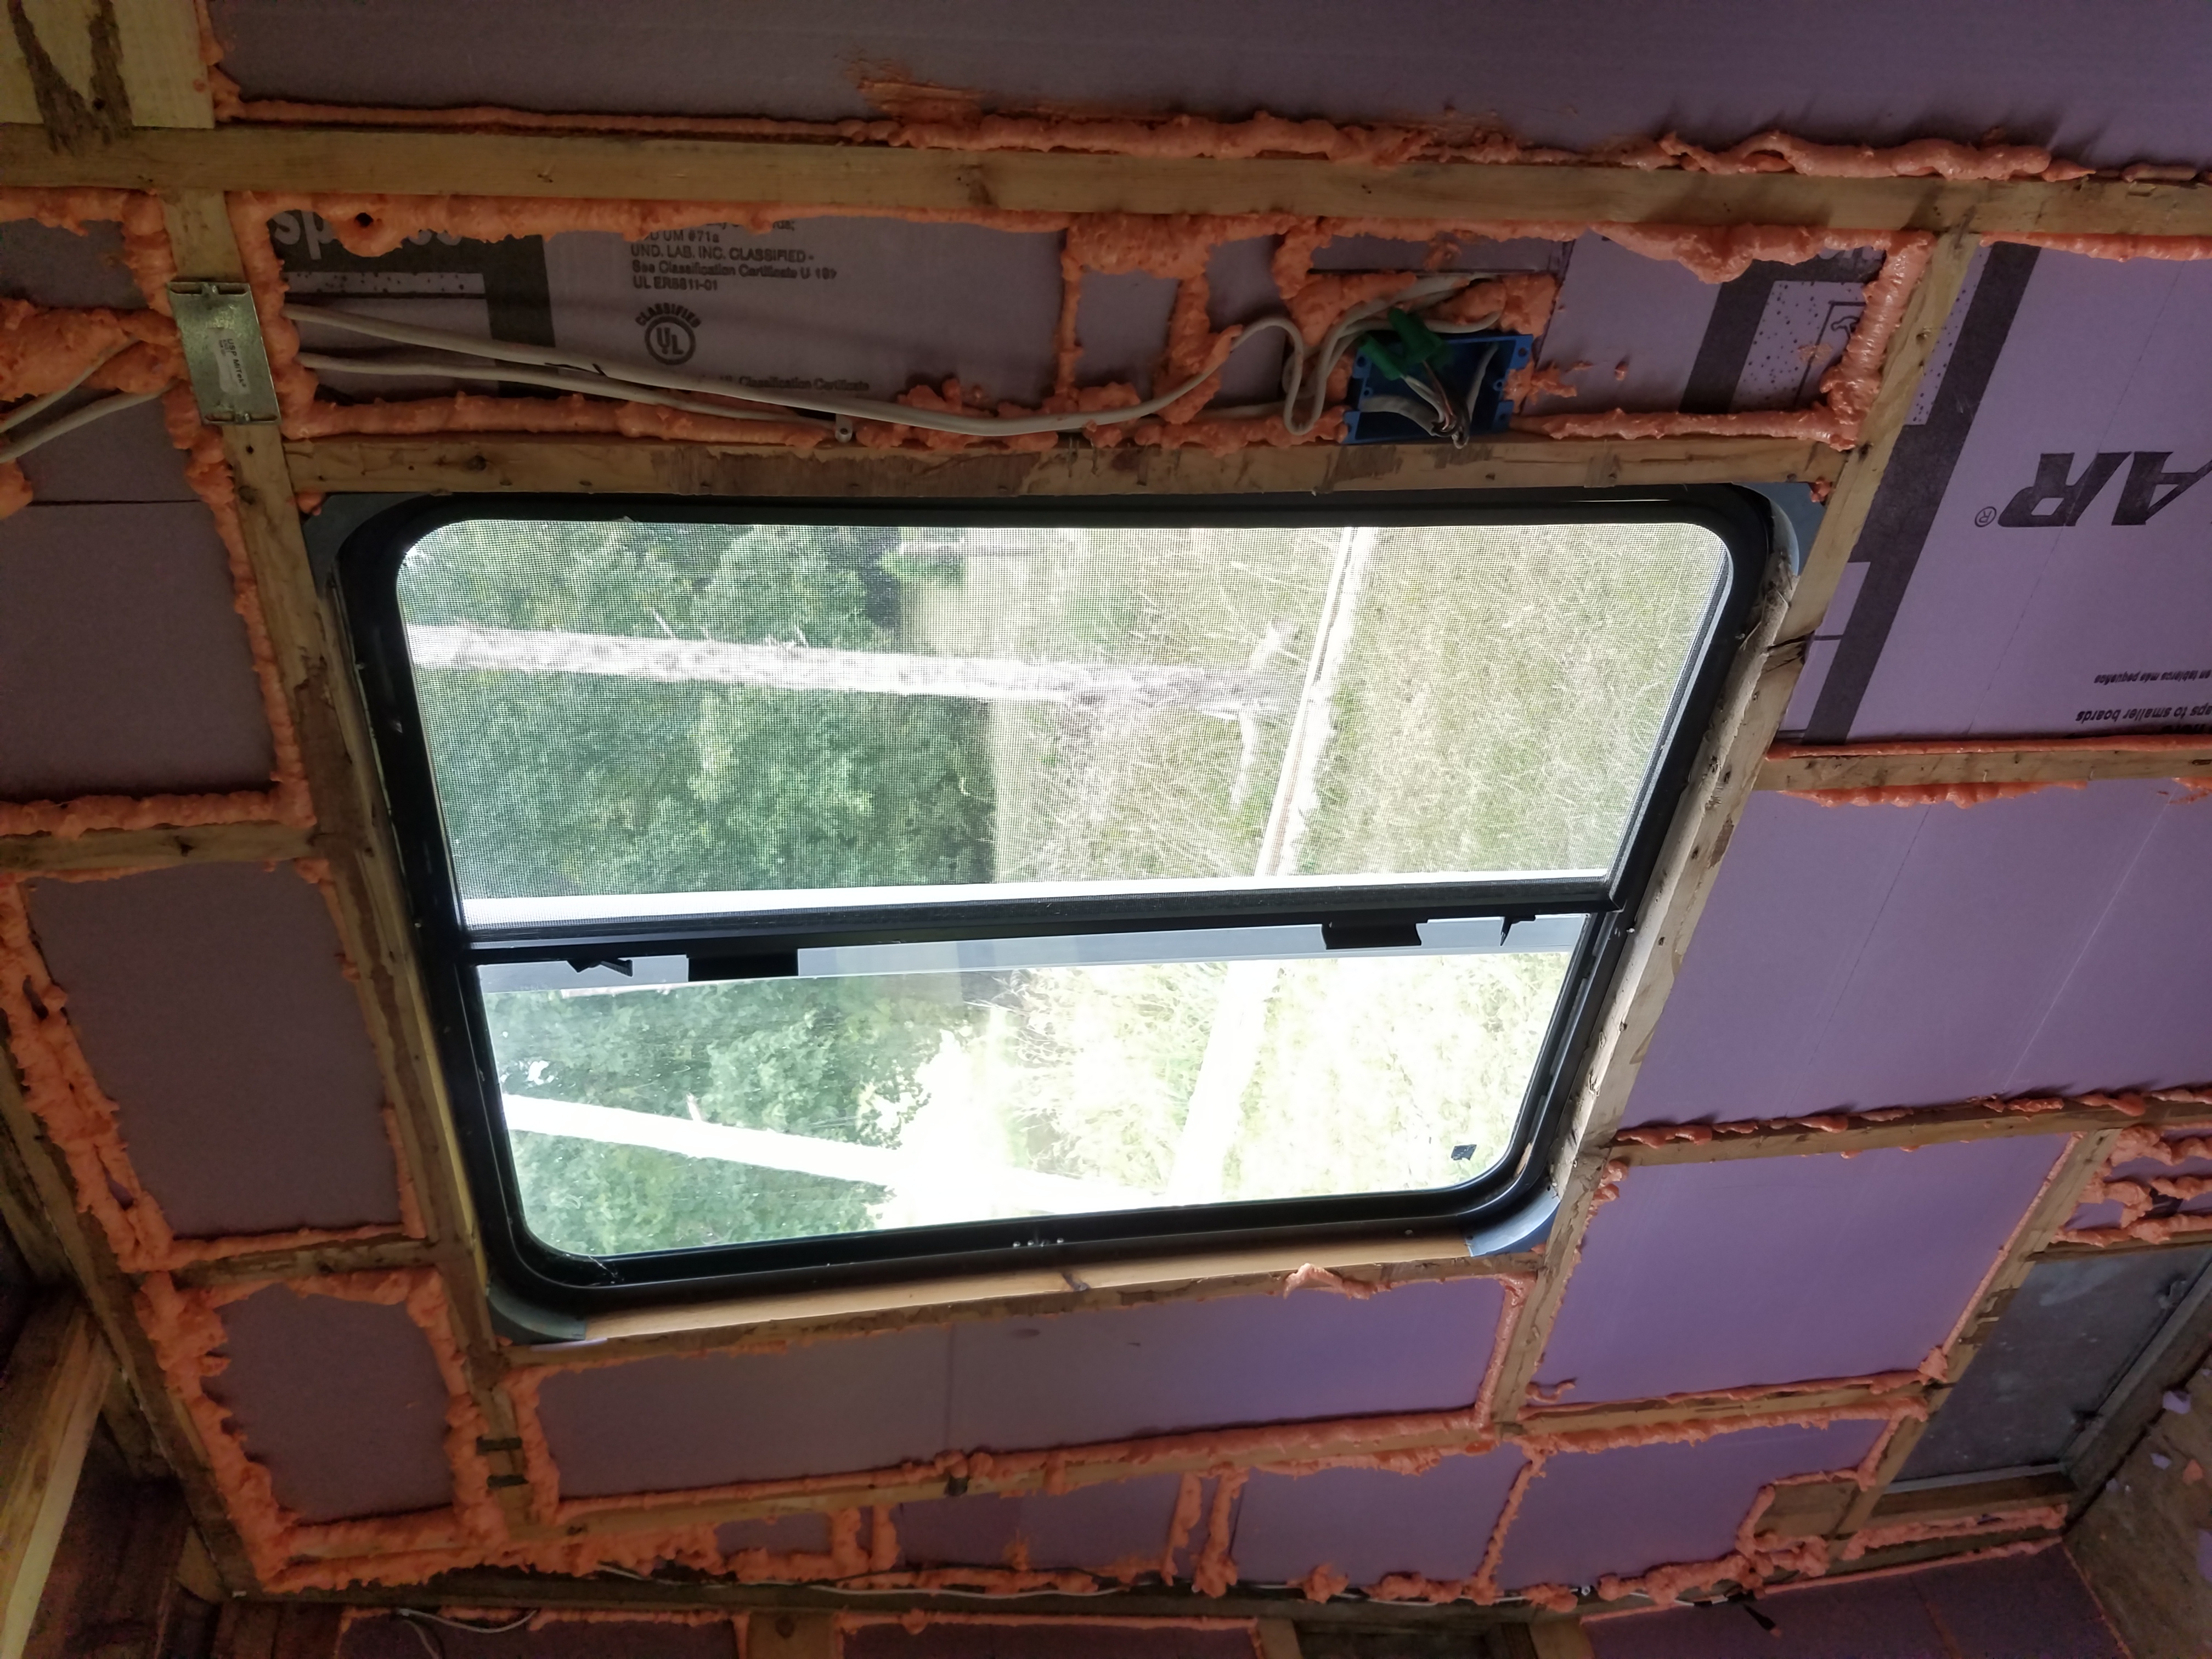
Drafts are the arch-enemy of insulation. Air movement degrades R-value, so keeping any air from circulating between the insulation and the aluminum skin will increase our R-value. We also sprayed more Great Stuff around the edges of the insulation after we put it up, filling the gaps between the board and the framing to keep any air from seeping through the gaps.
The nicest thing about this whole process was that it was stinking hot while we were working on the trailer over the weekend. The aluminum skin of the travel trailer was making the inside an oven under the strong southern sun. The walls were actually too hot to touch from the inside. It burned our fingers! The walls were conducting heat like crazy and for every piece of insulation we put up, we were keeping out a small oven’s worth of heat. The A/C was going full blast and we were still dripping sweat, but at least not fainting of heat exhaustion. It was great because as we were dry-fitting the insulation, we were able to notice it getting cooler in the Wind Rose while we worked. It’s so nice to make a noticeable difference!
Finishing Touches
It took me a few days to finish all of the difficult little corners, edges, and pieces after our weekend of work. Once the walls were completed I went around again to fill in anything I missed with the Great Stuff. In many places, the Great Stuff expanded out past the studs, meaning I’d have to trim it somehow before we started paneling the walls. I tried using my box cutter knife to trim the edges, but it was awkward trying to hold it sideways, and more often than not the knife ripped the foam rather than cutting it.
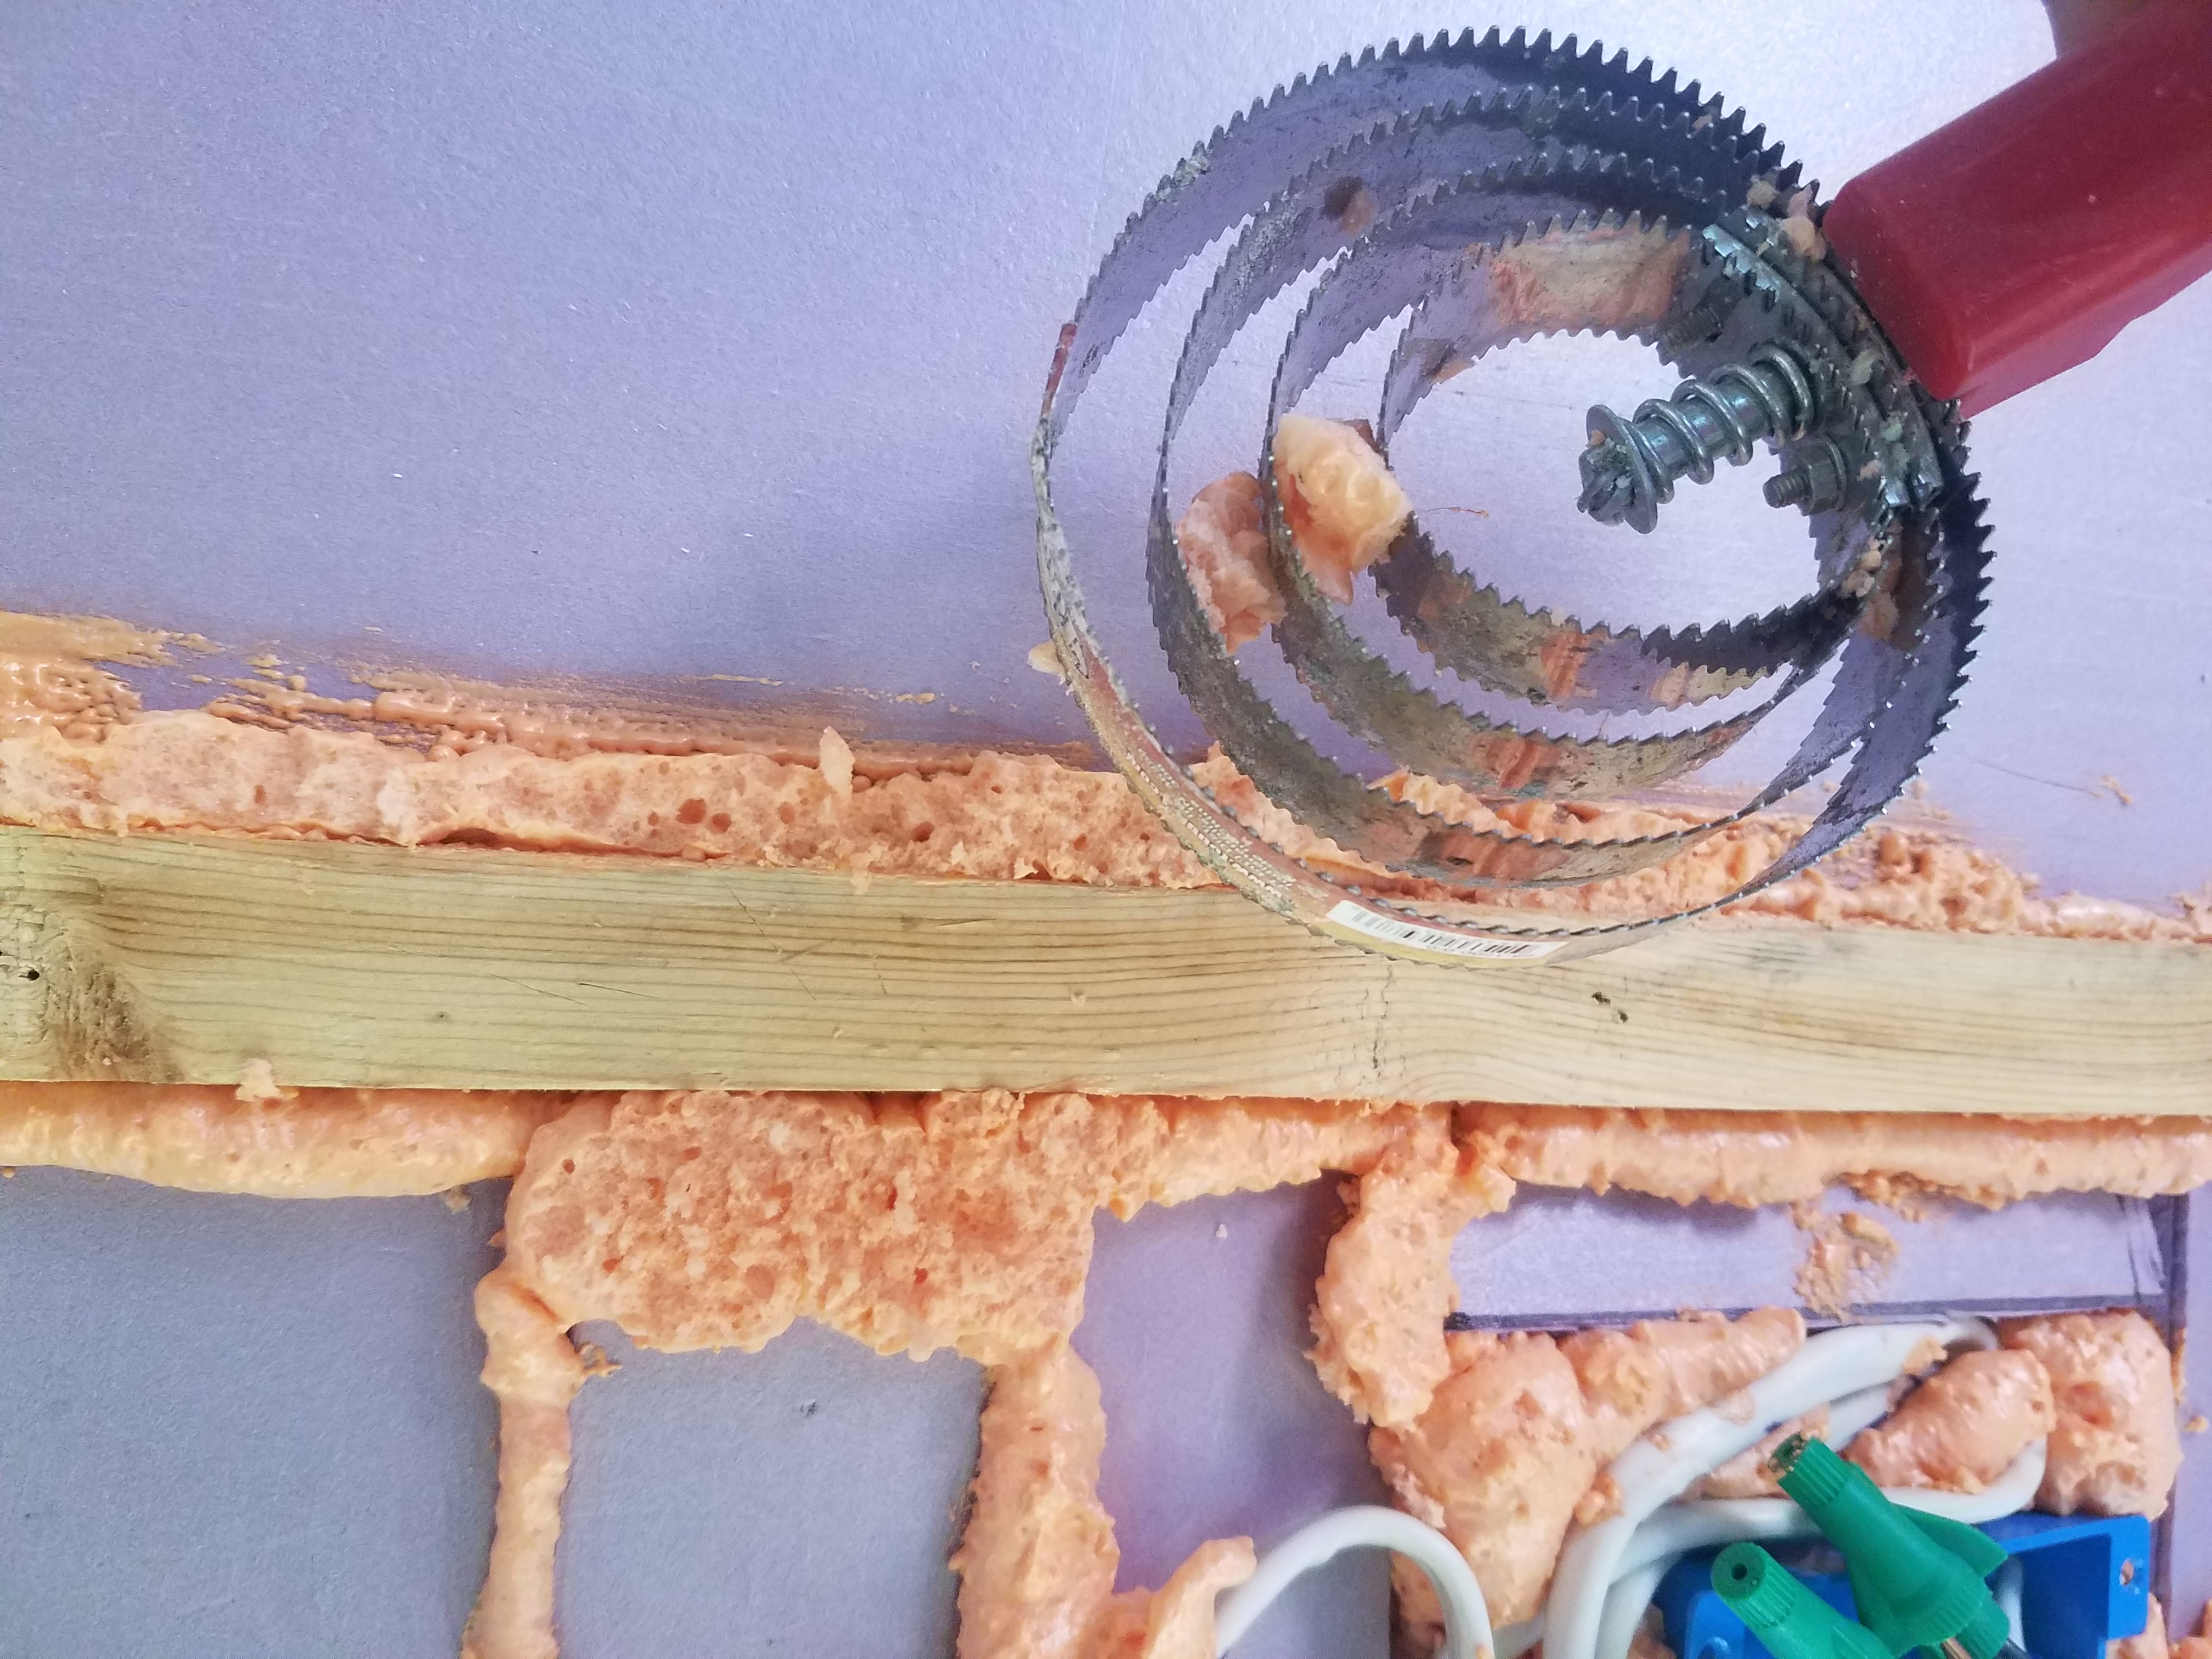
Luckily, my dad came in to see how everything was coming along and casually mentioned that he has “a comb to cut down the foam, in case I need it”. Yes, Dad, that definitely sounds like something I need! My dad had just recently finished insulating a small house on the property with spray foam insulation and, apparently, the tool of choice for trimming insulation flat to the studs is a curry comb.
Yes, a curry comb, like for a horse. The trick with the curry comb is that it’s strong enough and shaped just right to cut the foam without damaging your studs. You can push down on the stud and it will overlap to either side and easily cut the foam off level with the stud. Then you just cut anything in the middle down to the same height as the edges. I did the whole trailer in less than half an hour and I didn’t even break a sweat.
This was probably the best time-saving tool I’ve used yet, cheap and perfect for the job. Also, it feels like cheating in a good way. Then, all you have to do is sweep up the mess of foam bits all over the floor.
Insulating the Ceiling
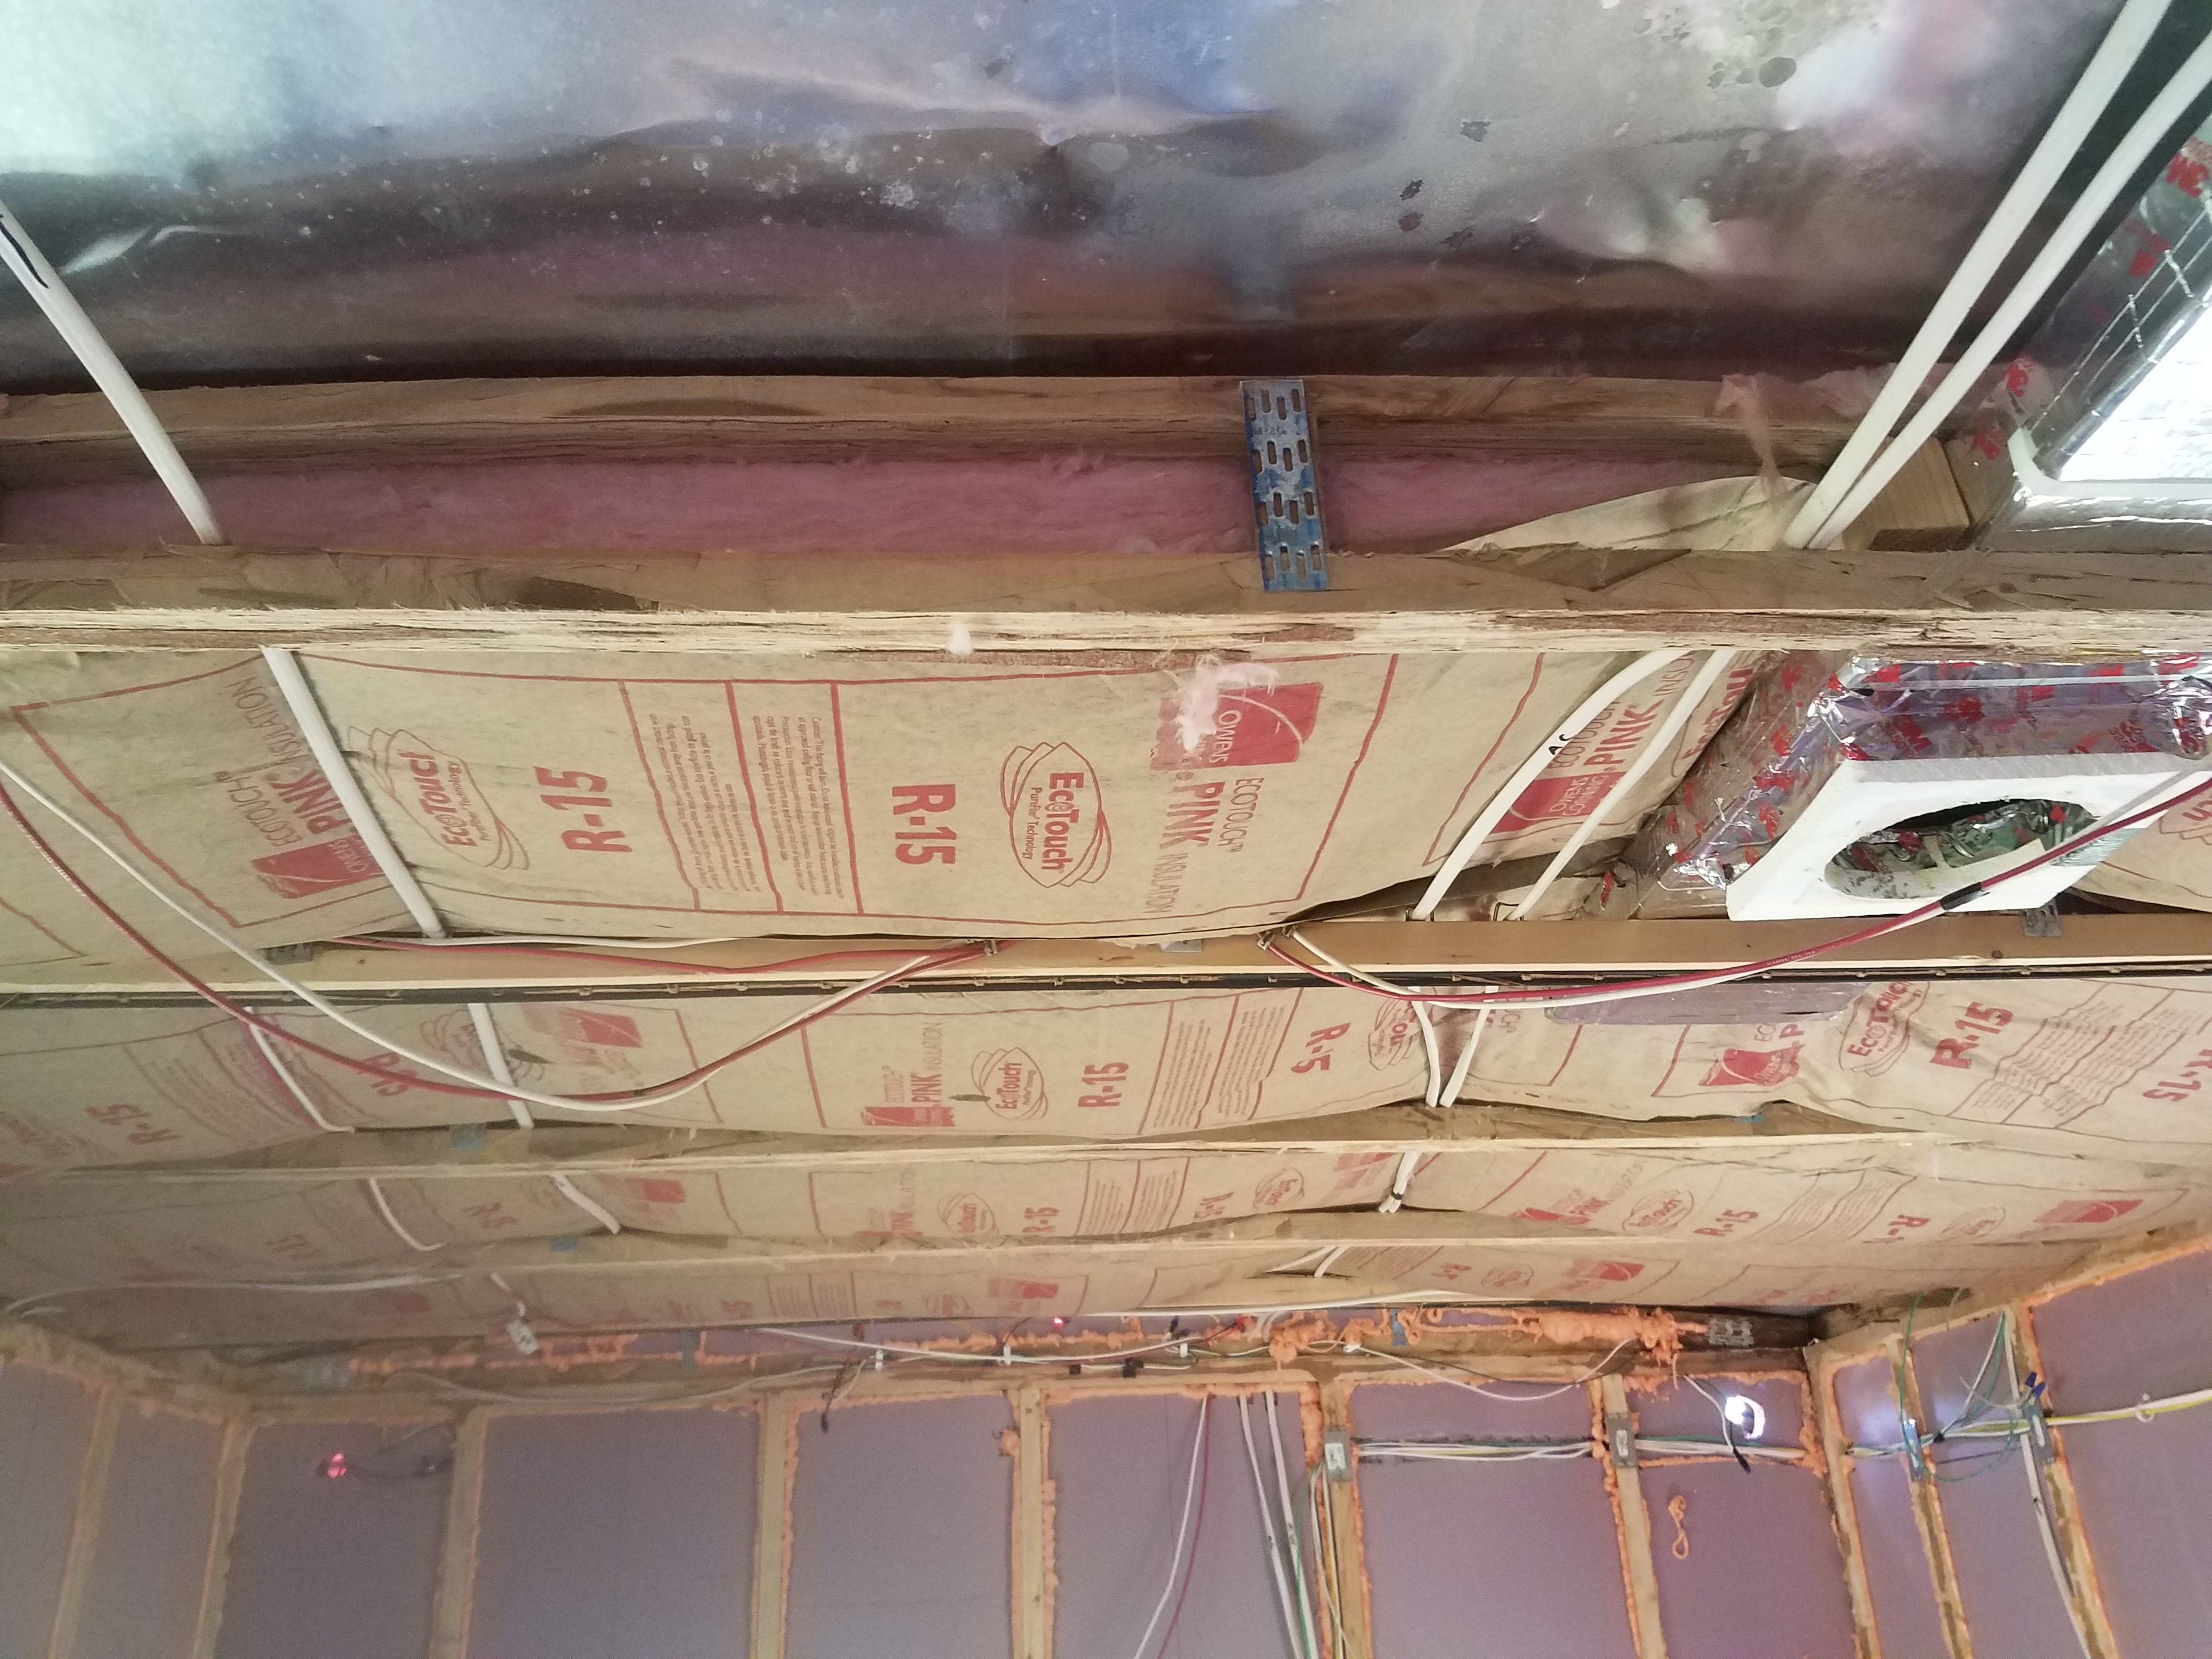
After finishing the walls, it was time to work on the ceiling. To put up the fiberglass overhead I needed to wear long sleeves and pants, a hat, a dust mask, and safety glasses. Getting a fiberglass rash all over yourself leads to an extremely unpleasant few days and nights. I knew I was going to be hot, but at least hot only lasts until you take off the long sleeves. Fiberglass embedded in your skin is a lot harder to get rid of. So, suitably attired, and with a handy step-stool to make reaching the ceiling easier, I went ahead and started shoving the batting into place.
Luckily, the batts were pretty much the perfect size for the ceiling trusses, both in length and width. Since nothing in this trailer is Ever conveniently or normally sized or spaced, I rejoiced at this happy coincidence! They fit right in and stayed in by themselves, so I didn’t even bother stapling them in with the nail gun. They also turned out to be the perfect depth to fill the roof cavity without bulging over the studs.
We had been toying with the idea of adding a layer of rigid foam board under the batting, but after a little conversation with my highly experienced father, I decided that would be more effort than it’s worth. The ceiling is already so much more highly insulated than the walls that we’re not going to be losing heat through there anyway. Also, we’d have to put the lowest layer below the wiring layer, making the wires inaccessible. That didn’t seem like a good idea to me. We’ll have to be careful to manage the humidity and moisture in the trailer to protect the fiberglass, but managing moisture is a given with trailer living. A happy consequence is that I get to return 10 sheets of foam insulation and get my money back! Yay!
Installing the Fiberglass Batting
The hardest part of this job was shoving the fiberglass underneath the A/C airducts. The wires left plenty of room above them, but the ductwork takes up a lot of space. I didn’t want the ducts to be completely uninsulated from above, so I decided to just shove the fiberglass through. I bruised the fronts of all of my fingers from shoving and pushing, and after a few hours my shoulders were killing me and my arms felt like a dead weight hanging off them. Pushing and pulling above your head is a Lot of work.
I also had to cut up a few pieces to accommodate the vents, the A/C unit, and a few cross-braces. Two trusses were slightly wider-spaced and wouldn’t hold in the batting, so I cut strips from left-over pieces and wedged them in to fill in space. It’s important not to leave space for drafts to circulate and creep into the trailer.
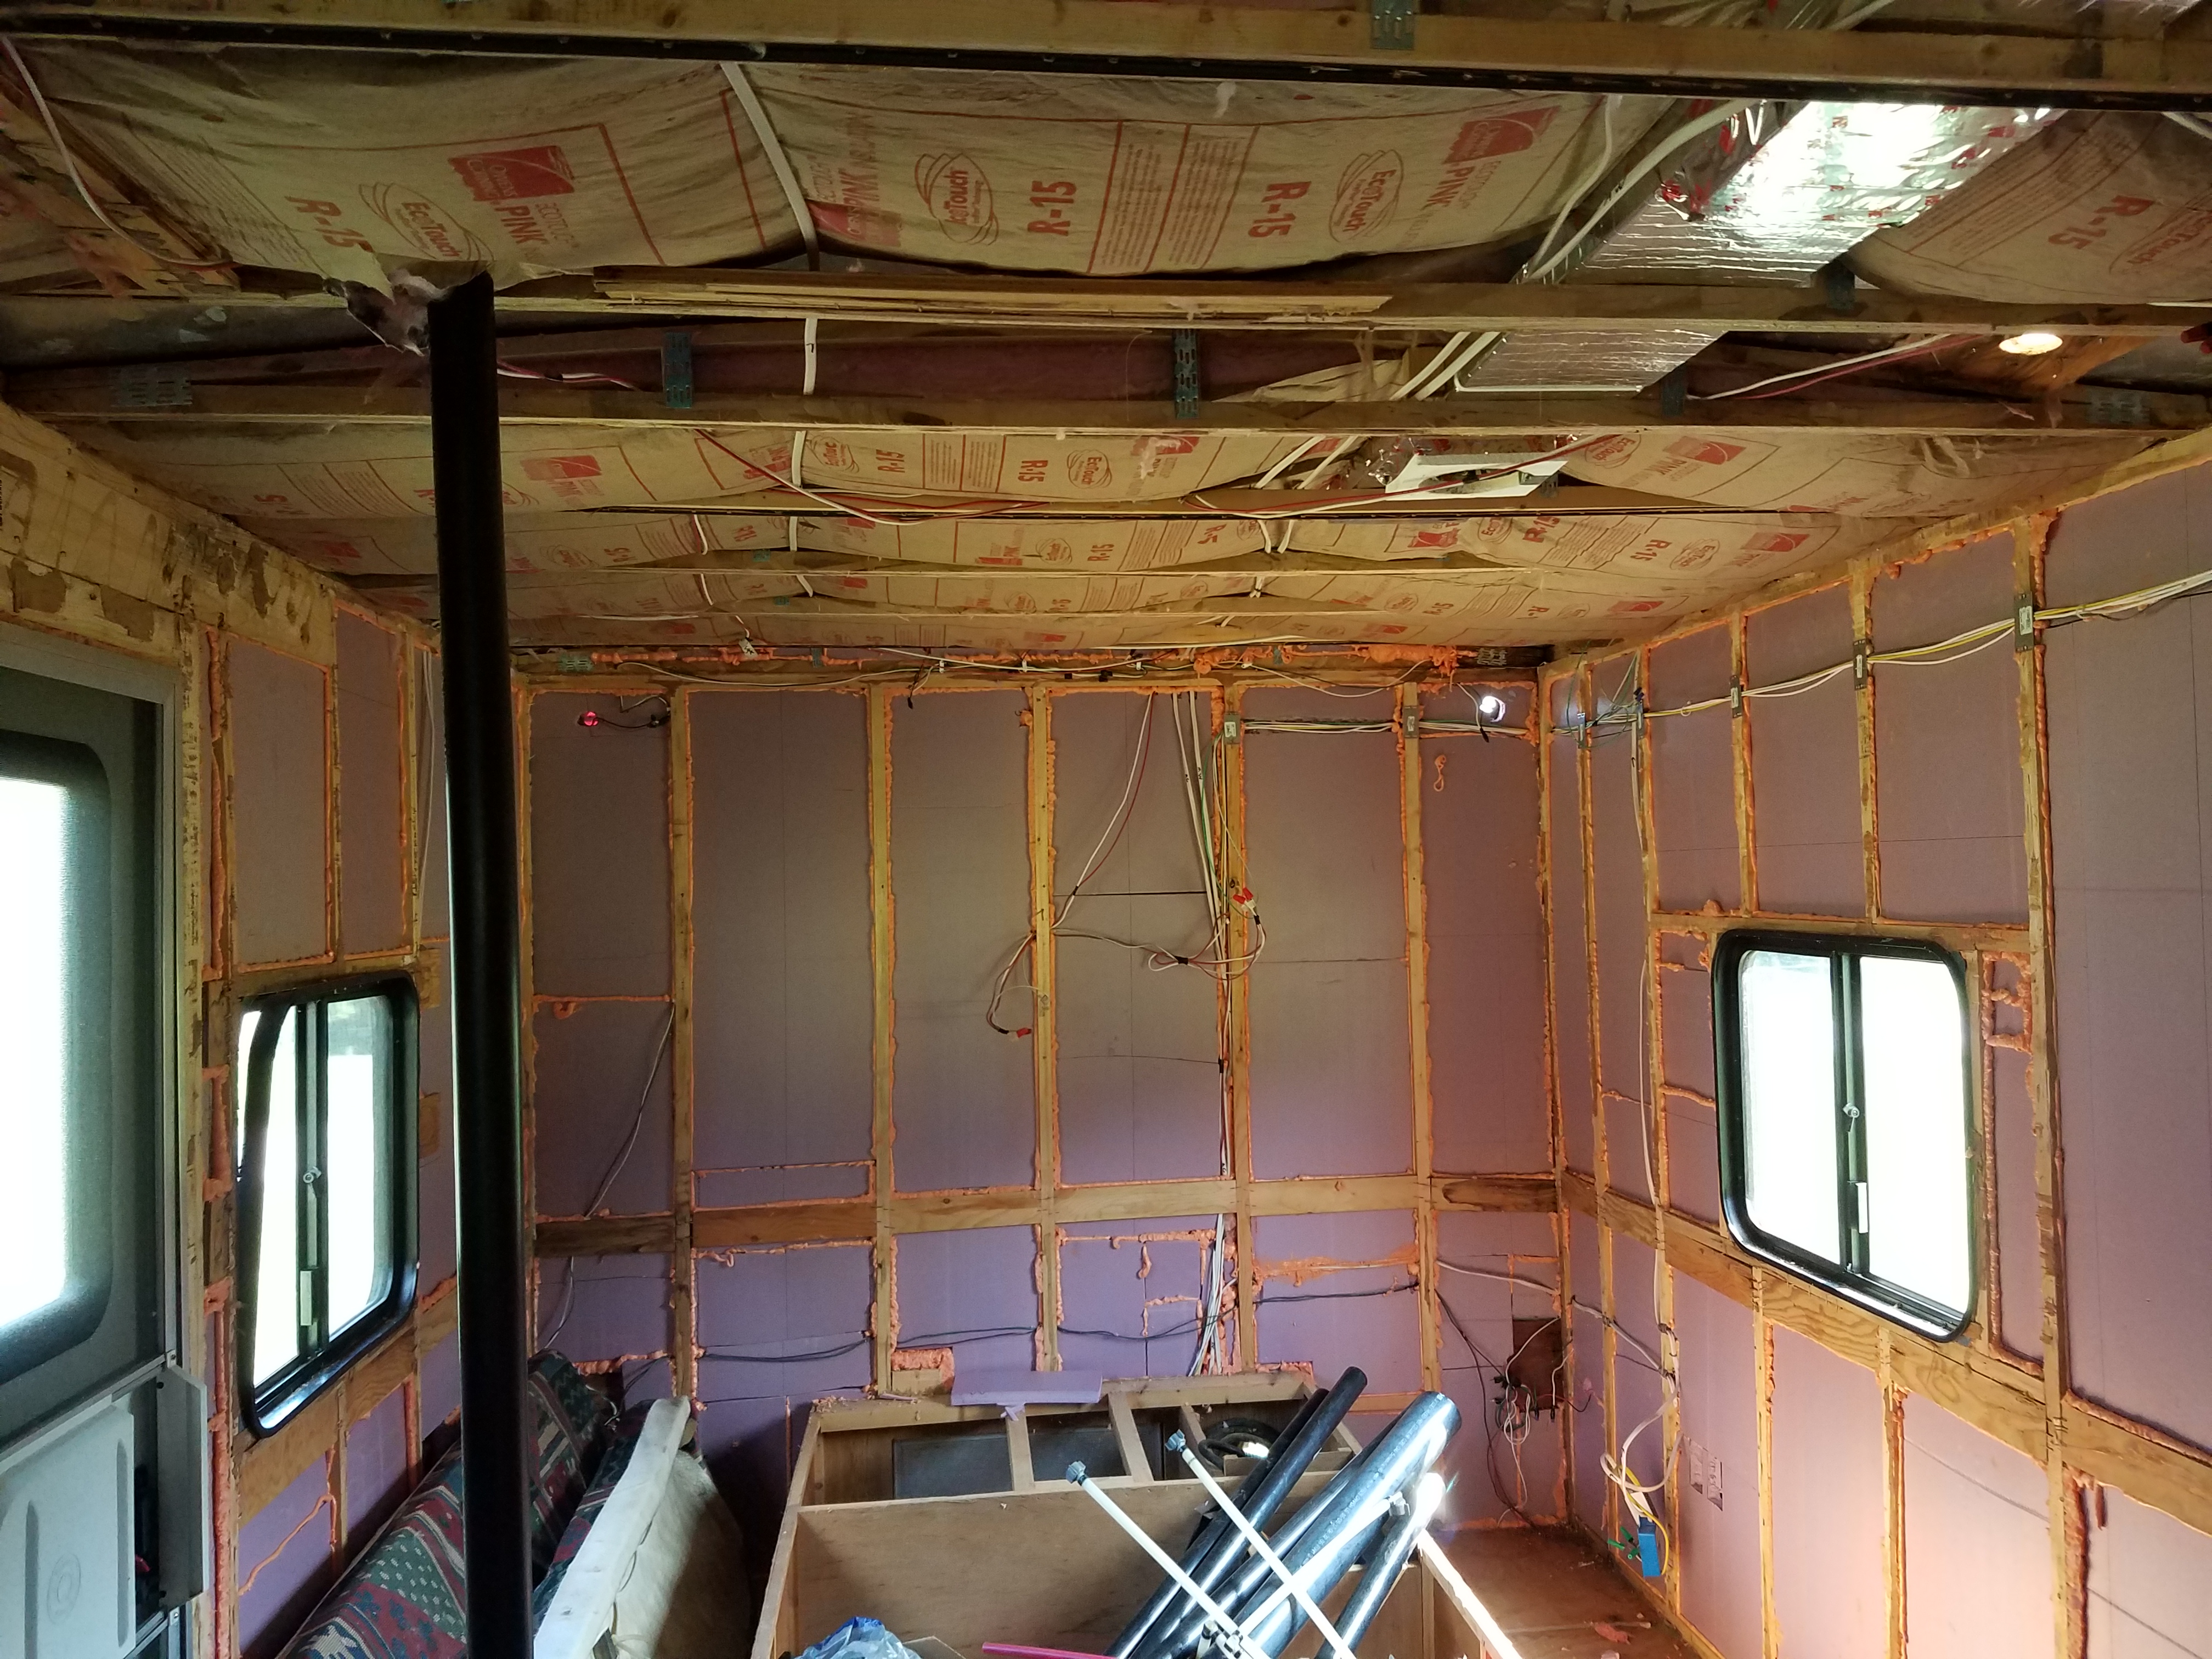
The very front of the trailer slopes down to make it more aerodynamic, so the ceiling depth in the front two trusses was too narrow for the fiberglass. For those two I used the rigid foam board and some aluminum tape to seal the gaps. At the back of the trailer, where the running lights are, on top of the wall is a small cavity that I almost missed while insulating the walls. It’s technically part of the ceiling, but I noticed it while putting in the fiberglass batting. That part got foam board and great stuff as well. I don’t want to leave any part of the travel trailer uninsulated.
My final insulation project was to shove some fiberglass into the boxes I built around the wheel well. That thin plastic covering needs insulation too, and it’s too weirdly shaped for rigid foam board. I insulated it on top and on the side to keep cold air from leaching into the closets. I decided to keep the extra scraps and leftovers of both types of insulation until I’m finished paneling the walls just in case I find any nooks and crannies I missed during the insulation process.
Now that the insulation is finished, I can check a big and very important (and expensive) project off the list! Adding better insulation was one of my main goals when I ripped the whole thing apart, and I think it’s one of the most important changes to make the Wind Rose suitable for full-time living. We like to live where there’s skiing, and that means that winter is no joke to us. I think we’ll be cozy and happy in our well-insulated trailer in the winter. And for the summer, we’ll be nice and cool in the A/C while we finish her up. Next up, paneling the walls!
Update
After living in the travel trailer for over a year, I can confirm that our insulation makes a huge difference in both winter and summer. We have neighbors living in trailers that only have the standard (insufficient) insulation and they struggle all winter with drafts and heating, and all summer with the air conditioning. The trailer is a tin box that can get very hot very quickly under the full sun. Our insulation allows us to get away with only using the A/C a few times a year here on the Oregon Coast, while our neighbors have to run theirs every day. The other thing that makes a huge difference in cooling the trailer is using our awning to shade the side of the trailer and the ceiling vents with fans. All together we’re very comfortable in our trailer and our electricity bill (heating and cooling) is less than $50 a month.