Renovating our 1997 Fleetwood Mallard for Full-Time Living (Part 15)
This is the story of how my husband and I purchased a 20-year-old travel trailer and I DIYed the crap out of it to make it suitable for full-time living. In this series, I’m giving All of the details about the process step-by-step, as performed by me, a 26-year-old woman with No experience in construction. The first installment in this series details the purchasing process and the changes I planned to make. You can find that article in the link below and start at the beginning. Then, follow along in the series by clicking on the link for the next article at the bottom of each page.
How to Design a Kitchen
Let’s start this post off with a clarification: I’m not building cabinets for my kitchen. I’m not buying cabinets for my kitchen. There will be no cabinets (in a traditional sense) in my kitchen at all!
*Gasp,* you say. The horror! But how can you have a kitchen without cabinets?! Kitchens have had cabinets for hundreds of years, what other way is there to do it? It’s impossible!
I’ll admit, cabinets certainly are handy things, especially for the manufacturers who build thousands of them at a time to fit many different sizes and configurations of kitchens. They’re simply free-standing boxes that can be connected (or not) to other boxes, placed at any height with a separate toe-kick, and topped with almost any type of counter you want. They’re basic and versatile. They make them in several levels of “sturdiness” and doors come separately to match many types of decor and designs. So, that’s why you have cabinets in your house.
However, in a trailer, I’m not going for standard or one-size-fits-all. When you’re trying to save space and weight and also get the most function and flexibility out of every piece of furniture you add, you need to be creative. You have to think outside of the cabinet.
If you’re looking for compact, functional, versatile living ideas, campervans are the place to look. I’m in awe of these people and their van conversions. Unlike with a trailer or RV, the vans are not designed to be lived in, so they have to start from scratch and install everything. They also have to get very creative with such a small space, so I find a lot of the best space and weight-saving designs come from these crazy — I mean, interesting and talented- people.
I did some research on the “standard” dimensions of kitchen furniture. What height should a countertop be? How much overhang does a countertop need? What’s the standard height of a toe kick? These questions are important to design a comfortable and functional countertop. Luckily, they’re also pretty easy to find online. There’s usually a range to choose from, so it’s still very customizable. Just be sure to consider the Minimum dimensions, as those are usually important to function. A Desk needs to be 16″ wide because that’s how large your laptop or monitor and keyboard are. It’s possible to make a desk that’s too narrow to actually use, and that is a big problem. So, when minimizing to save space, just make sure you’re not minimizing function as well.
Saving Weight
That’s one of the most important aspects to consider when you’re constructing a tow-behind vehicle. Lightweight materials and simple construction are important. I’m not looking to add cabinet backs or sides to a box when the walls themselves will do just as well. I’m not looking to make a bunch of separate structures when one larger structure will do and save materials in the construction.
Also, I’m no woodworker. I’m an amateur and simplicity will be my best friend in my endeavor to produce a quality project. No fancy fronts or tricky drawers or slides or finishes for me. I want it to be simple, functional, lightweight, and beautiful.
With this motive, I decided that long shelves both above and below the counter would work best in our travel trailer.
Pros: Simple to make, less material, lightweight. Flexible storage space.
Cons: Won’t hold items securely while being towed. Not easy to keep organized.
To address the obvious difficulty, open shelves are not going to keep our items secured while the travel trailer is on the move. Fortunately for us, we don’t plan to be traveling in our trailer very frequently. Once we get it where we’re planning to live, we might not move at all for a year or two. That is why I don’t feel the need to prioritize function for traveling.
If that’s not the case for you, there are many great resources for building cabinets, and even building cabinets in RVs and travel trailers, to choose from. I am planning to add a slight lip to the edge of the shelves for security against the rocking that travel trailers are subject to just from walking around inside.
As for the organization, I am confident that a few wire racks, storage bins, and plastic tubs can serve admirably to keep items together and organized. The benefit of this is that I can pick the perfect size bin or rack for each type of item and customize the space for what I need. When my kitchen needs change, I can change the storage items as well. Additionally, when we move, we can take all the bins out and put them safely in boxes on the floor without much trouble. Since this won’t happen very often, I’m not worried about it.
Toe Kick
The shelving will have a toe-kick since these are added for ergonomics. I’m a little concerned about wasting those 4″ of vertical space and 20″ of horizontal space, but I’m not sure how many long, skinny things we have to store under there anyway. I’m more concerned about having to lean forward uncomfortably every time I cook.
I love to cook and I plan to cook pretty much every meal we eat, with a few exceptions for holidays. I want to be comfortable while I cook, and that’s more important to me than 4″ of space. It’s the whole reason I demolished the front of the trailer! To make cooking more comfortable and enjoyable. I’ve heard reviews from a few other tiny-house livers and RVers who didn’t build toe-kicks, and they regret it. So, toe-kicks it is! I can definitely turn them into drawers later if I so desire, per many excellent plans I’ve already found online.
Cabinet Doors
As a caveat, I am planning to put doors on the cabinet under the kitchen sink that will house the trash can and recycling bin. I think it would be nice to close the doors on the odors as well as on cleaning materials and other under-the-sink items. I’ll also use a door on the small space beneath the stove, mostly for aesthetic reasons.
I’ll be doing “faceless” frames for the doors with hidden hinges and a simple flat door in the European style. Easy to make and using the least material possible. The other shelves will be covered with curtains of some durable and washable cloth to keep out the dust and make things look neat. I think these curtains will add a nice splash of bright color to my white and natural wood kitchen.
The over the counter shelves will be open, with only a small lip to help prevent things from sliding off accidentally. The way the front of the trailer slopes back for added aerodynamics means that there is very little depth to work with above the sink, so it will only be suitable for small items. The shelf over the stove will be deeper but will hold the microwave, leaving little space for other items. Most of the storage will be under the counter.
Countertop
The counter along the front of the trailer, holding the sink, will be shallower than the standard, only 20″ deep. That will make it easier to have a functional “dinning” table that folds up from the wall, leaving space for a chair between the table and the countertop. That wall will have a floor-to-ceiling pantry in the corner as well. The sink is smaller than a standard double-bowl kitchen sink, only 15.5″ deep and 22.5″ wide. It’s only one bowl and I think it’ll do very well for washing the smaller pots and pans we’ll be using in our trailer.
The countertop will be a thin (1″) layer of reclaimed wood butcher block. Thicker butcher block, usually 1.5″, is traditional and less likely to warp, but also heavy. I don’t need this countertop to last for generations, and using reclaimed wood will mean most of the warping has already occurred. Keeping the weight down is more important in the long run. The reclaimed wood will come directly from some of the old and falling-down outbuildings on the farm. We have almost a dozen old tobacco-drying barns on the property that we don’t need. I like to think I’ll be taking a little bit of the farm with me wherever we travel.
Plan and Measure
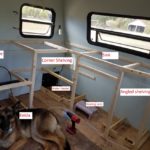
So, that’s the overall plan for the kitchen. In practice, I’ve decided to build it in 4 pieces, mostly to make the construction and assembly easier. The stove, kitchen, corner, and end pieces will all be built separately. I’ll also build the pantry separately, but I consider that separate from the rest of the “cabinetry”.
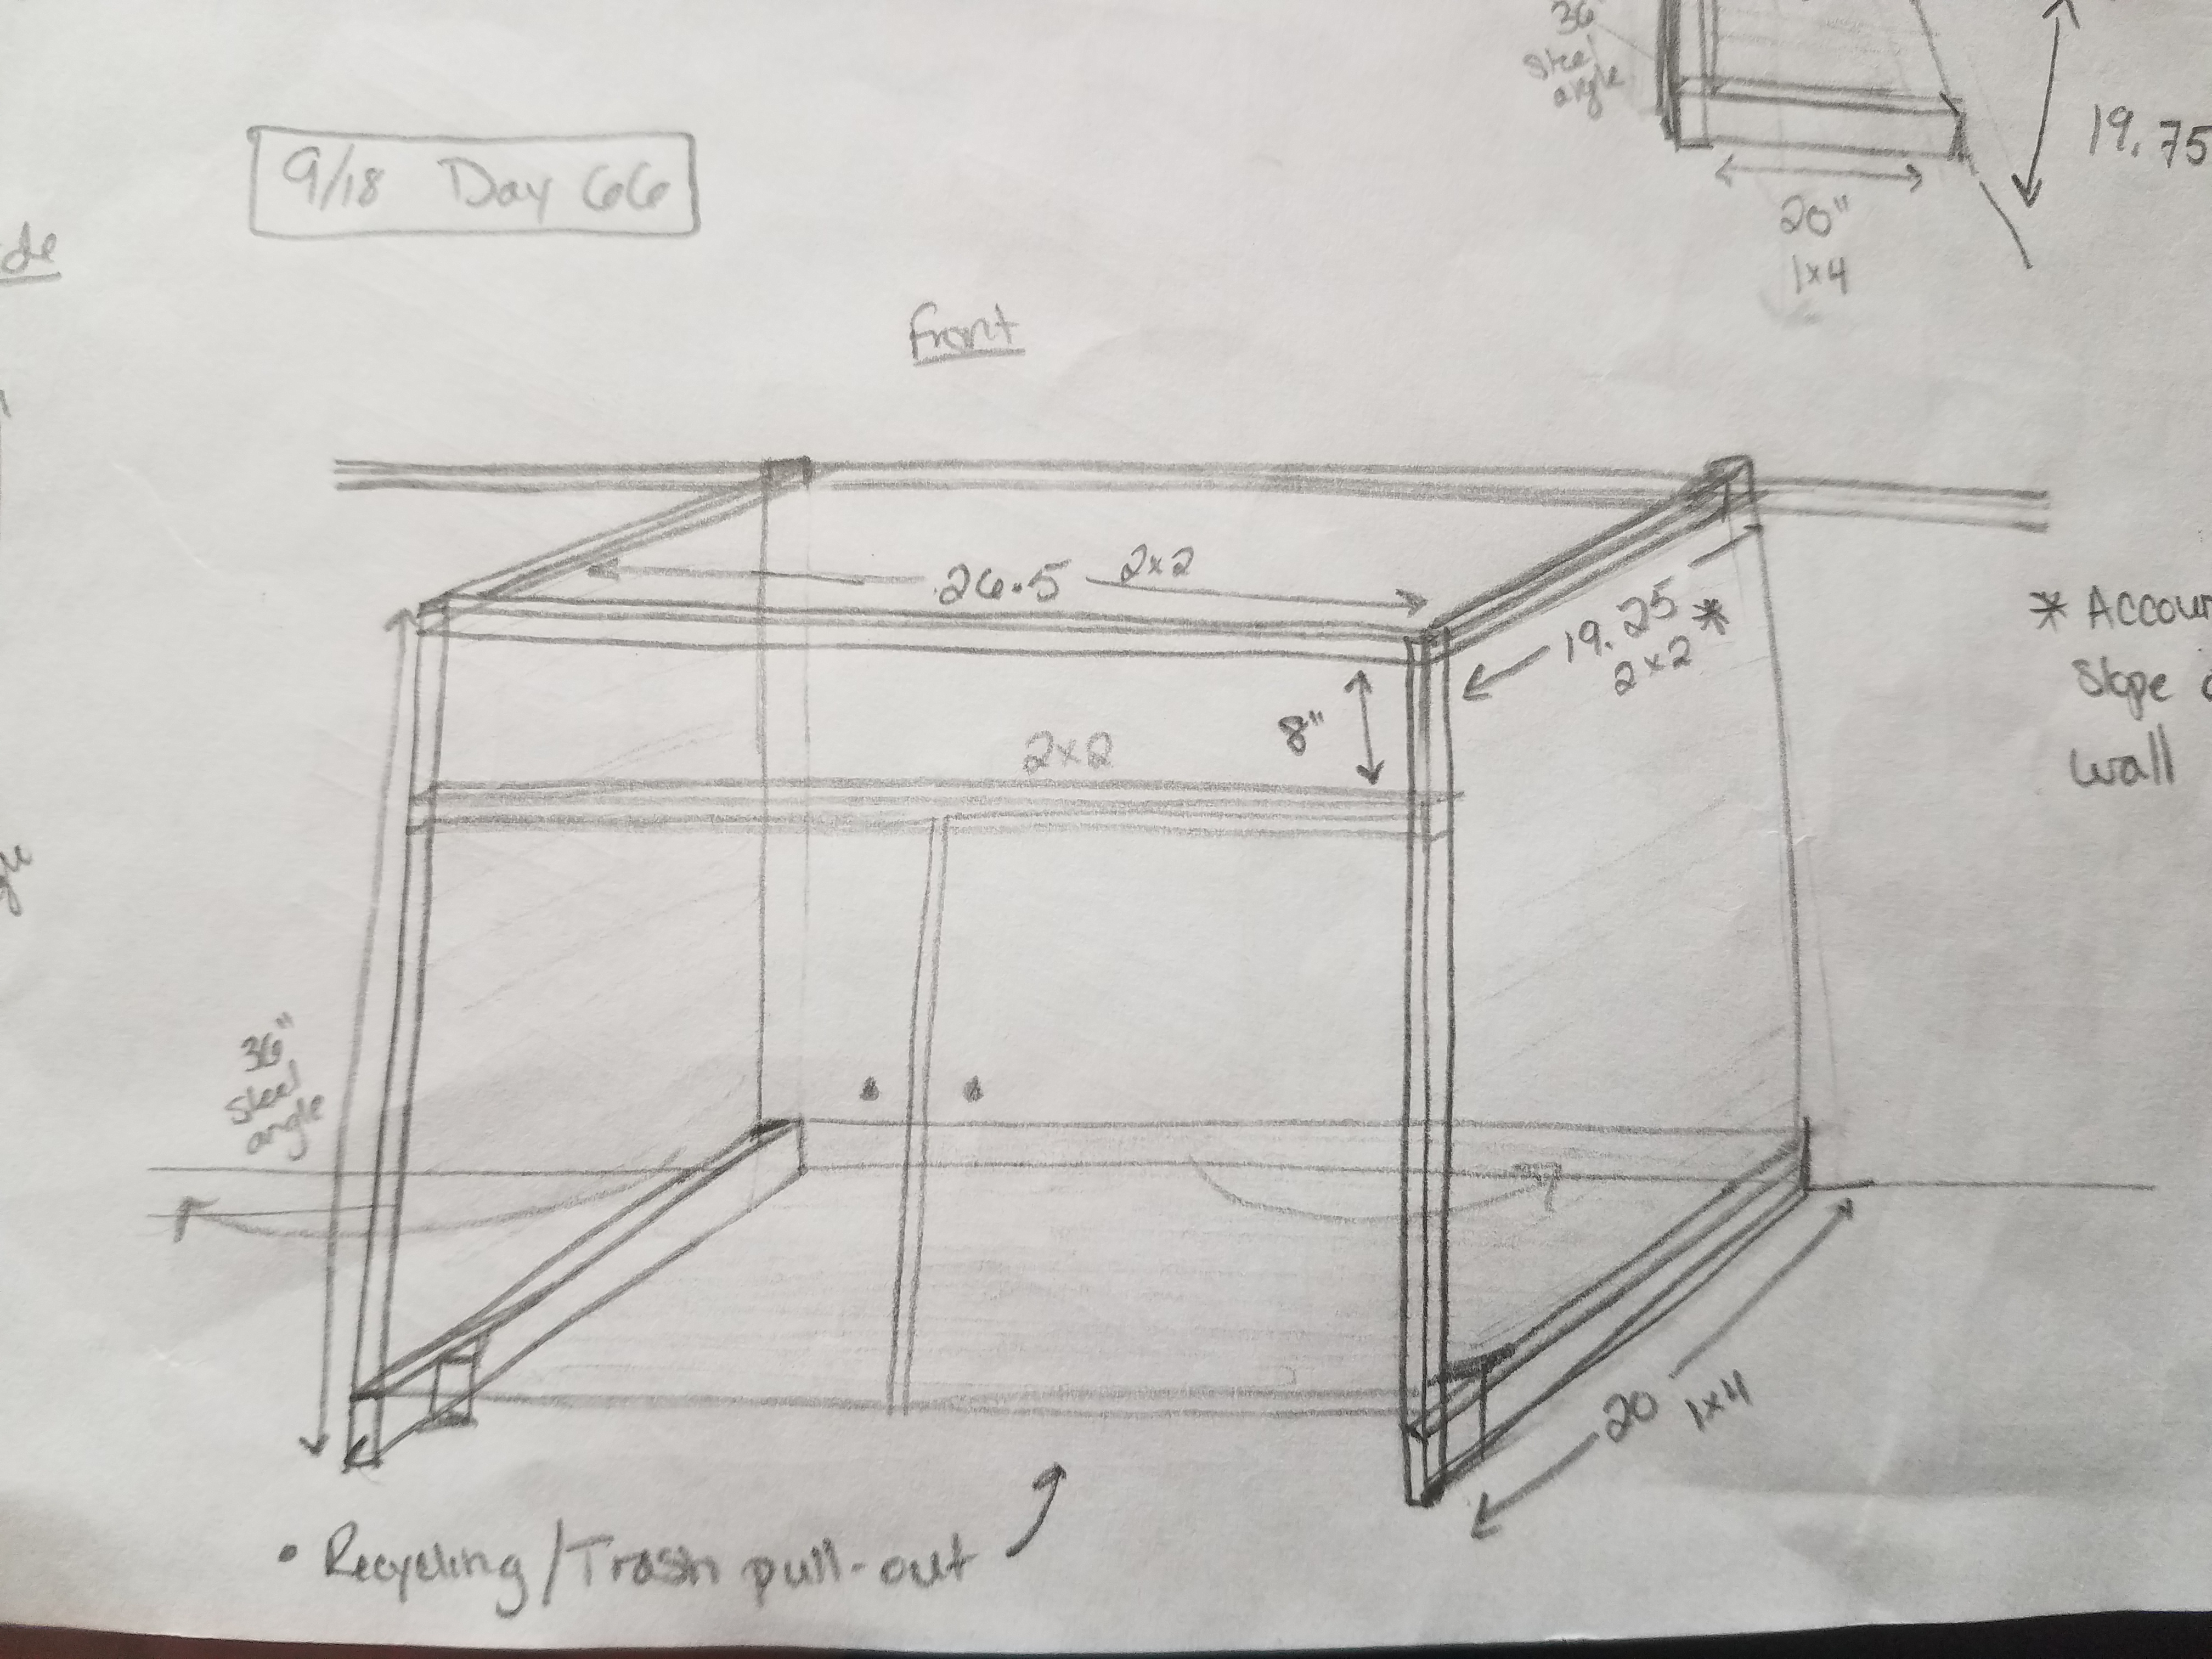
Rather than wing it, as I’ve done with little building projects in the trailer previously, I decided to be professional and plan the whole thing out. I measured the space, the appliances, the windows, and everything else I could think of. Using these measurements, I sketched out the design for each piece of shelving with specific measurements for each piece of wood. I’ll double-check my measurements before I cut and after I finish each piece to stay on track. However, this place will help me make a materials list so I can get what I need at the hardware store.

Basic Woodworking Practice
Before I start trying to build my kitchen, I’m going to dive into a few basic woodworking books to find the tips, tricks, and skills I’ll need to make something functional and beautiful. I want these pieces to be handmade, not “homemade.” I don’t want them to be wobbly or crooked. To this end, I’ve decided to practice my new skills on a different project before tackling the kitchen.
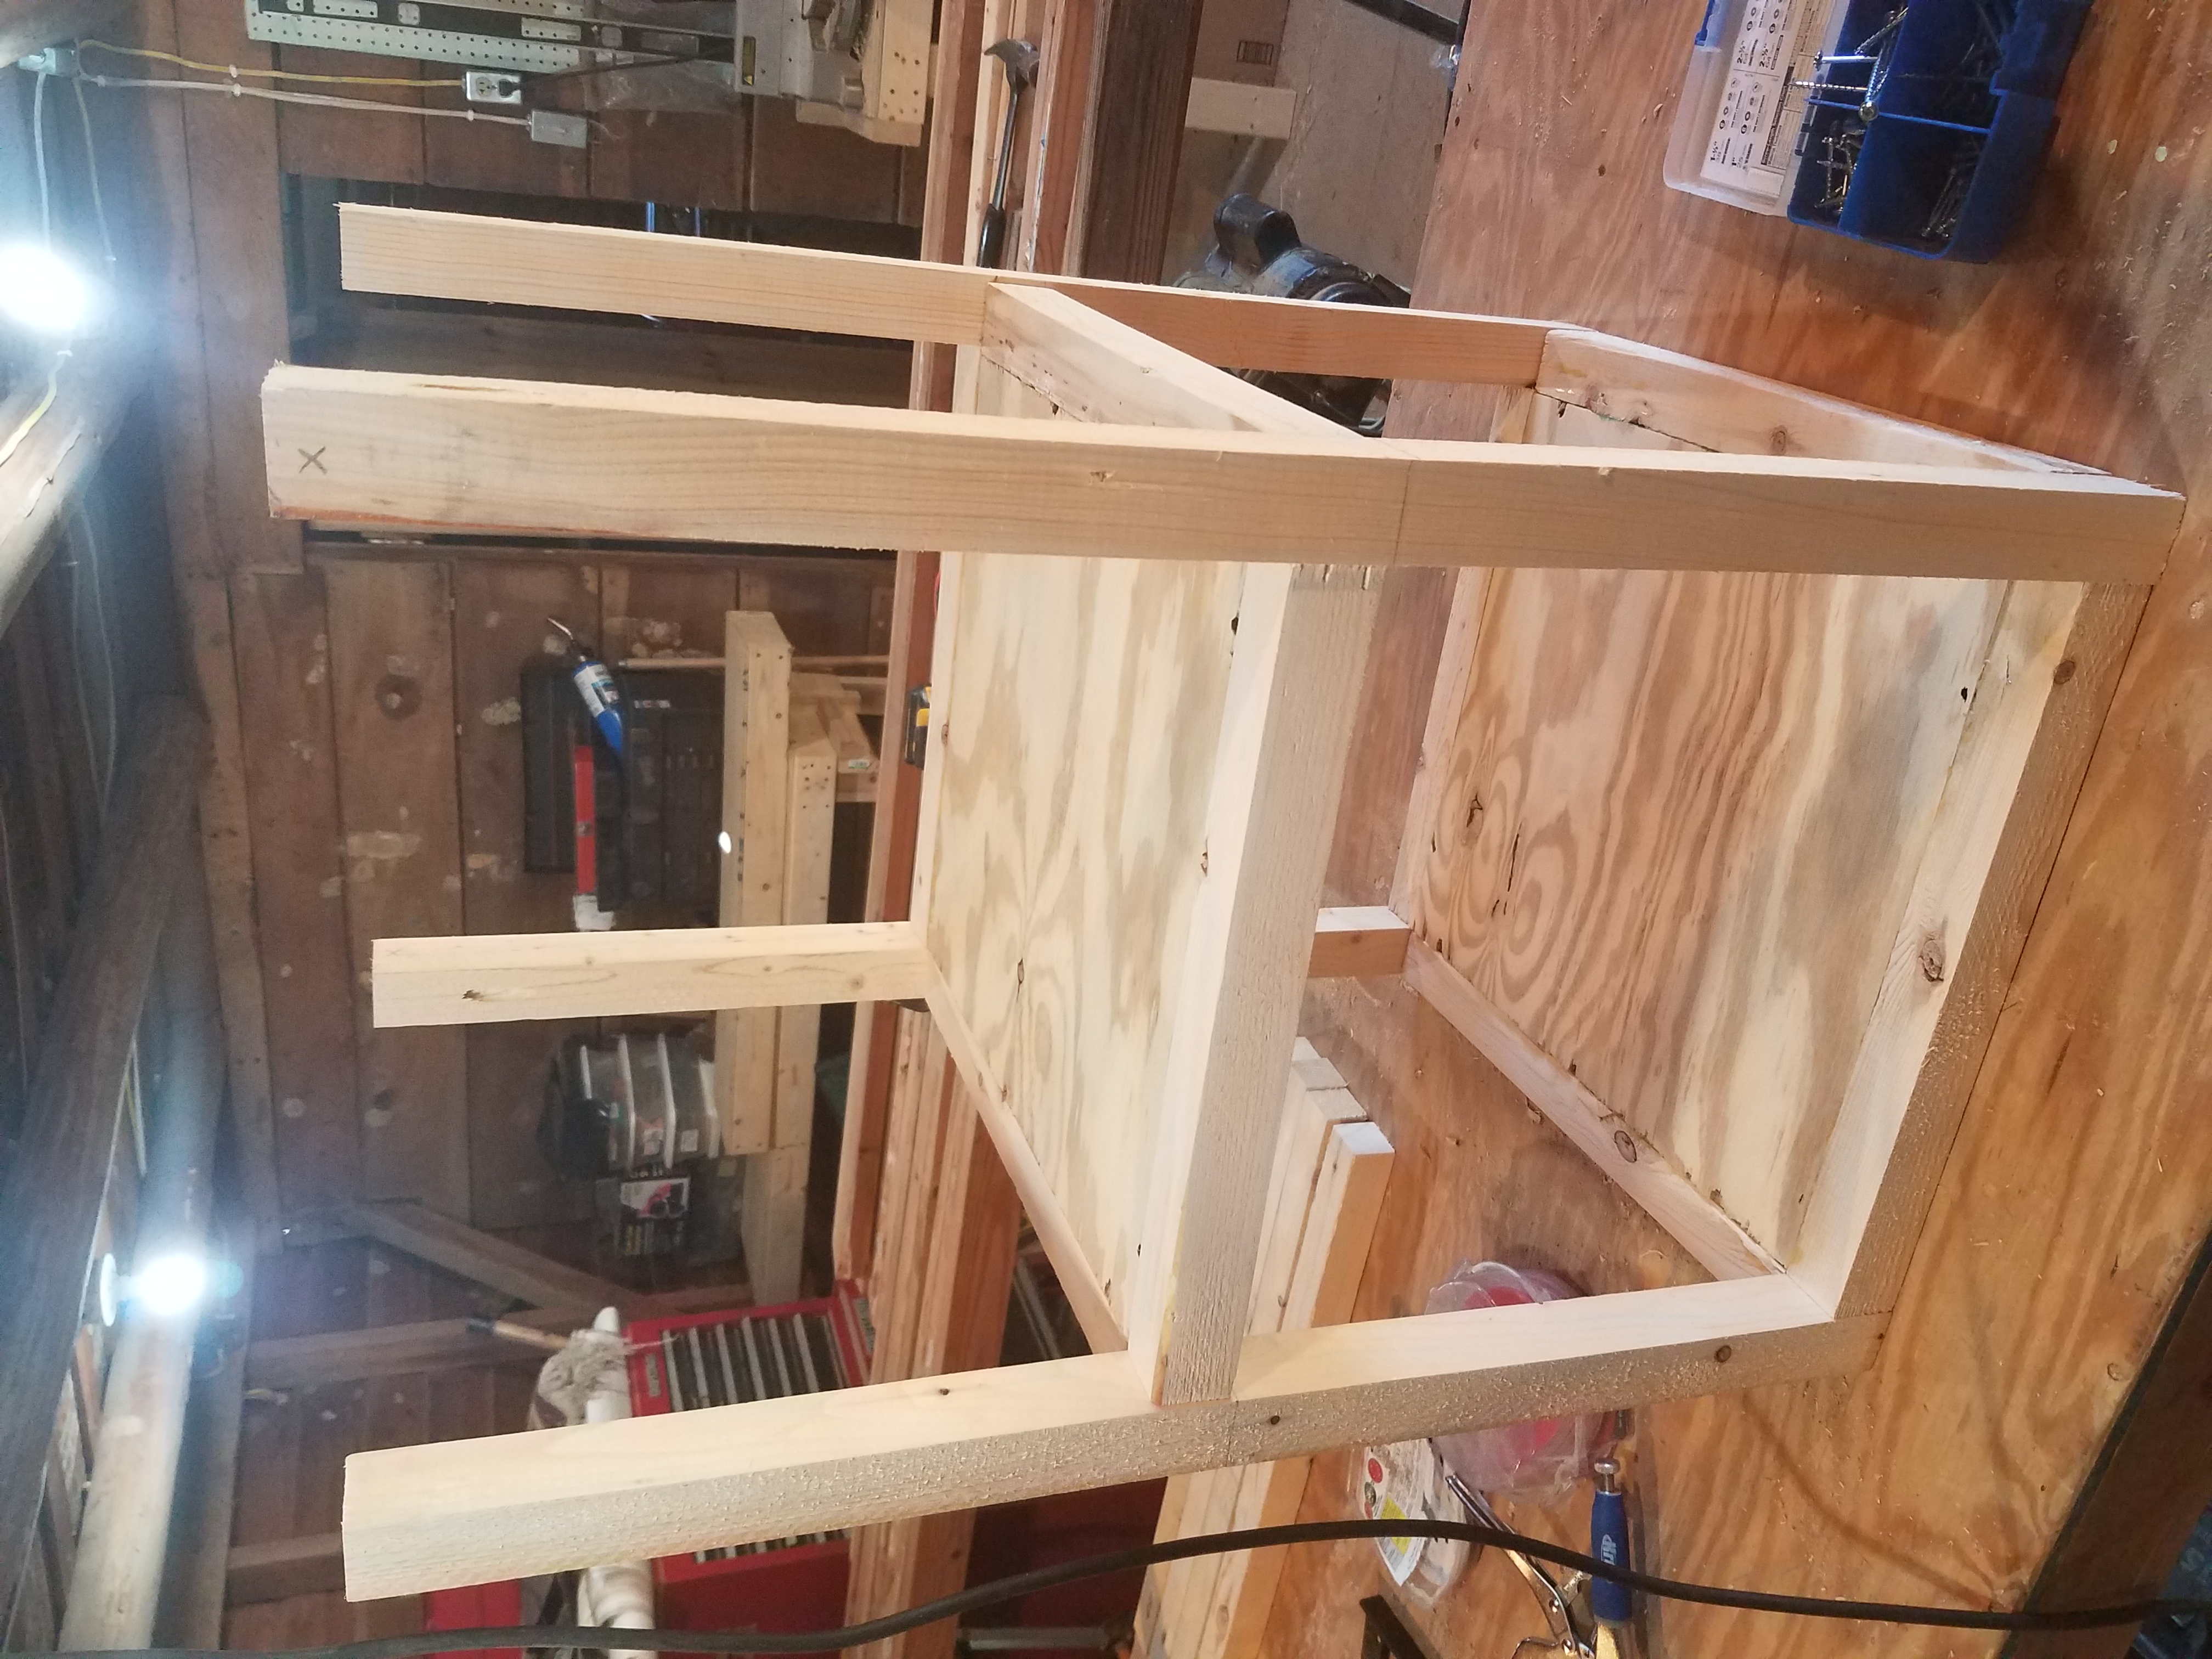
My husband works from home fairly frequently and the little desk we have for him isn’t really doing it anymore. I’ve found a great plan for an easy desk that will be larger and more functional for his work. It’s built entirely with 2x2s and one sheet of plywood, which means it’s going to be very like what I’ll build for the travel trailer, inexpensive, and simple. It uses pocket screw joinery which I need to learn to do sturdy and professional work. It’s a great practice piece.
https://www.ana-white.com/woodworking-projects/parson-tower-desk
I understand that sanding, staining/painting, and covering with polyurethane can be the most tricky and most time-consuming part of the job, so I’ll practice on the desk and hope to get the kitchen done easier for having the practice.
Only then, having read up and practiced, will I be ready to start building my kitchen, beginning with the easiest sections and ending with the most complicated.
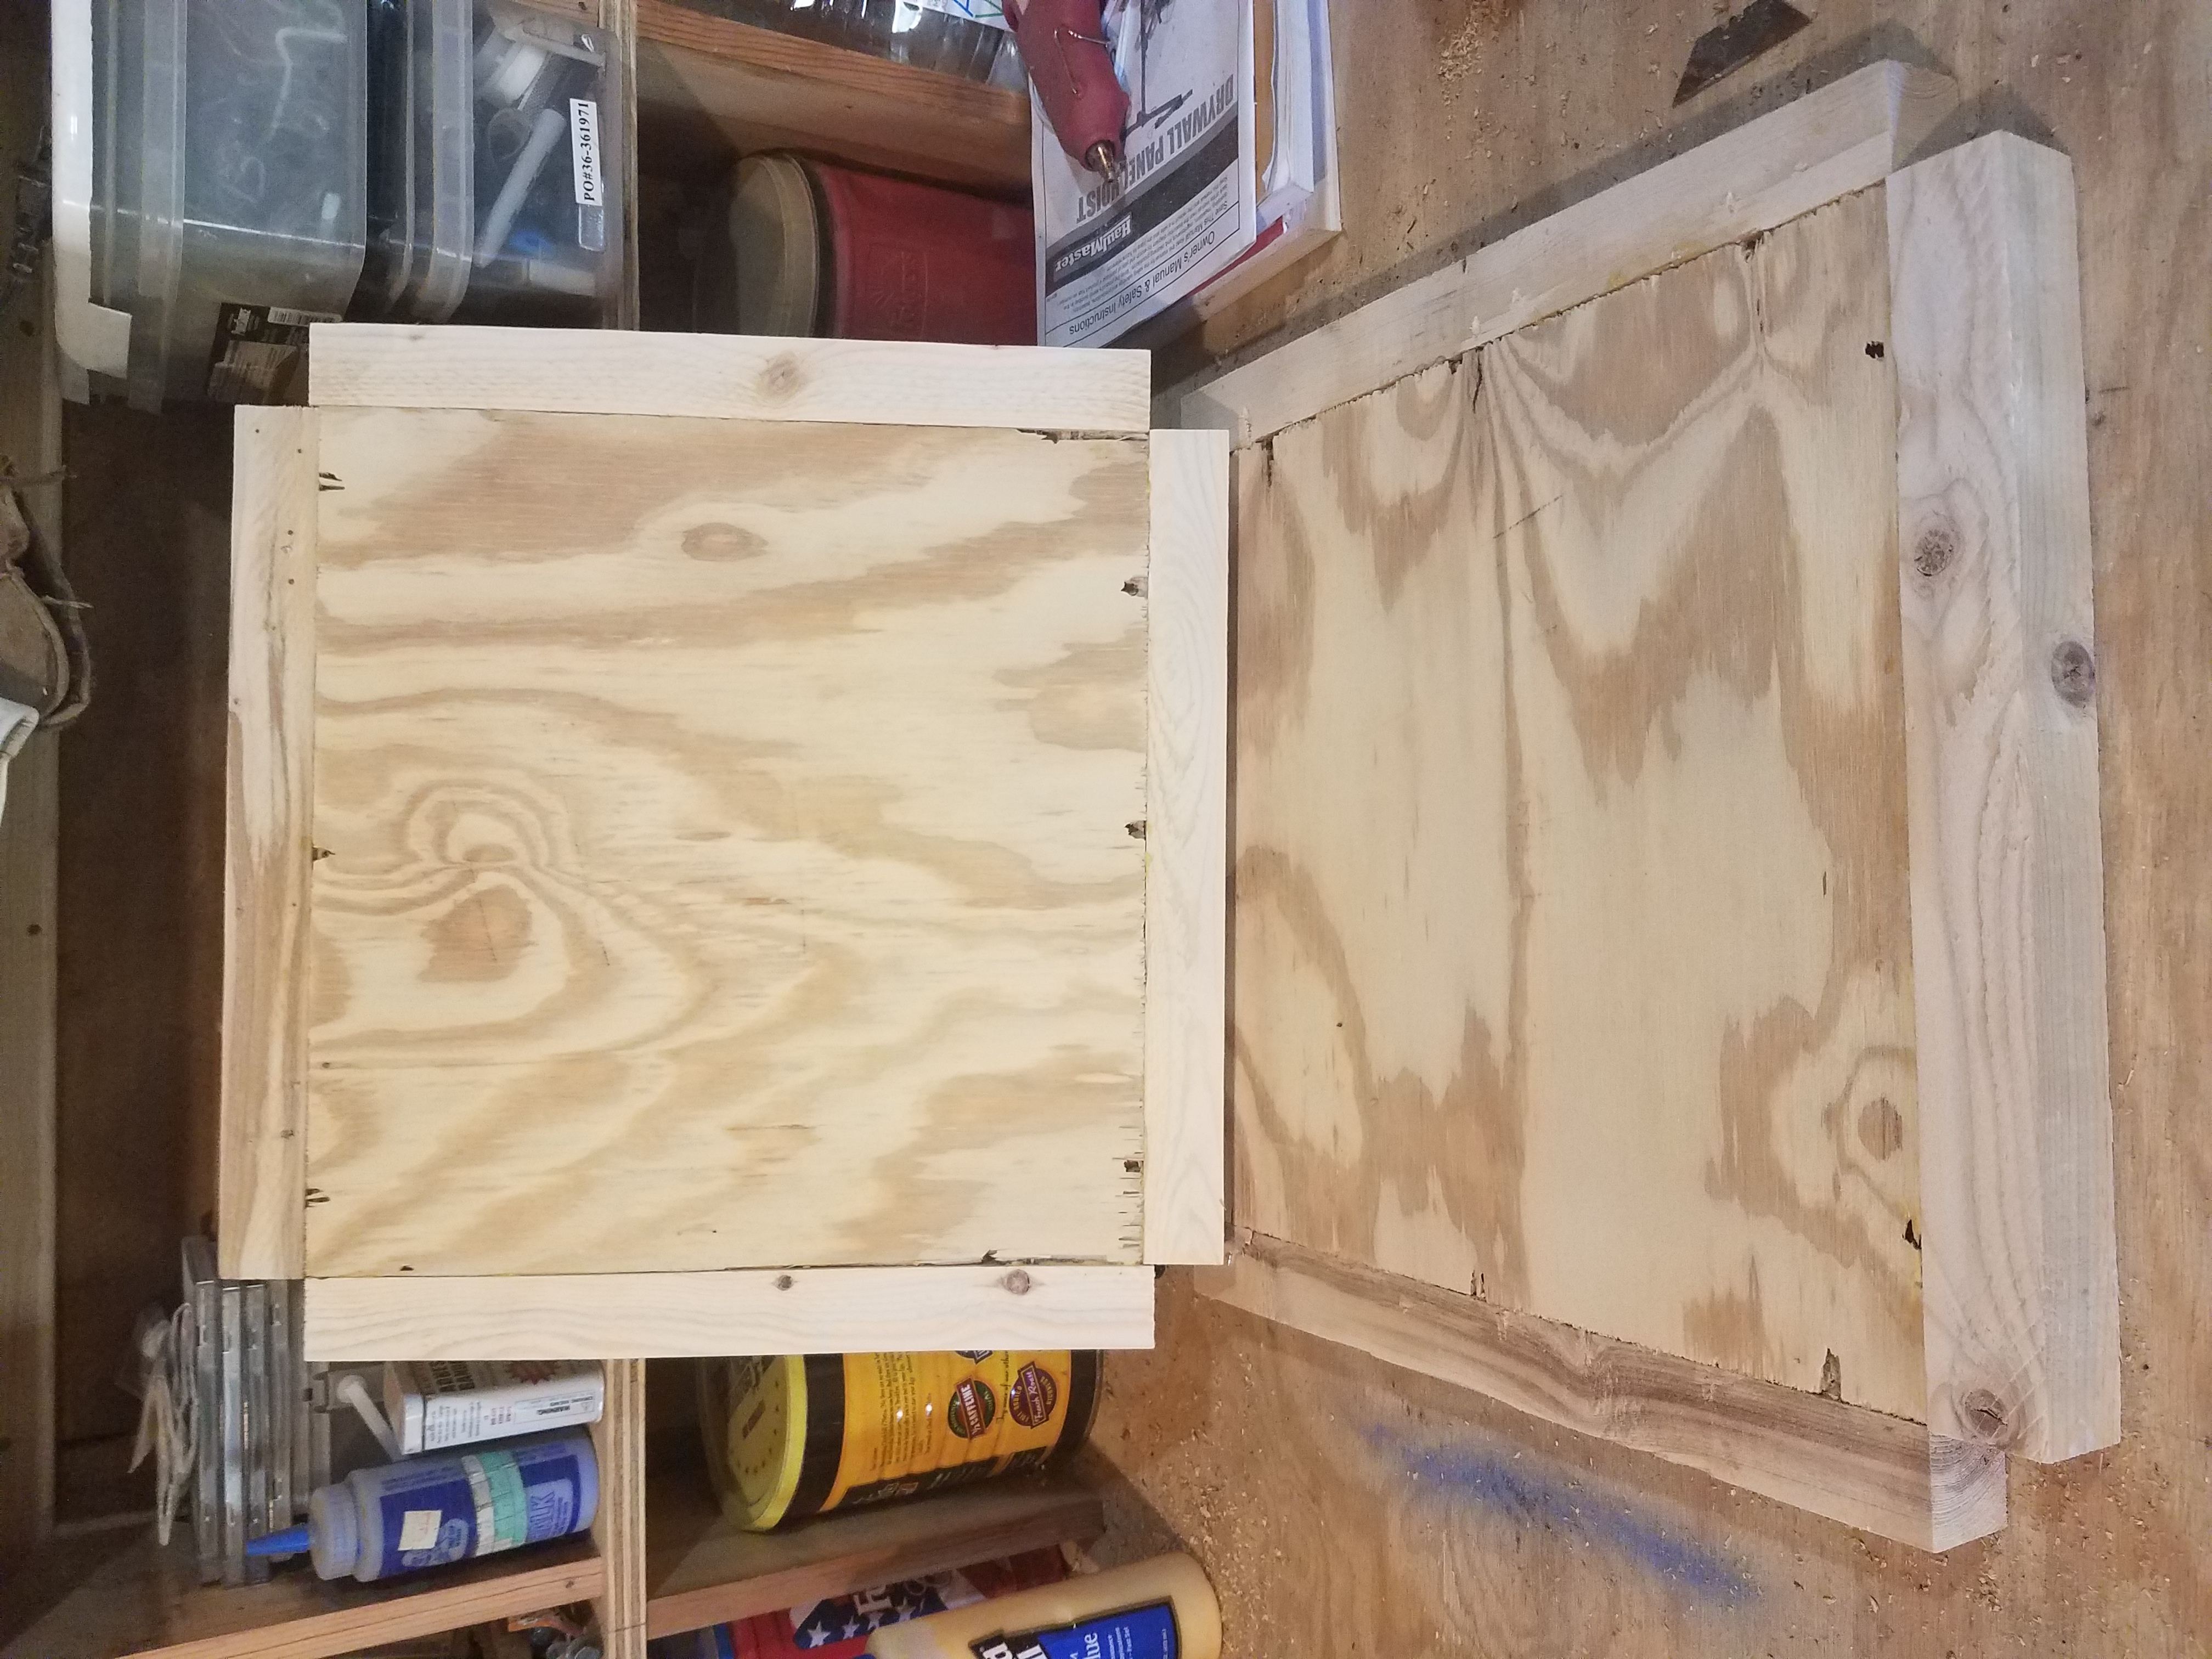
After completing the desk project, I can say that I Definitely needed the practice. I had never used a table saw or “chop” saw (compound mitre saw) before and had to figure out the safest and best way to use those tools. I had to drill the pocket holes 3 times before I finally got them right. I had to correct my cuts on almost every piece. I used painter’s caulk to try and fill in the gaps and holes and smooth out the edges. I practiced sanding at lower and higher grits to see how it would affect the plywood and pine. Then I used the satin paint I was planning to use in the kitchen to see how it would work. The result is not the pretty, polished piece from the plan. I definitely learned a lot about woodworking.
I learned that I should read the instructions carefully before using a new piece of equipment (sorry, Kreg jig). Also, having the right tools (and the right-sized screws) is important if you don’t want screws sticking up from the tabletop.
I learned that painters caulk can cover a multitude of sins…. but not All of them. I learned that choosing the straightest pieces of lumber for longer cuts is important (screws won’t make it straight, they just make it crack). I also learned that furniture-grade plywood is more expensive than construction-grade because the construction-grade plywood just isn’t nice enough for a desktop (no amount of sanding will change that). It also turns out that satin sheen paint draws attention to every little flaw and divot in a way that flat paint doesn’t.
By learning all of these critical lessons in a no-pressure way, I was able to avoid the frustration and burn-out that comes from wasting wood and messing up important cuts. When I messed up the desk, I just forged on and ignored the fact that the result wouldn’t be as nice. I won’t be able to do that in my kitchen without feeling very disappointed in myself.
With the desk, I gave myself permission to make a lot of mistakes and accept a sub-standard result. The desk isn’t very pretty, and probably isn’t very level or flat either, but it’ll do the job. I didn’t need it to be pretty, I just needed it to help me learn. It’s served its purpose and I feel a lot more capable when it comes to building with wood. I also got to surprise my husband with the completed desk, and he was a lot more proud of me for it than I was, which is a very nice reaction to a handmade gift.
So, on that positive note… Bring on the kitchen build!