Renovating our 1997 Fleetwood Mallard for Full-Time Living (Part 12)
This is the story of how my husband and I purchased a 20-year-old travel trailer and I DIYed the crap out of it to make it suitable for full-time living. In this series, I’m giving All of the details about the process step-by-step, as performed by me, a 26-year-old woman with No experience in construction. The first installment in this series details the purchasing process and the changes I planned to make. You can find that article in the link below and start at the beginning. Then, follow along in the series by clicking on the link for the next article at the bottom of each page.
Plumbing the New Bathroom
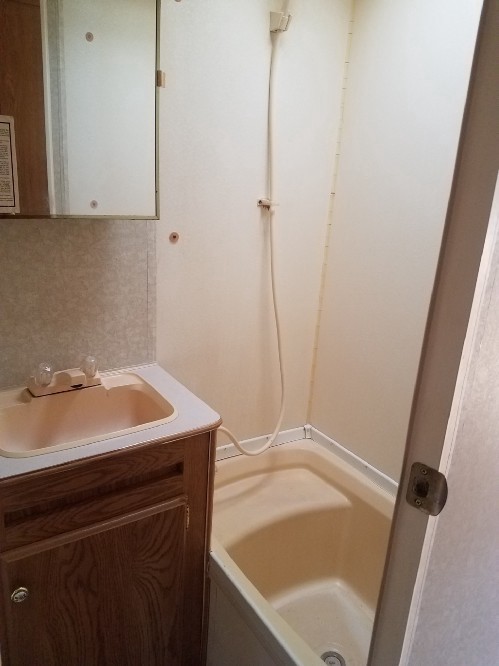
The next hurdle in the rebuilding process was the massive changes I wanted to make to the bathroom. The old bathroom was incredibly tiny and not very functional, with the shower/tub fit for children but not adults. Everything was crammed into a tiny room and very cramped.
I envisioned a more open concept, with a shower and sink that were part of the bedroom, making for a much larger combined, multi-function space. The toilet would be in a small, closet-like room, but at least you would only have to be cramped for 1 bathroom-related activity, instead of all 3. This is how they’re designing all of the more modern RVs and campers, but my 1997 Mallard is decidedly not modern.
I imagined moving around a few pipes under the floor and vastly improving the bathroom in our camper. Unfortunately, as I soon learned, changing the bathroom is tricky. There are several challenges with plumbing that are unique to travel trailers and RVs.
Space Limitations
Space limitations. Most plumbing in regular houses is run under the floor, through the walls, and sometimes across the ceiling if you’re on the 2nd floor. Camper walls are too narrow for waste pipes (only 1.5″), and the floor is also too shallow (maybe 3″ deep). To get around this problem, most of the plumbing in campers and RVs is hidden under couches, through built-in furniture, and behind cabinets and shelves.
Unfortunately for me, that means I can’t just run pipes wherever I want. No going across the floor to the other side of the camper, at least not without installing a speed bump in the hallway. No going behind the walls, unless I want them to bulge out like a modern art installation. I’ve got to stick to the same general area that the pipes were in before.
Waste Disposal
Waste disposal. All the waste from your plumbing must go to the grey water tank or black water tank. The grey and black water tanks are fixed in place under the camper with steel bars that are welded to the frame. There is a single input hole in each tank that comes up through the floor. All of the waste plumbing must eventually end up at that hole.
You can move the tanks, but it requires cutting and welding and possibly ordering new tanks, and I decided to forgo that. You can cut new holes in the tank, but only within the space that the tank already occupies, which wasn’t helpful to me since I wanted to move things away from the tanks entirely. Unfortunately, I can only move the fixtures so far from where the pipes to the tanks come out of the floor. Once again, it looks like I have to keep my bathroom close to the original location.
Venting
Venting. The tanks must be vented, not just for the smell, but also to prevent a vacuum or pressure build-up in the pipes. This isn’t something that can be avoided. It’s a law of nature. Nature abhors a vacuum. There are two vent holes in the roof and unless you’re prepared to cut new holes and patch the old ones, that’s where your vent pipes need to end up. I despise the idea of putting More holes in the already hole-ridden roof of my trailer. The more you move your fixtures, the more difficult it will be to get your pipes back to the vent holes. Also, in my case, the vents traveled straight from holes in the tank to the vent holes in the ceiling and were sticking up like a pillar right where I wanted to have open walking space. Irritating.
A New Layout
Taking all of that into account, I had to change my bathroom layout several times as I bumped up against hard reality. The shower was the hardest part of figure out. The ceiling in the camper is only 6’5″ high, leaving very little room to raise the shower pan for plumbing underneath it. As I found out, shower pans are already about 2″ off the floor, to account for the drain underneath it. My husband is 6′ tall, so as he stands on the shower pan, his head is only 3″ from the ceiling.
But, that’s not all. A waste drain pipe needs to rise 1/4″ per foot of run between the fixture and the hole into the tank (gravity can be a friend or foe when it comes to plumbing). The further away it is from the tank, the higher off the ground the shower needs to be. Also, waste drain pipes for a shower need to be at least 1.5″ in diameter. So, if you add the 2″ for the shower pan and another 1.5″ for the pipe, not counting any rise I would have to add per foot, my husband’s head is only 1.5″ from the ceiling as he stands in the shower. I realized that the shower just couldn’t be moved more than a foot away from the original position without making it impossible for my husband to stand in it.
Originally, I planned to switch the positions of the toilet and shower and run the toilet plumbing under the shower back to its hole in the black water tank. Unfortunately, the toilet requires a 3″ waste pipe, and that would mean raising the shower 3–4″ above the floor at the least. Once I dry-fitted the plumbing I realized that accounting for the height added by the 45-degree elbows in the toilet plumbing, the shower would have to be on a platform raised 7″ above the floor.
That would make it impossible for my husband to stand up in the shower. My ideal bathroom arrangement was a no-go unless I planned to start cutting steel and welding the tanks into a different place. This whole DIY-contractor stuff is harder than it looks, folks.
So, I went back to the drawing board and ended up compromising on my open concept plan. The shower and toilet will be in a small bathroom, with the sink by itself in a corner of the bedroom. That way someone can brush their teeth while the other is in the bathroom, and we’ll be more efficient.
Rather than build walls around the toilet and shower room, we’ll plan for track folding doors in the future and probably use a heavy curtain for now. My husband and I decided that we would be fine using a curtain around the toilet since it’s only the two of us. In all reality, the thin walls of the bathroom and the small confines of the trailer do not provide any privacy or soundproofing in the bathroom. This is true in all trailers that I’ve been in. You can hear everything, even with a wall. So, a curtain won’t be any better or worse at providing privacy, but it will be a lot lighter and also allow us to move through the small space more freely, being able to push the curtain out of the way when the bathroom isn’t in use. The hallways and bathroom will be more spacious as a result.
Limited bathroom privacy. Yes, living in a travel trailer is going to take some getting used to…
Building the Shower Stall
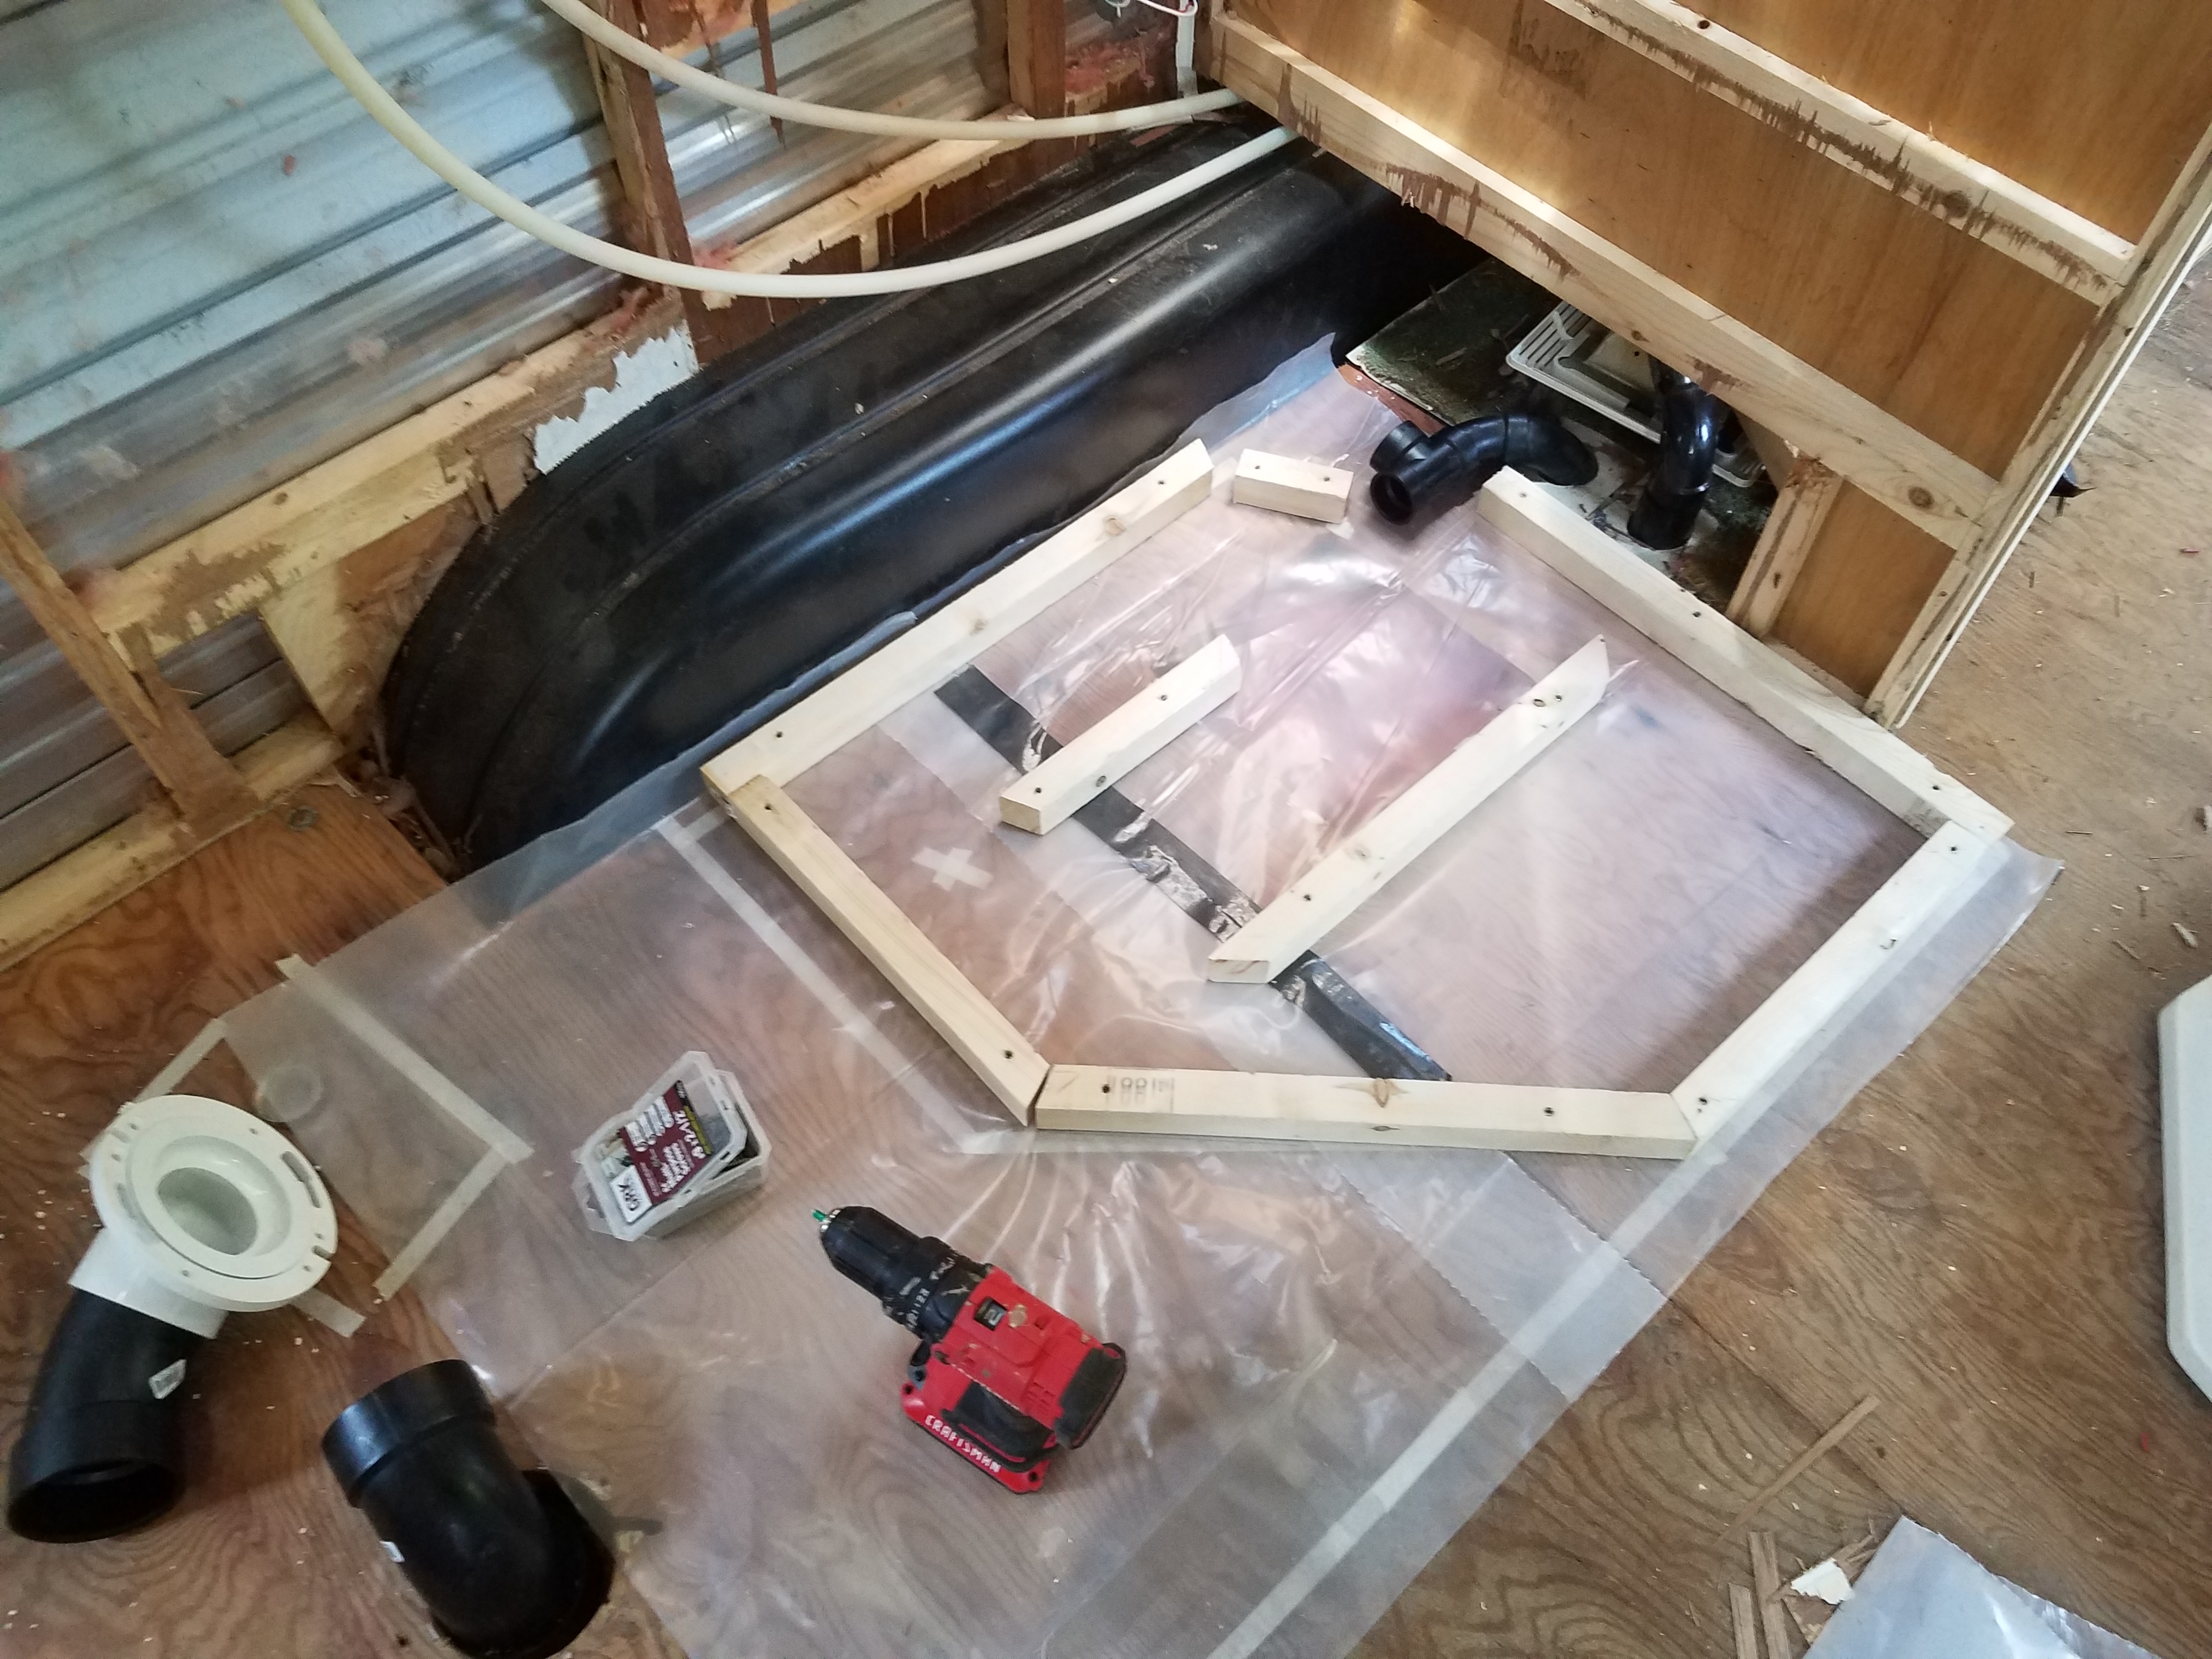
So, I started building my shower stall over the original placement of the old tub. I ordered a neo-angle shower stall online at an RV supplier’s website. The small sizes and lightweight construction are critical for RV and trailer construction. You need to have the shower pan before you begin construction so you can get accurate measurements.
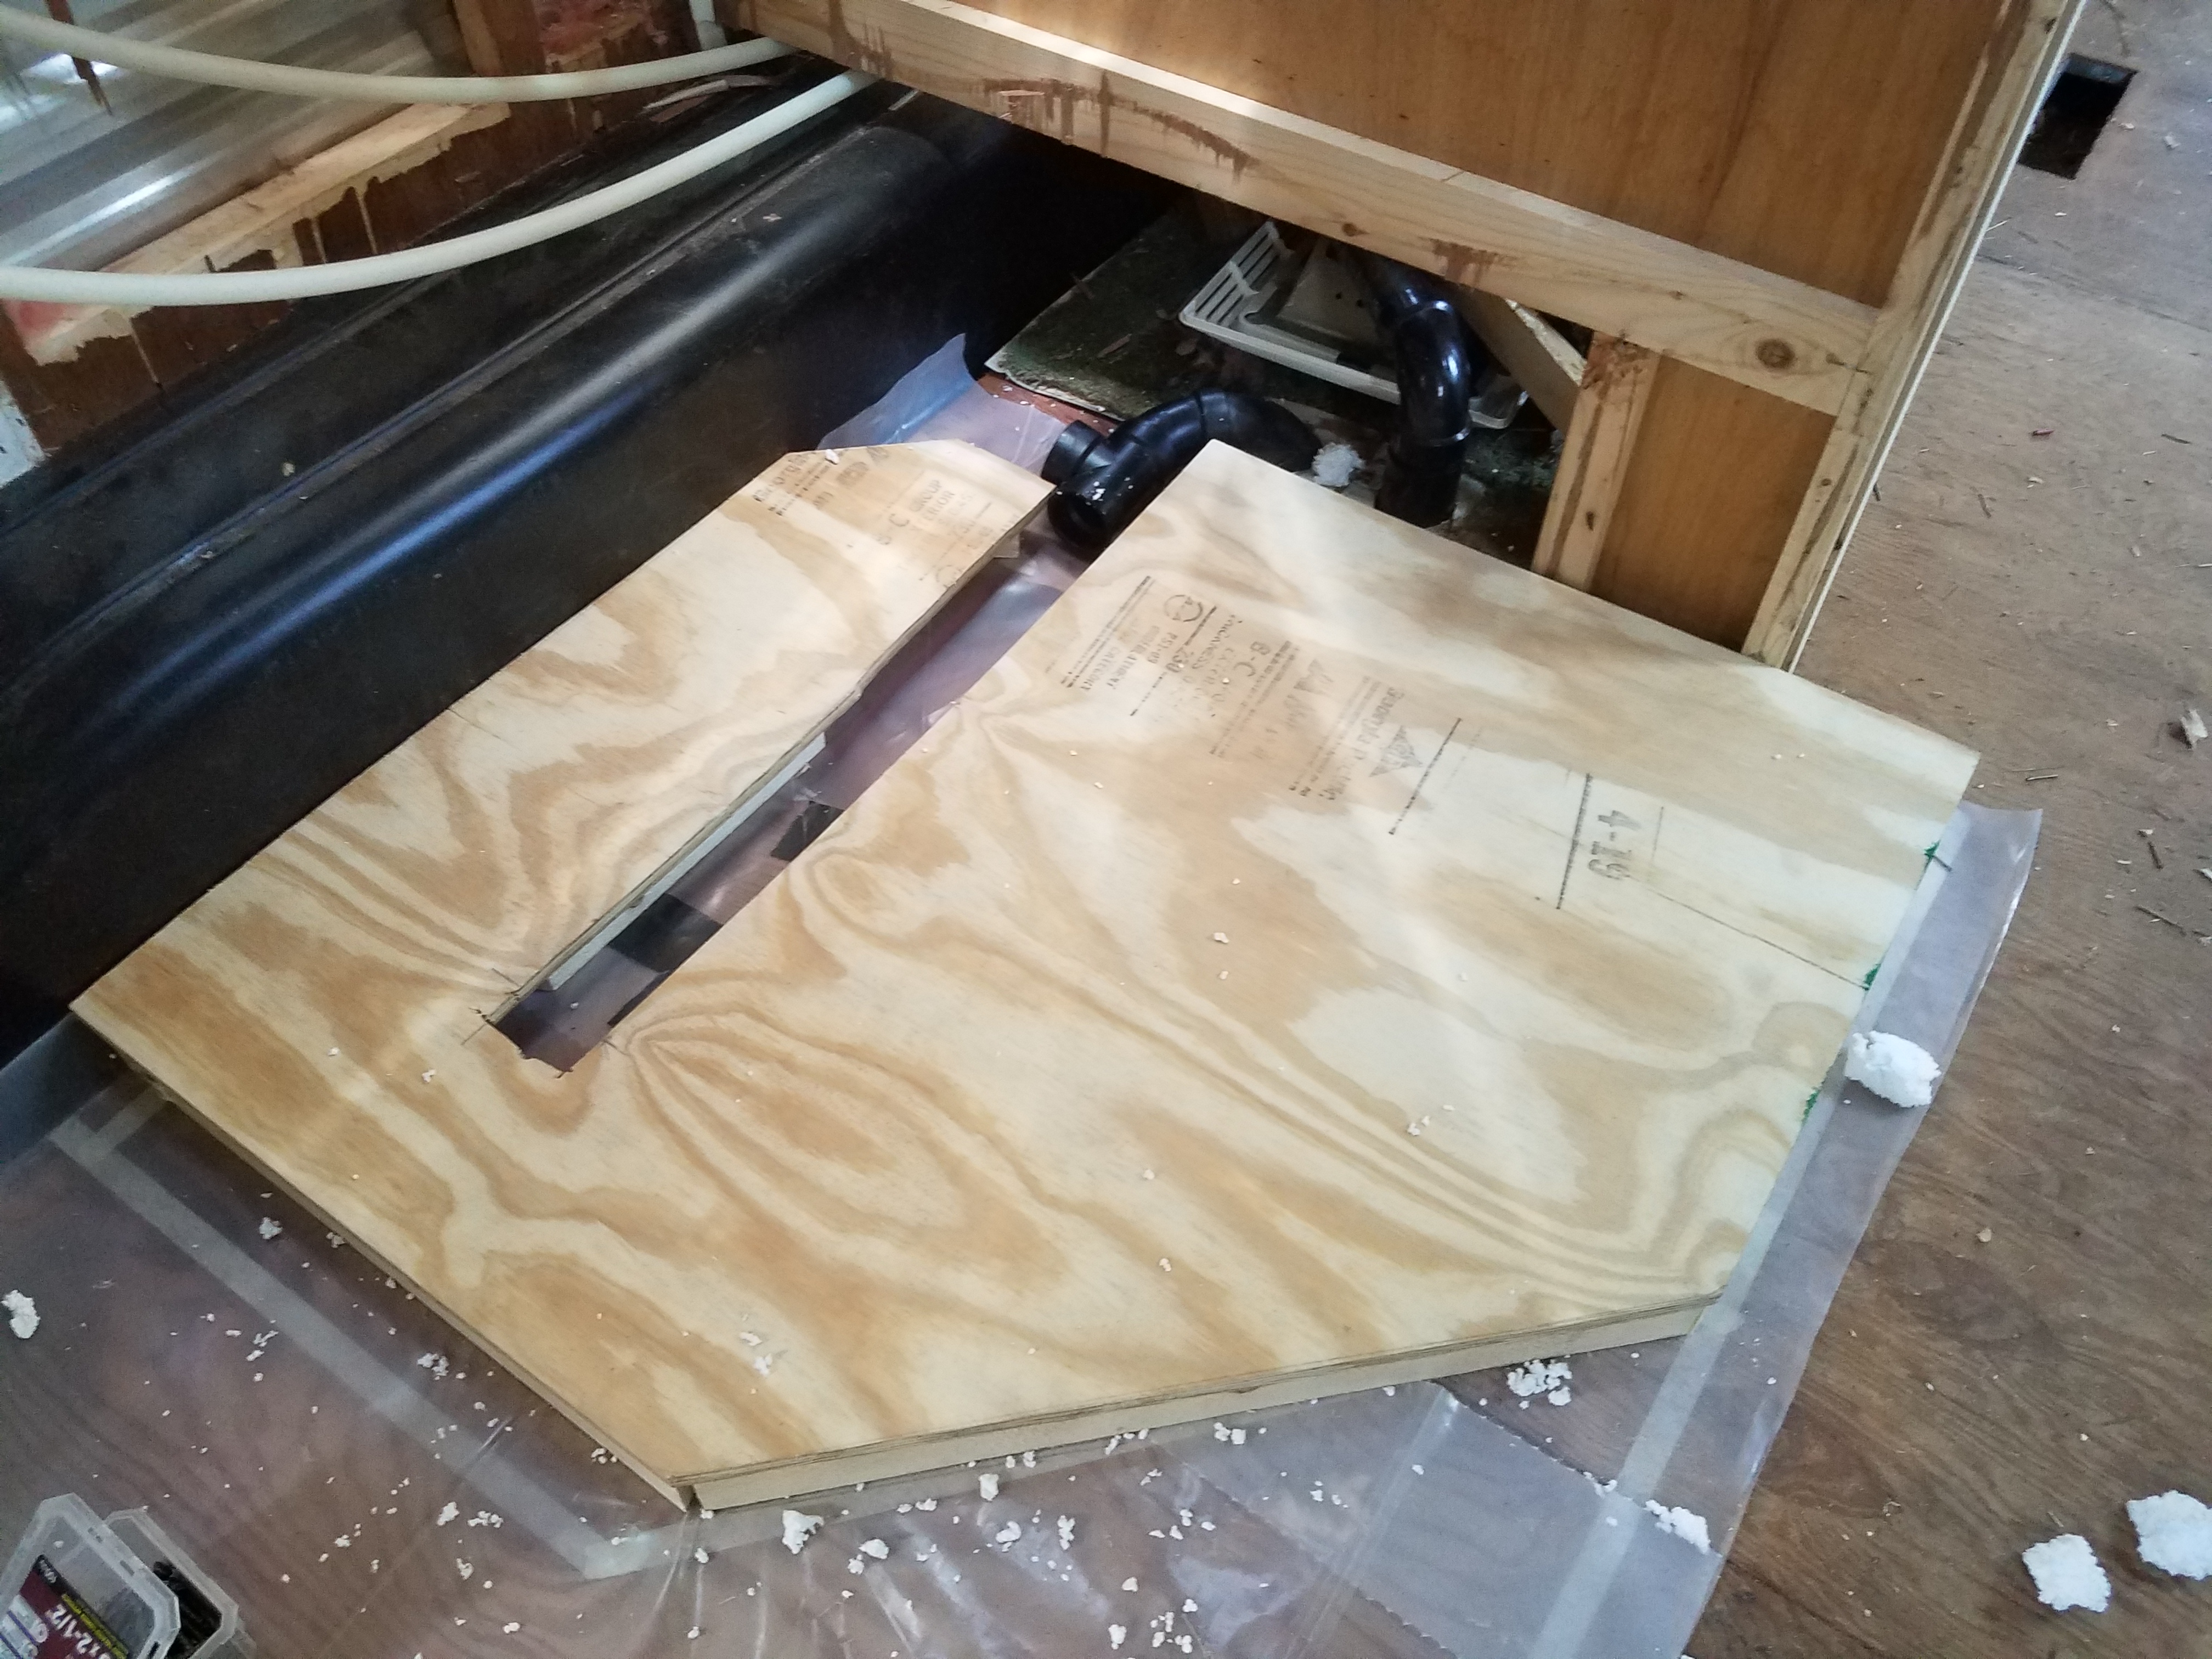
I determined that I would need a 1.5″ raised platform to accommodate the plumbing and the slight rise needed for the waste pipe. The bottom of the shower pan has a 2″ thick layer of styrofoam on it and I was able to cut a notch in the styrofoam to fit the pipes. I traced the outline of the pan on a piece of plywood and measured all of the sides.
Luckily, using 2×2 furring strips placed flat on the subfloor would give me the 1.5″ rise I needed. Adding a layer of 1/2″ plywood on top of that would result in the perfect amount of space for the pipes underneath the shower. The height from the shower pan to the ceiling would be about 6’1″, giving my husband just enough space to stand in the shower. He’ll have to duck his head to wash his hair, but it’s the best we could do. Living in a trailer does require some compromises.

I put a thick sheet of 0.6mm heavy-duty construction plastic under the shower base to protect the plywood sub-floor from any dripping pipes or tiny leaks. I like to hope for the best, but plan for the worst. I left the base open where the pipes will run back into the grey water tank. The hole you can see in the floor was where the old p-trap for the tub/shower used to go. I’ll be using a different type of p-trap that won’t require a hole in the floor.
I outlined the probable placement of the shower on the floor with masking tape, although you can see that I ended up moving it a bit. I butted the shower up against the original wall between the bathroom and couch. You can see how thin the wall is, and how much it would not block bathroom-related sounds. I also placed it directly against the wheel-well to save space in the hallway. I left some room at the back of the neo-angle shower shape for the vent pipe and the hot and cold water pipes to run up to the ceiling.
Laying the Pipes
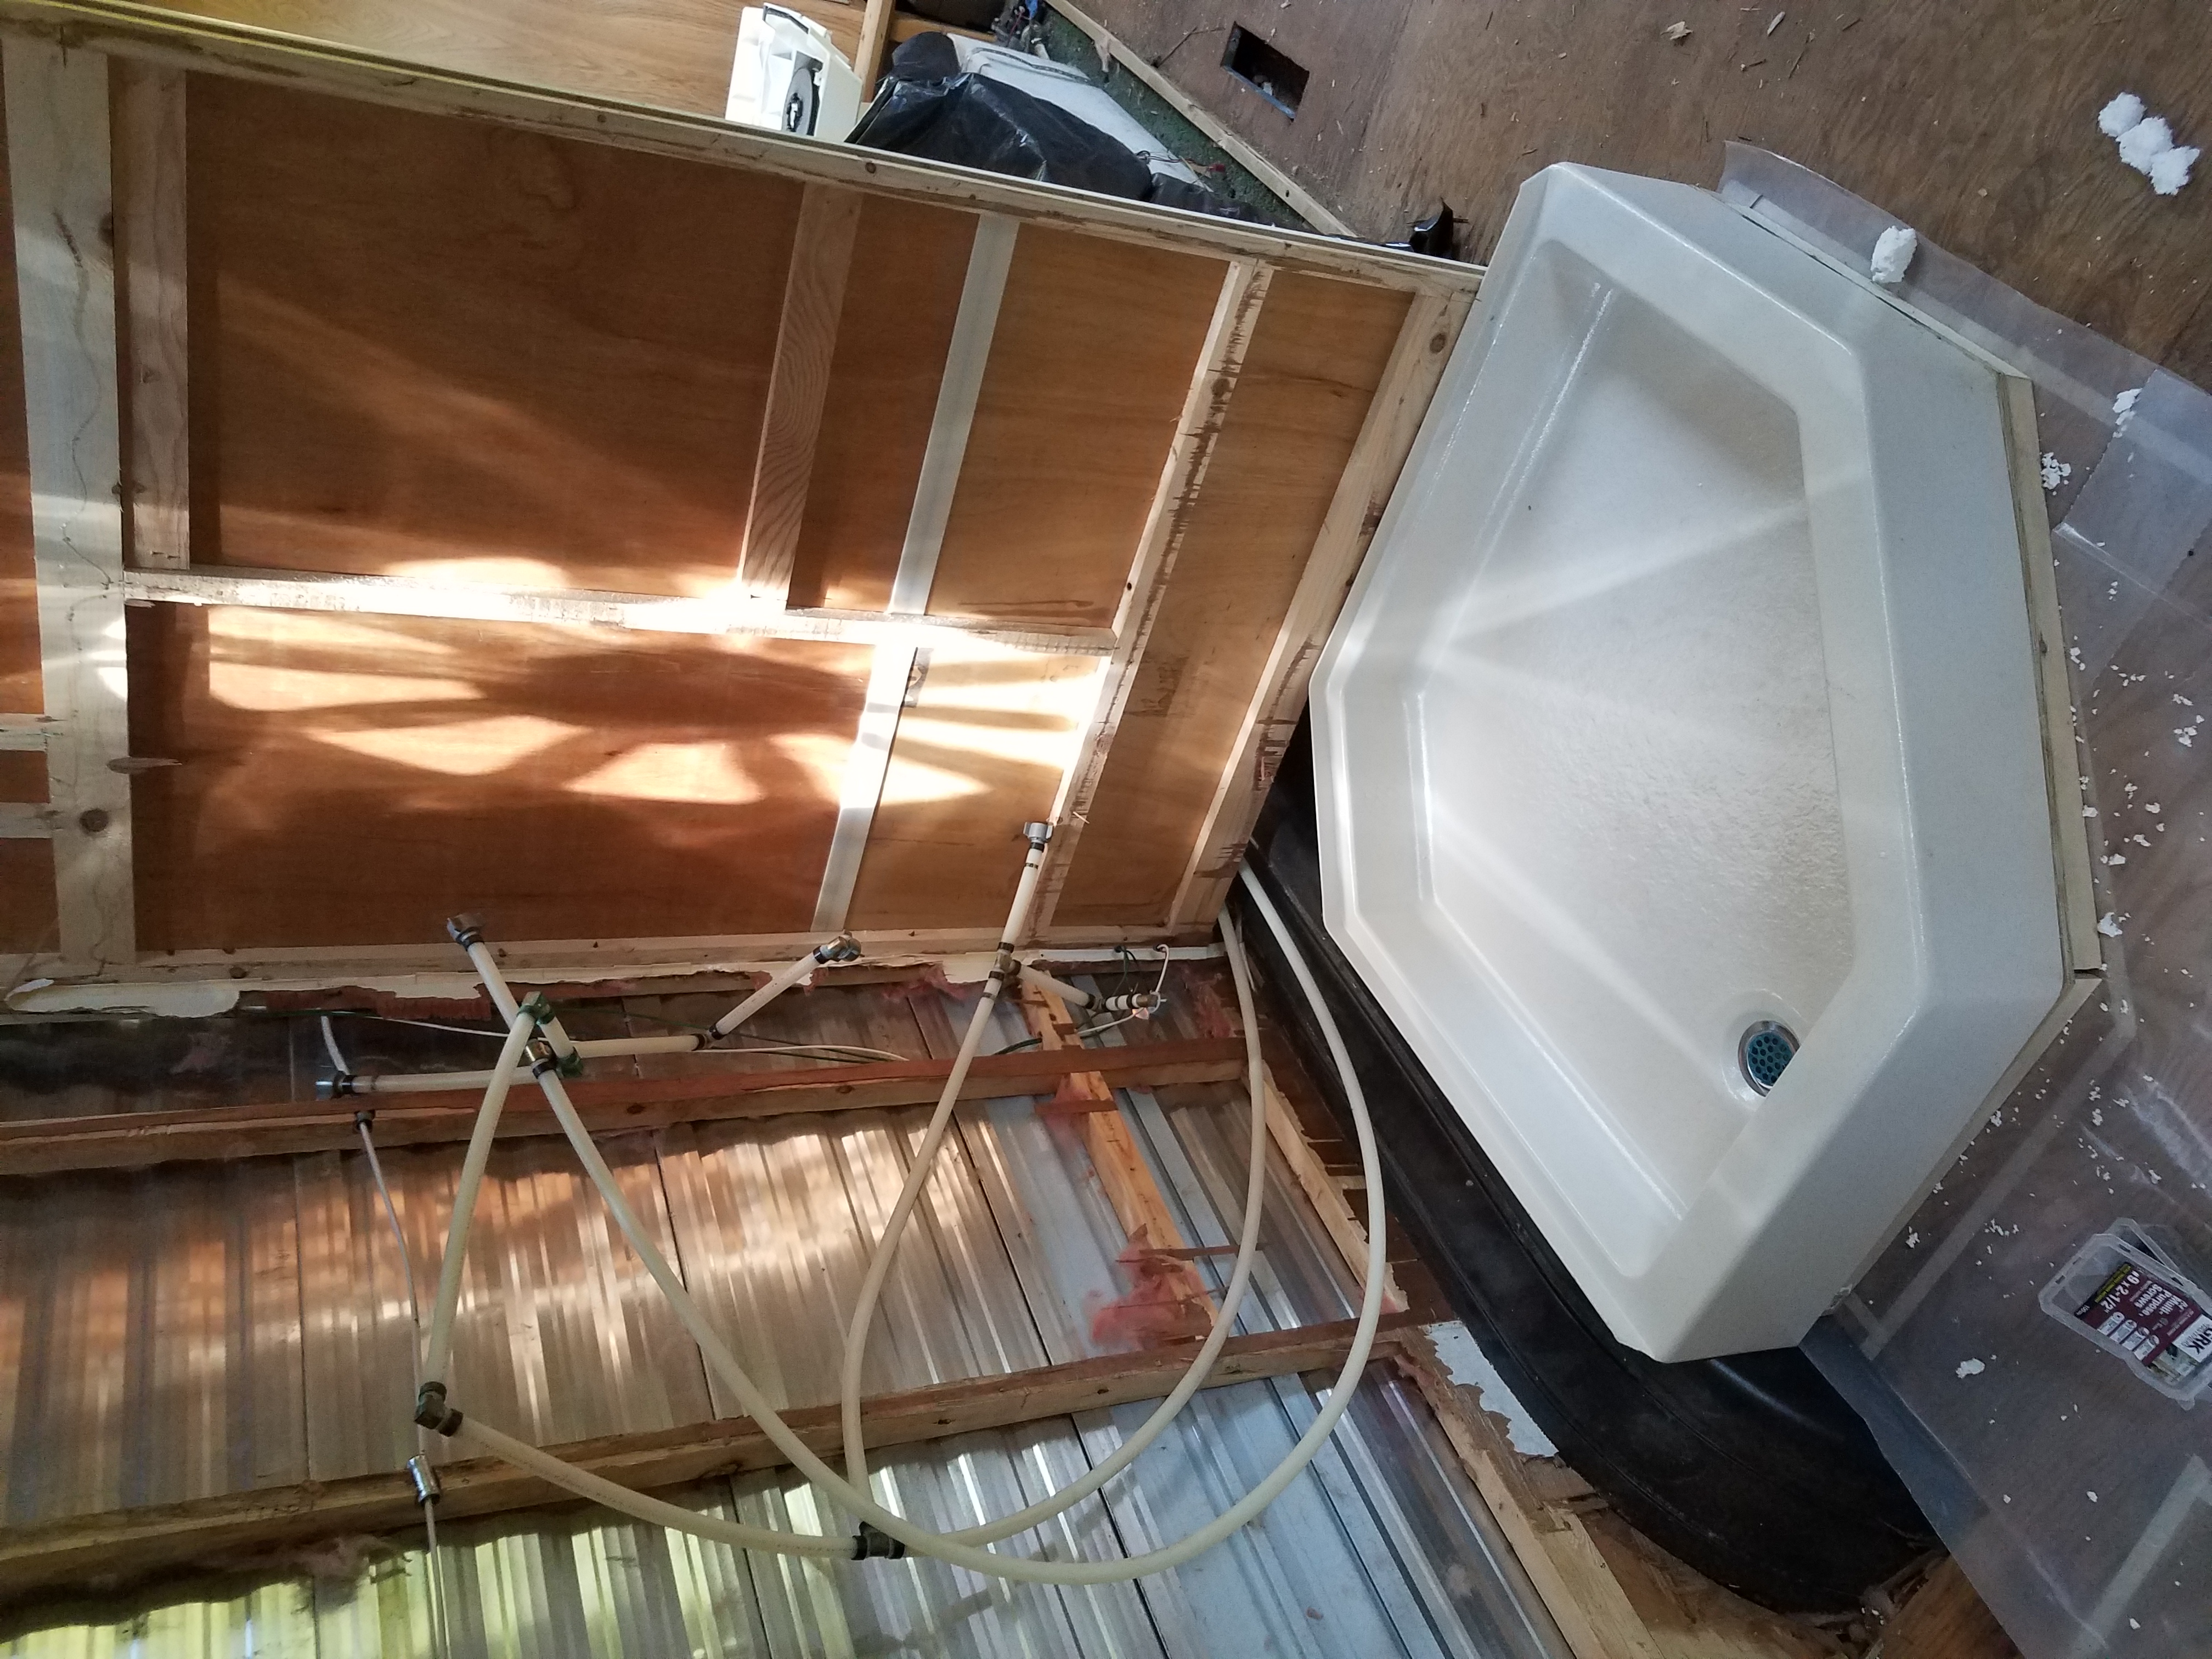
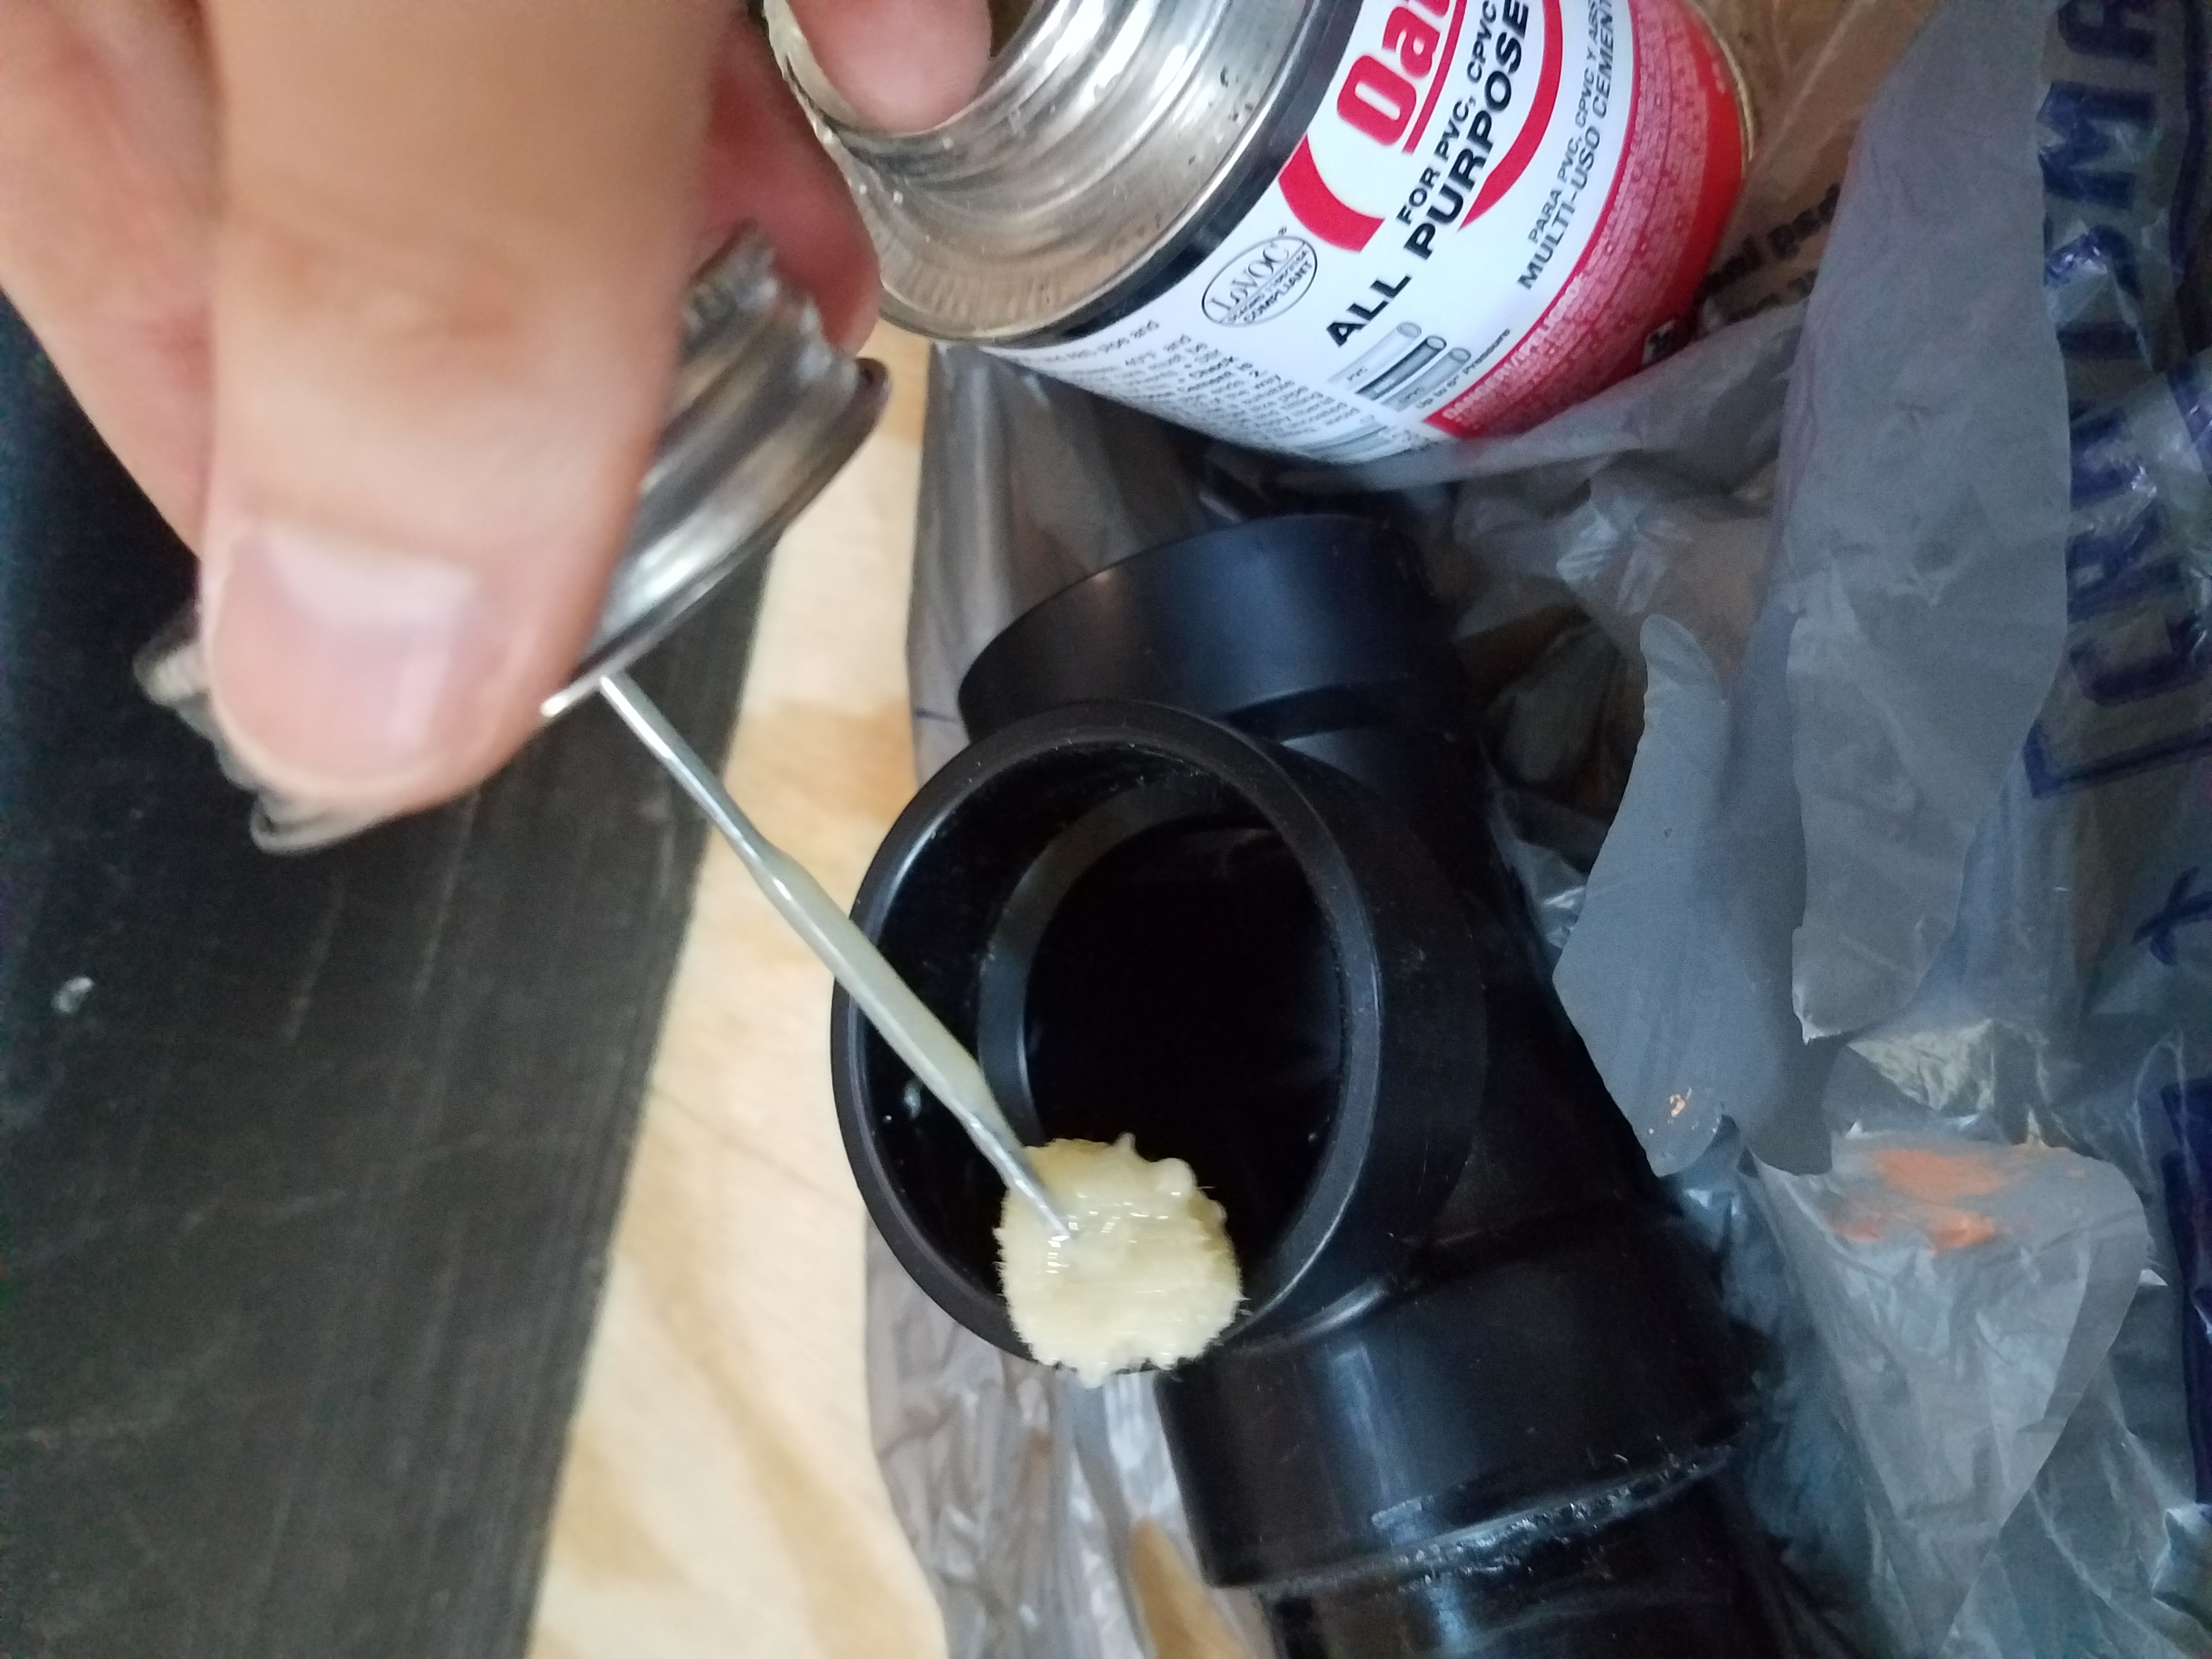
I marked the location of the drain with a small x so I could reference it while setting up my drain pipes. Measuring pipes is very difficult, so I ended up having to fit and then cut my pipe a few times before reaching the perfect length to position the drain exactly under the drain hole in the shower pan. I cut the pipe with a hacksaw since I only had to do a few. If I had to do a whole house, I would have wanted a faster and less labor-intensive method. But for cutting 10 pipes or less, it seemed easier. I can’t say that my pipes were all cut perfectly straight and evenly, but they went smoothly into the fittings and I believe it will be okay.
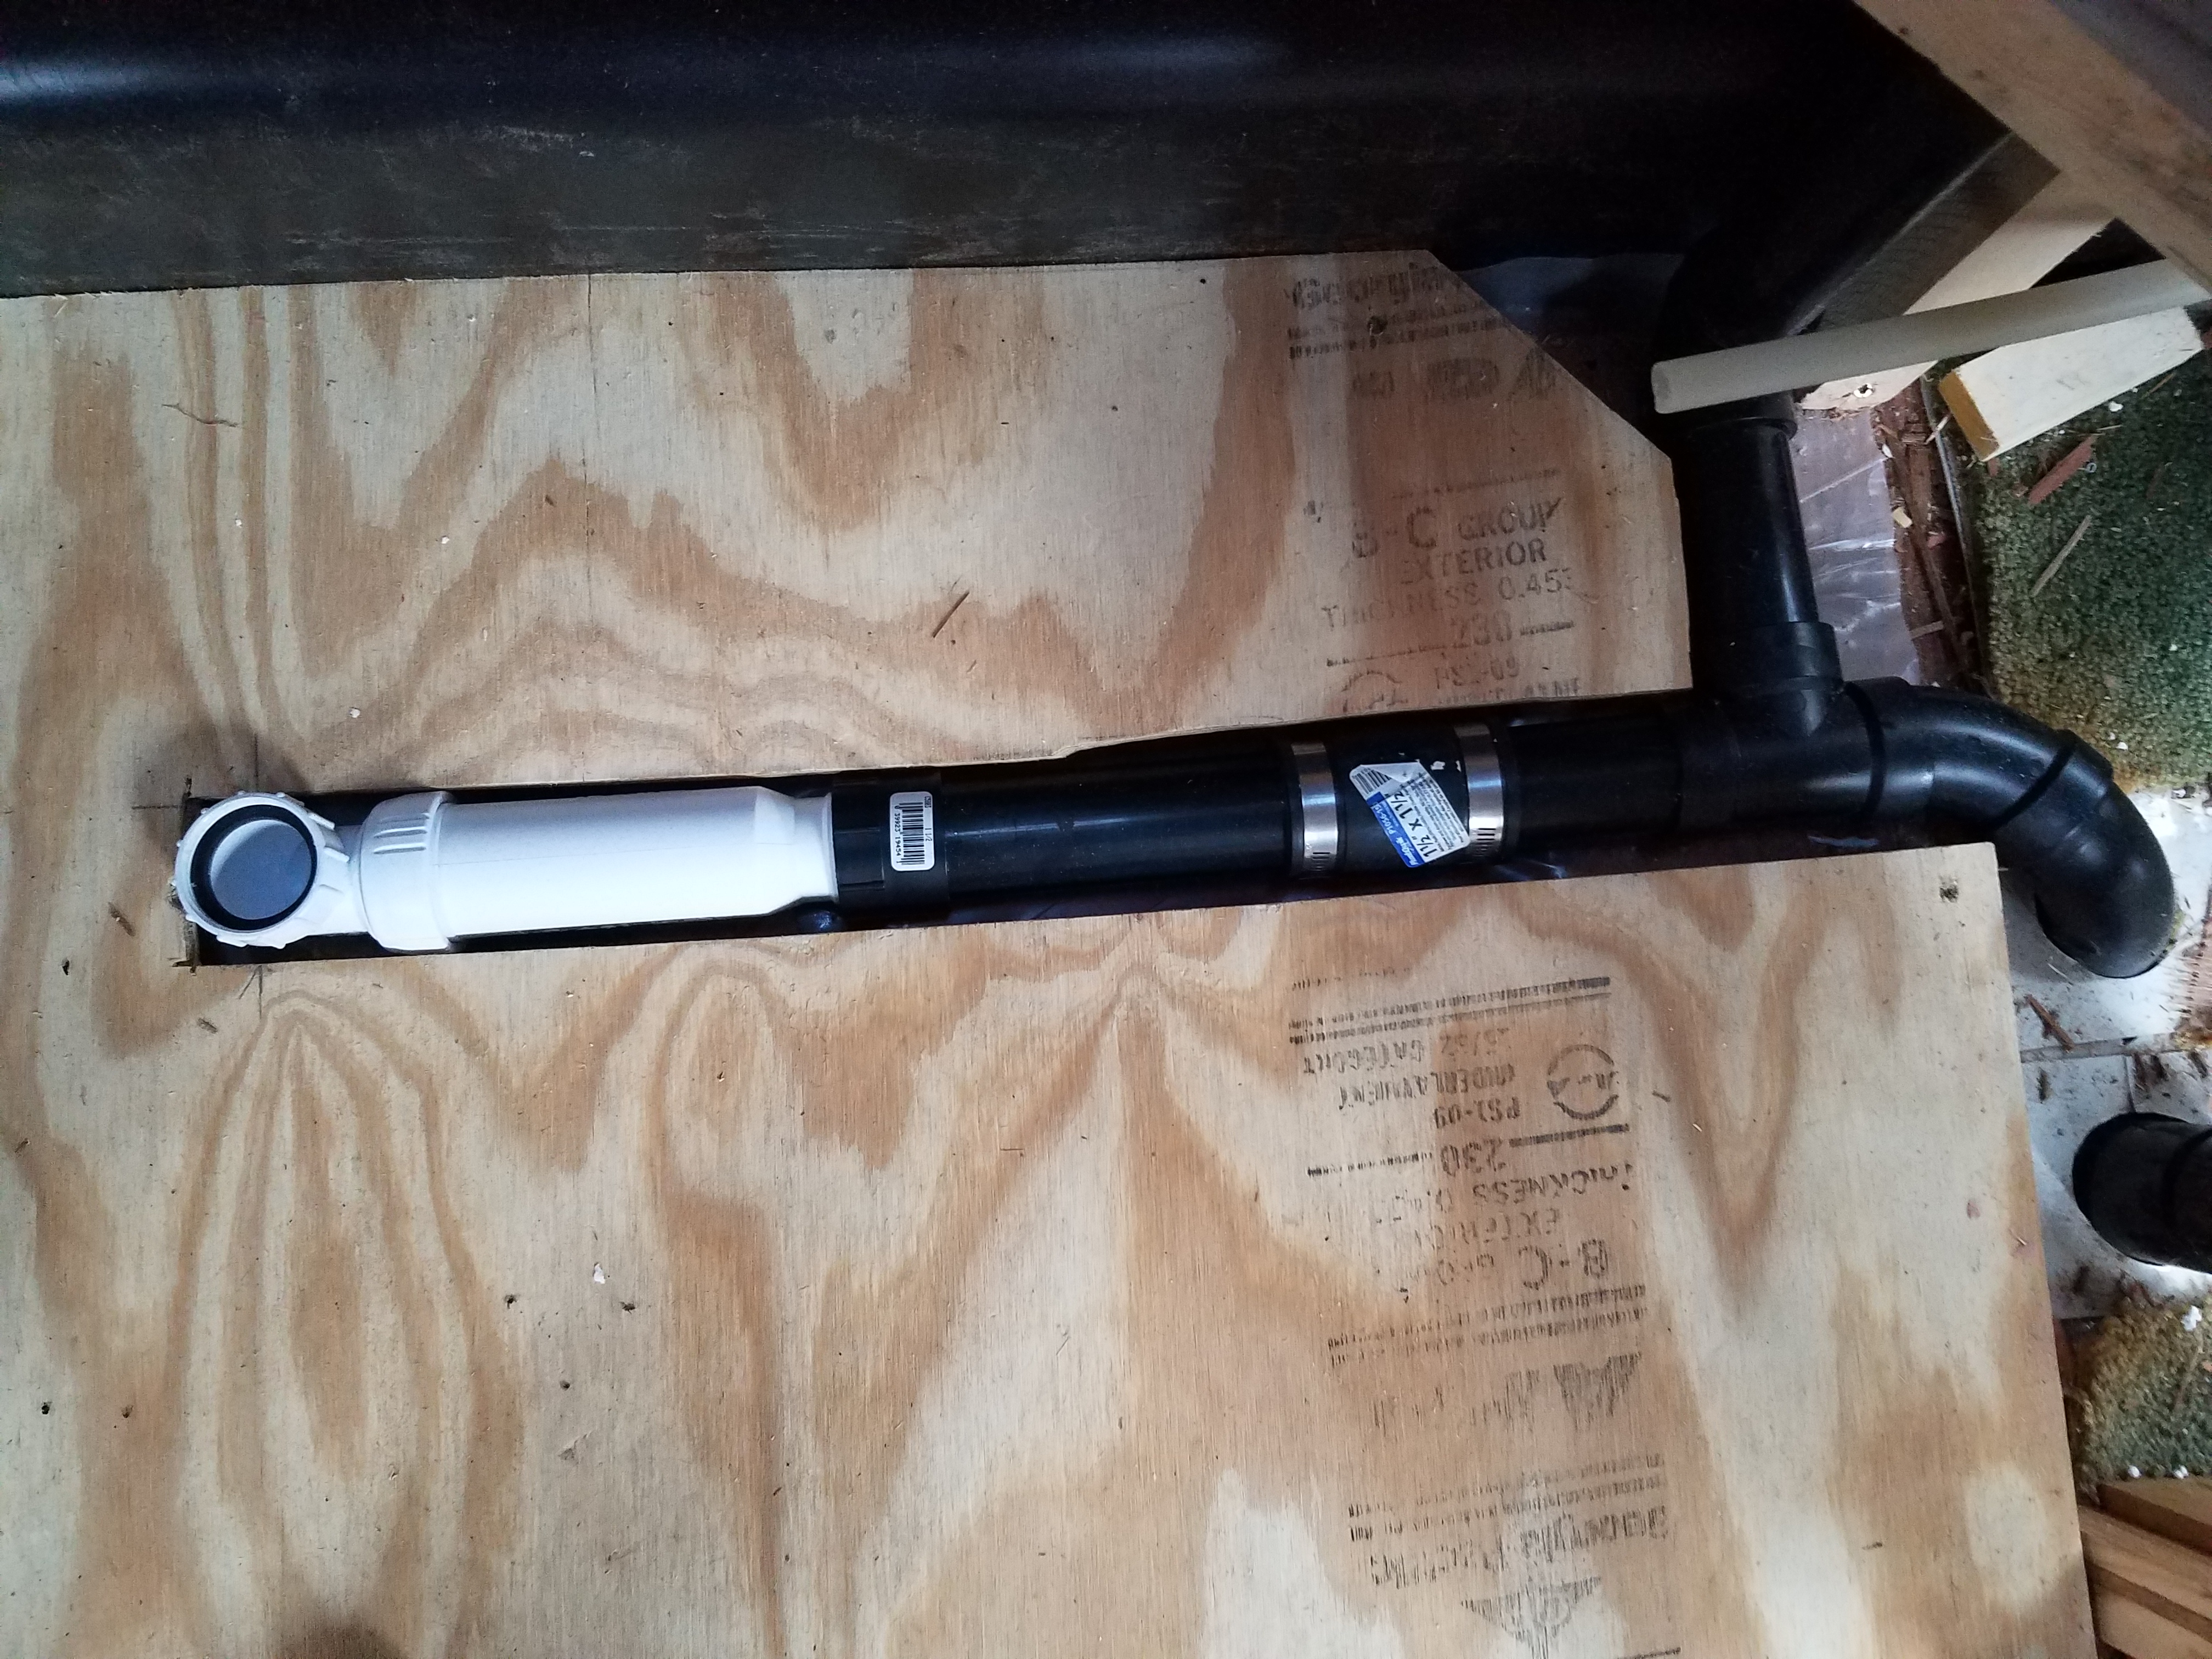
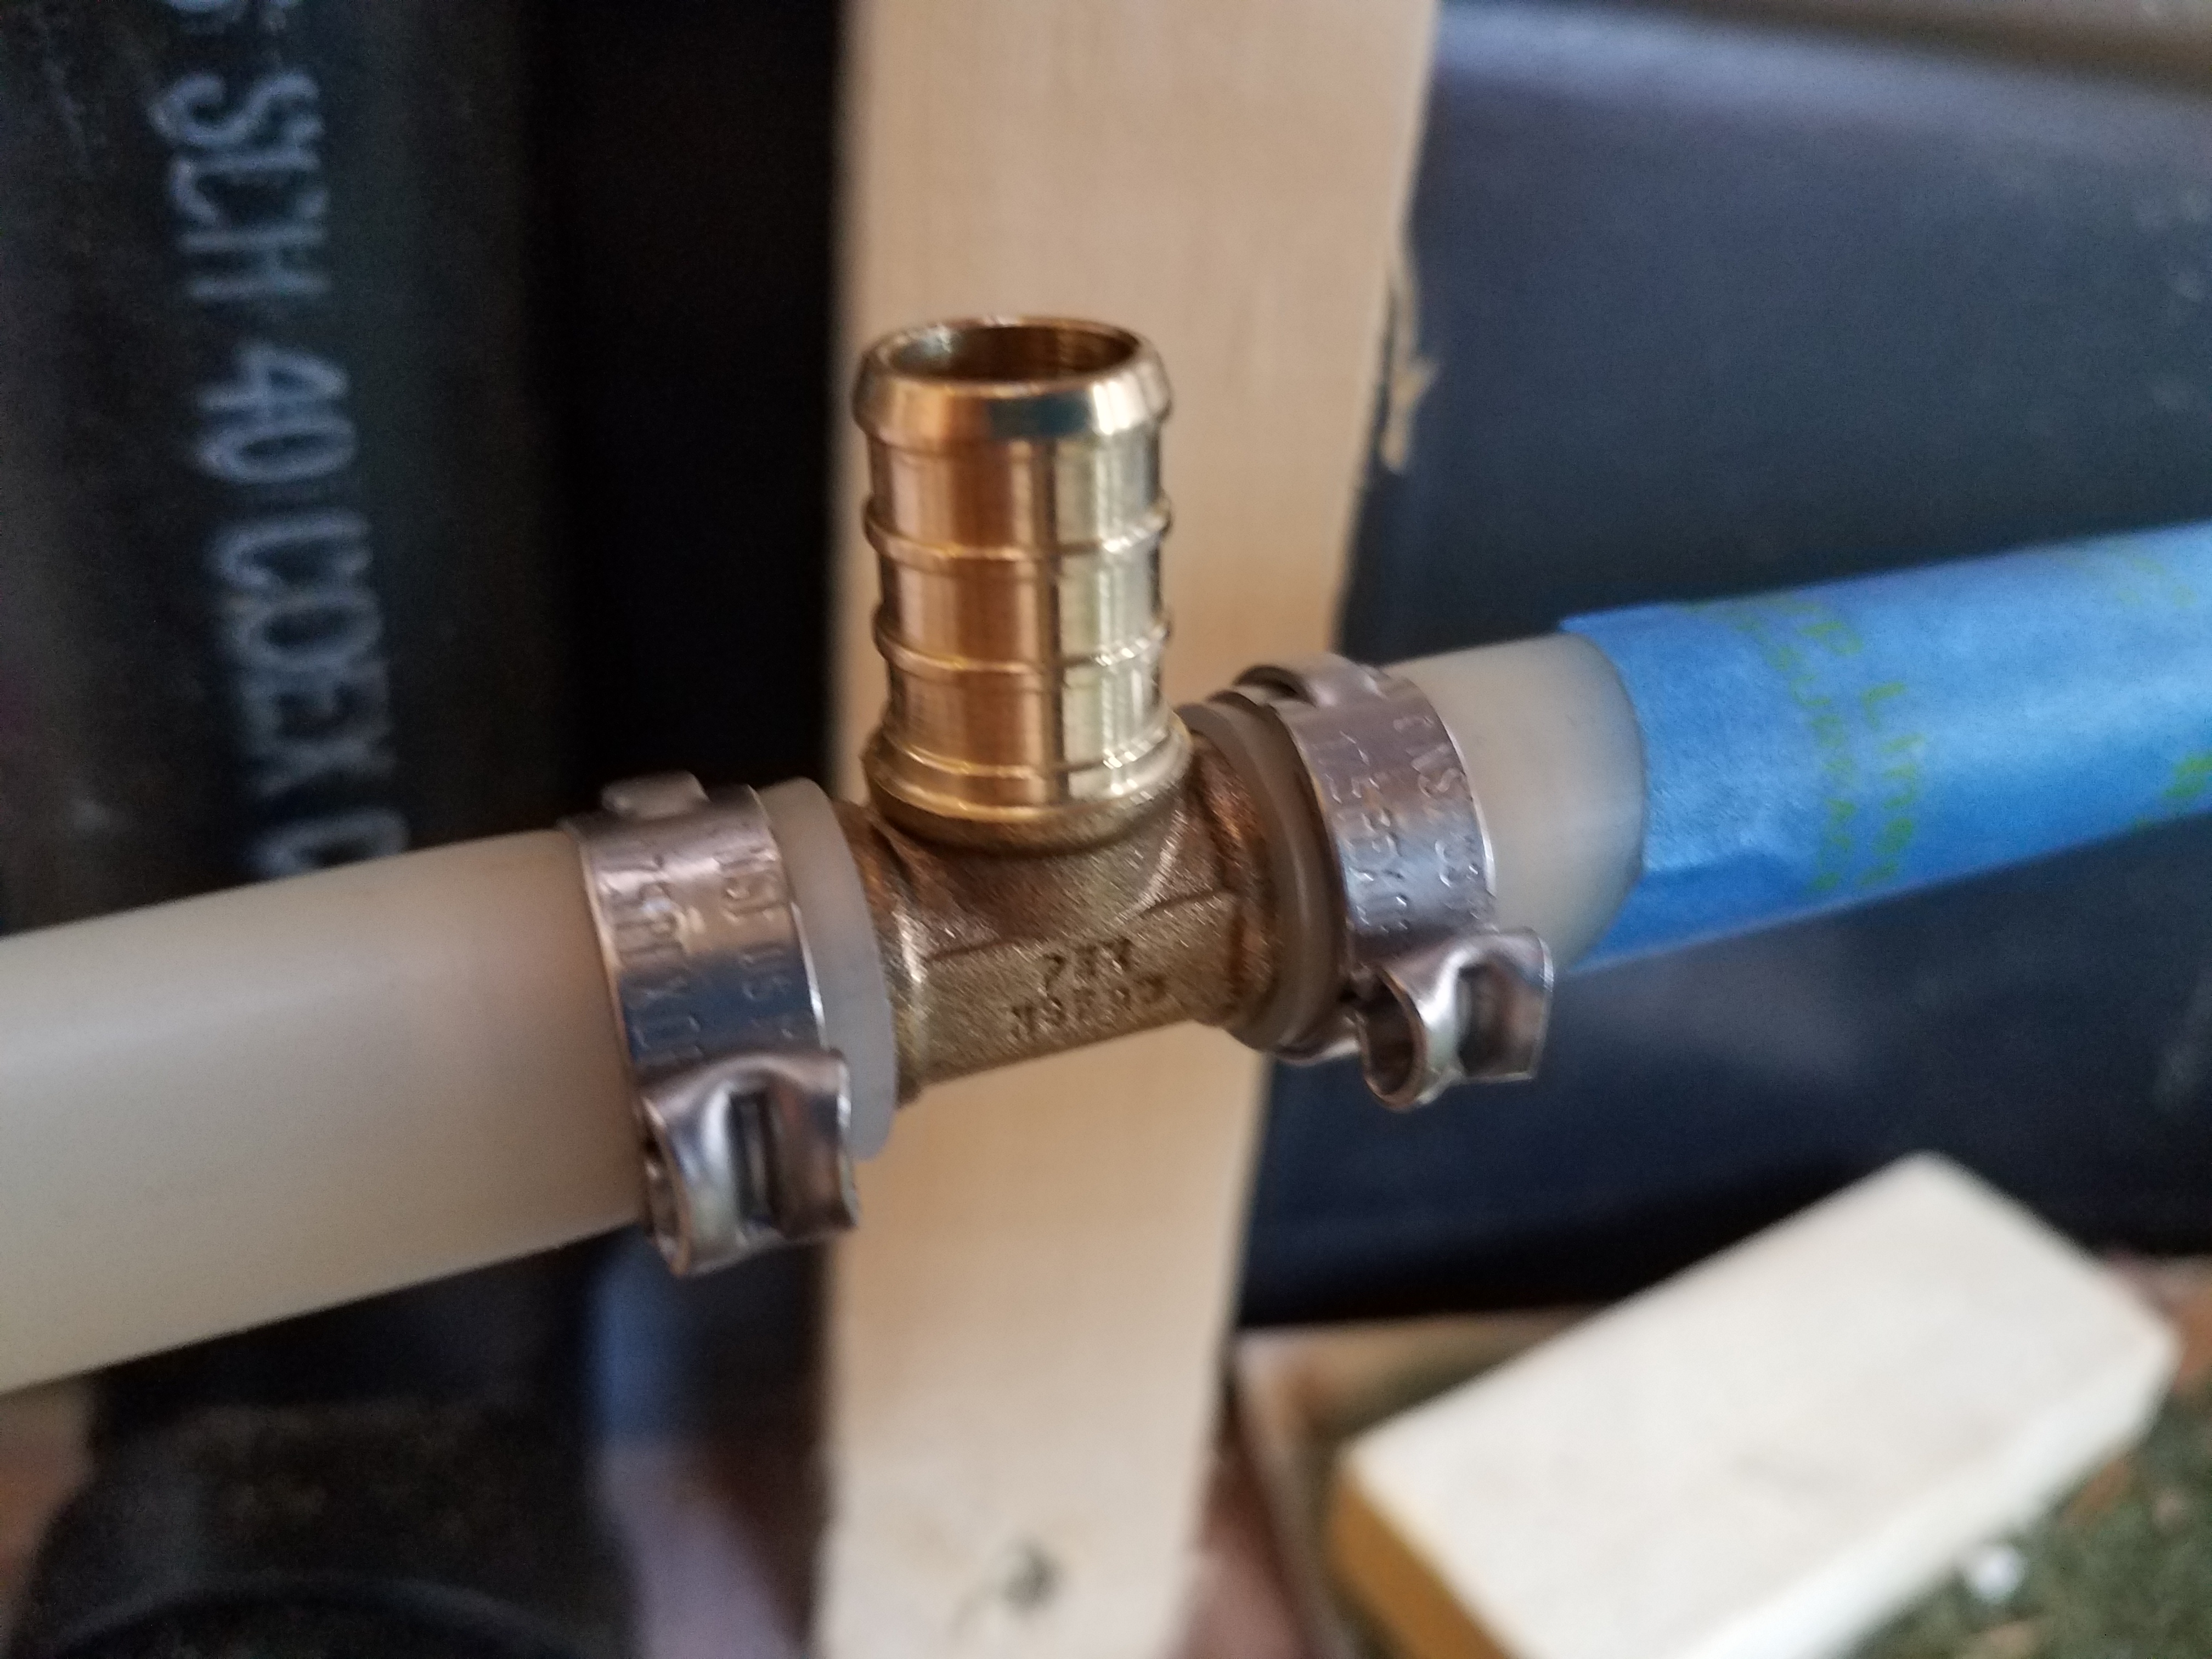
I decided to use a HepVo Waterless Valve in place of a traditional p-trap and air-admittance valve combination. If you research HepVo valves you will see the ingenious design and the many sincere and convincing testimonials about the wonders of the waterless valve (https://hepvo.com/). The main reason I chose it was its small size. It takes up a lot less vertical space than a p-trap and I need everything to be as thin as possible. Although the valve eliminates the need for a vent for sinks and showers, I will still need to vent the grey water tank, regardless. I’ll also use this valve on my bathroom and kitchen sink, and I won’t have to vent those!
The valve and pipes fit underneath the platform perfectly, with hardly any space to spare. I made a straight run between the shower drain and the grey water tank hole. This was made easier by choosing a shower pan with the drain on the left and buying a selection of elbow fittings so that I could find out what I needed on the job.
The shower drain was a very straightforward assembly.
The shower drain → 90-degree elbow attachment HepVo valve → male threaded 1–1/2″ adaptor → a piece of straight pipe → a flexible connector → a straight pipe → a T-shaped fitting → a 45-degree street elbow → the pipe coming up from the grey water tank.
The flexible connector will allow the shower pipes to move a little as we step into and out of the shower. Some flexing can be expected and I want to avoid putting pressure on the pipe joints and creating a leak. The T-shaped fitting is where the vent for the grey water tank shoots up to the ceiling and makes its way through the closet behind the shower along to the vent hole through the roof.

Thankfully, the cut-off angle at the back of the neo-angle shower provides space for the pipes to go up to the ceiling in a convenient nook. The pipe coming up from the grey water tank was turned at a 45-degree angle to accommodate the original shower drain, but luckily, it turned out to align perfectly with the new shower drain.
Once I had the pipes dry-fitted and checked for placement and height, I screwed the pieces of 2×2 that make up the base into the floor, trying to screw into the floor joists as much as possible. Luckily, the pressure on the shower will be downward, so the screws won’t have to work too hard.
Here’s a tip, when you want to make a 45-degree angle, you have to cut the end of each piece of wood at a 22.5-degree angle (half of 45), and then put them together. I’m not exaggerating when I say that I spent a whole day at work puzzling over that in the back of my mind before it hit me. Some things don’t come as easily to me as others do, and woodworking has been a frustrating learning process. It’s not intuitive to me how to make things fit together, but trial and error will get you there eventually.
I used the shower pan to trace the shape on the plywood and just cut it directly to fit. I had to make another cut for the pipes to run below the plywood at the proper slope and one for the vent pipe at the back. We chose 1/2″ plywood because 3/4″ seemed like overkill and 1/4″ seemed too flexible. I’m no plywood construction expert, so I made my best guess.
When I tested the base by putting the shower pan on top of it, I could see that the drain lined up with the hole I cut in the plywood. I dry-fitted the pipes so make sure they would run straight back to the tank and that the hole I cut was wide enough.
Next, I moved on to building the walls of the shower enclosure. First, I built a box around the wheel-well to protect it and allow it to serve as a small closet. The wheel-well is covered by somewhat flimsy plastic that collapses under any weight. By building a box around it and capping it with plywood, I’ll be able to store things on top of it and also build the shower wall on top of it. I probably overbuilt it a bit, but I just used the 2×2 furring strips I had bought for the rest of the project. It was a simple matter of measuring and making a few cuts.
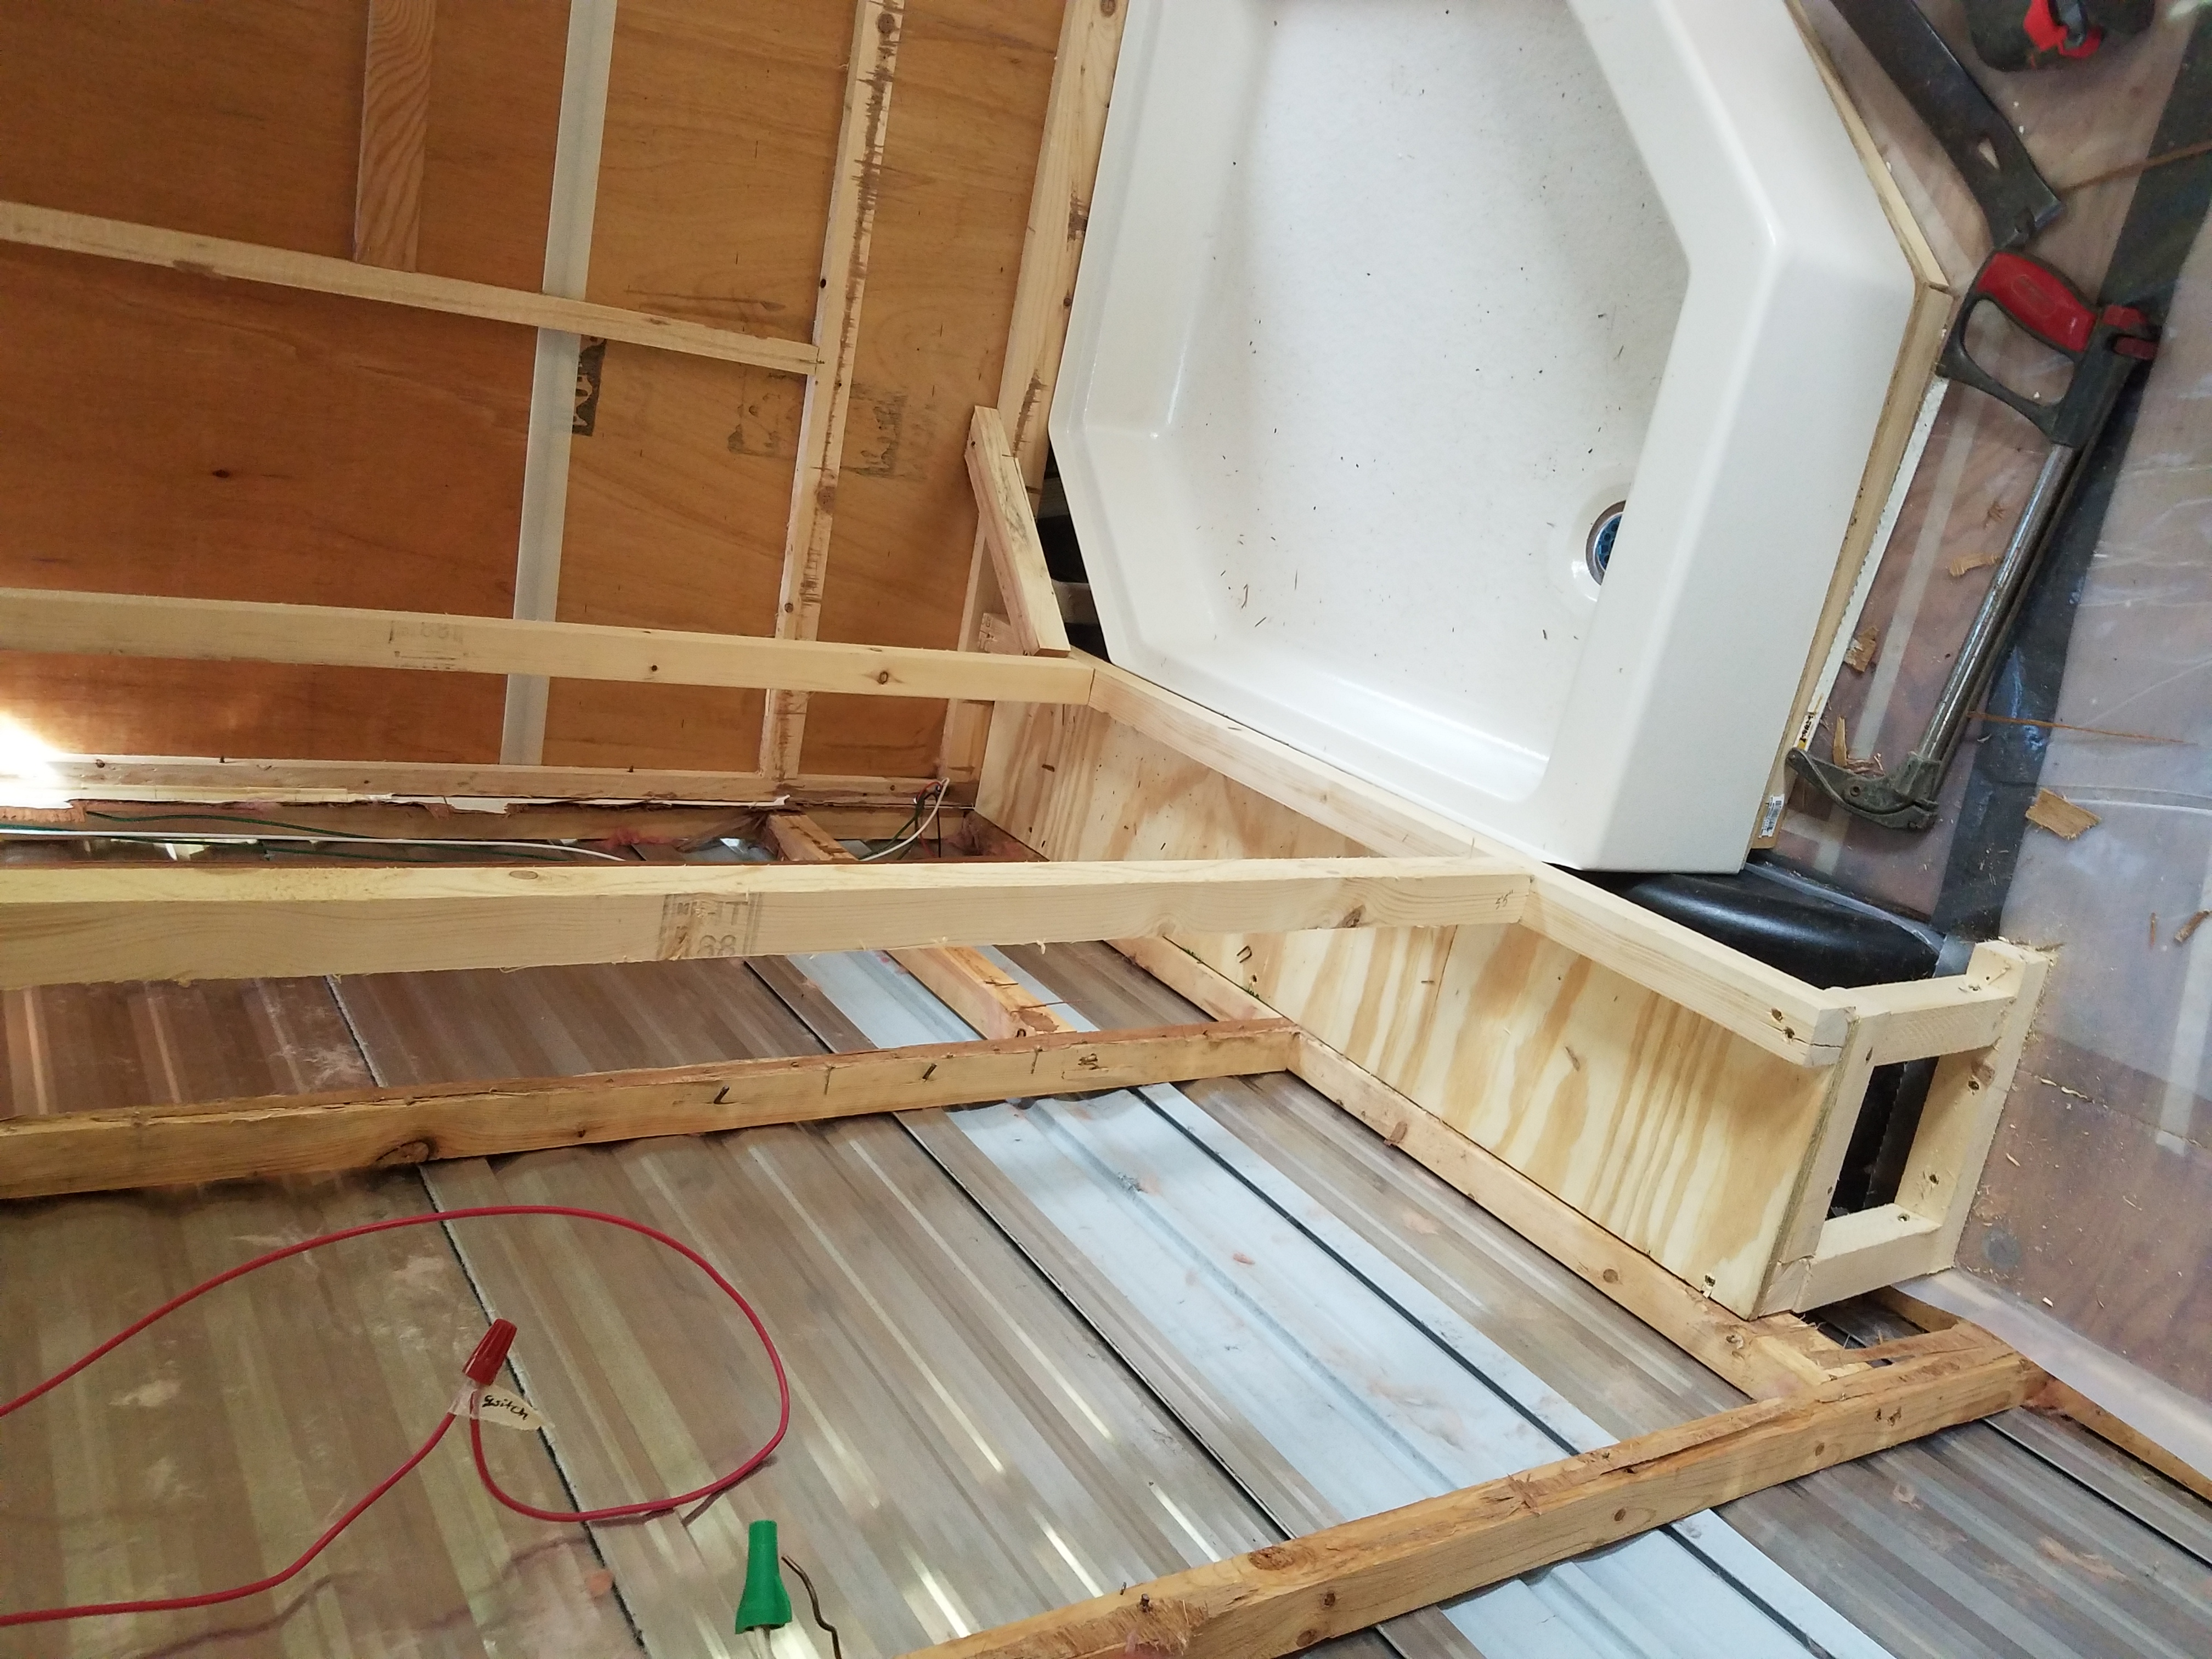
Next, I built the shower wall by cutting the 2x2s to size and screwing them into a header and footer board. The footer board is screwed into the box over the wheel well and the header board is screwed into the ceiling supports. I saved myself some building by using the existing bathroom wall as one of the walls of the shower.
I had to add a little extra length to the original wall, which I did by clamping and gluing an upright board (a 2×2 cut in half) with some horizontal connecting pieces for strength. The boards were too thin for screws, so wood glue will have to do. I’m counting on the shower surround to hold itself up for the most part, since that wall is very thin and rather flimsy anyway.
I’ll need to add a few cross-pieces between the studs to support the showerhead and faucet rough-in pipes, but first I need to finalize the vent and waste plumbing. It’s a lot easier to move PEX tubing around and squeeze it into tight corners than it is to move larger ABS plumbing. Always do the waste plumbing first and the hot/cold water plumbing after.
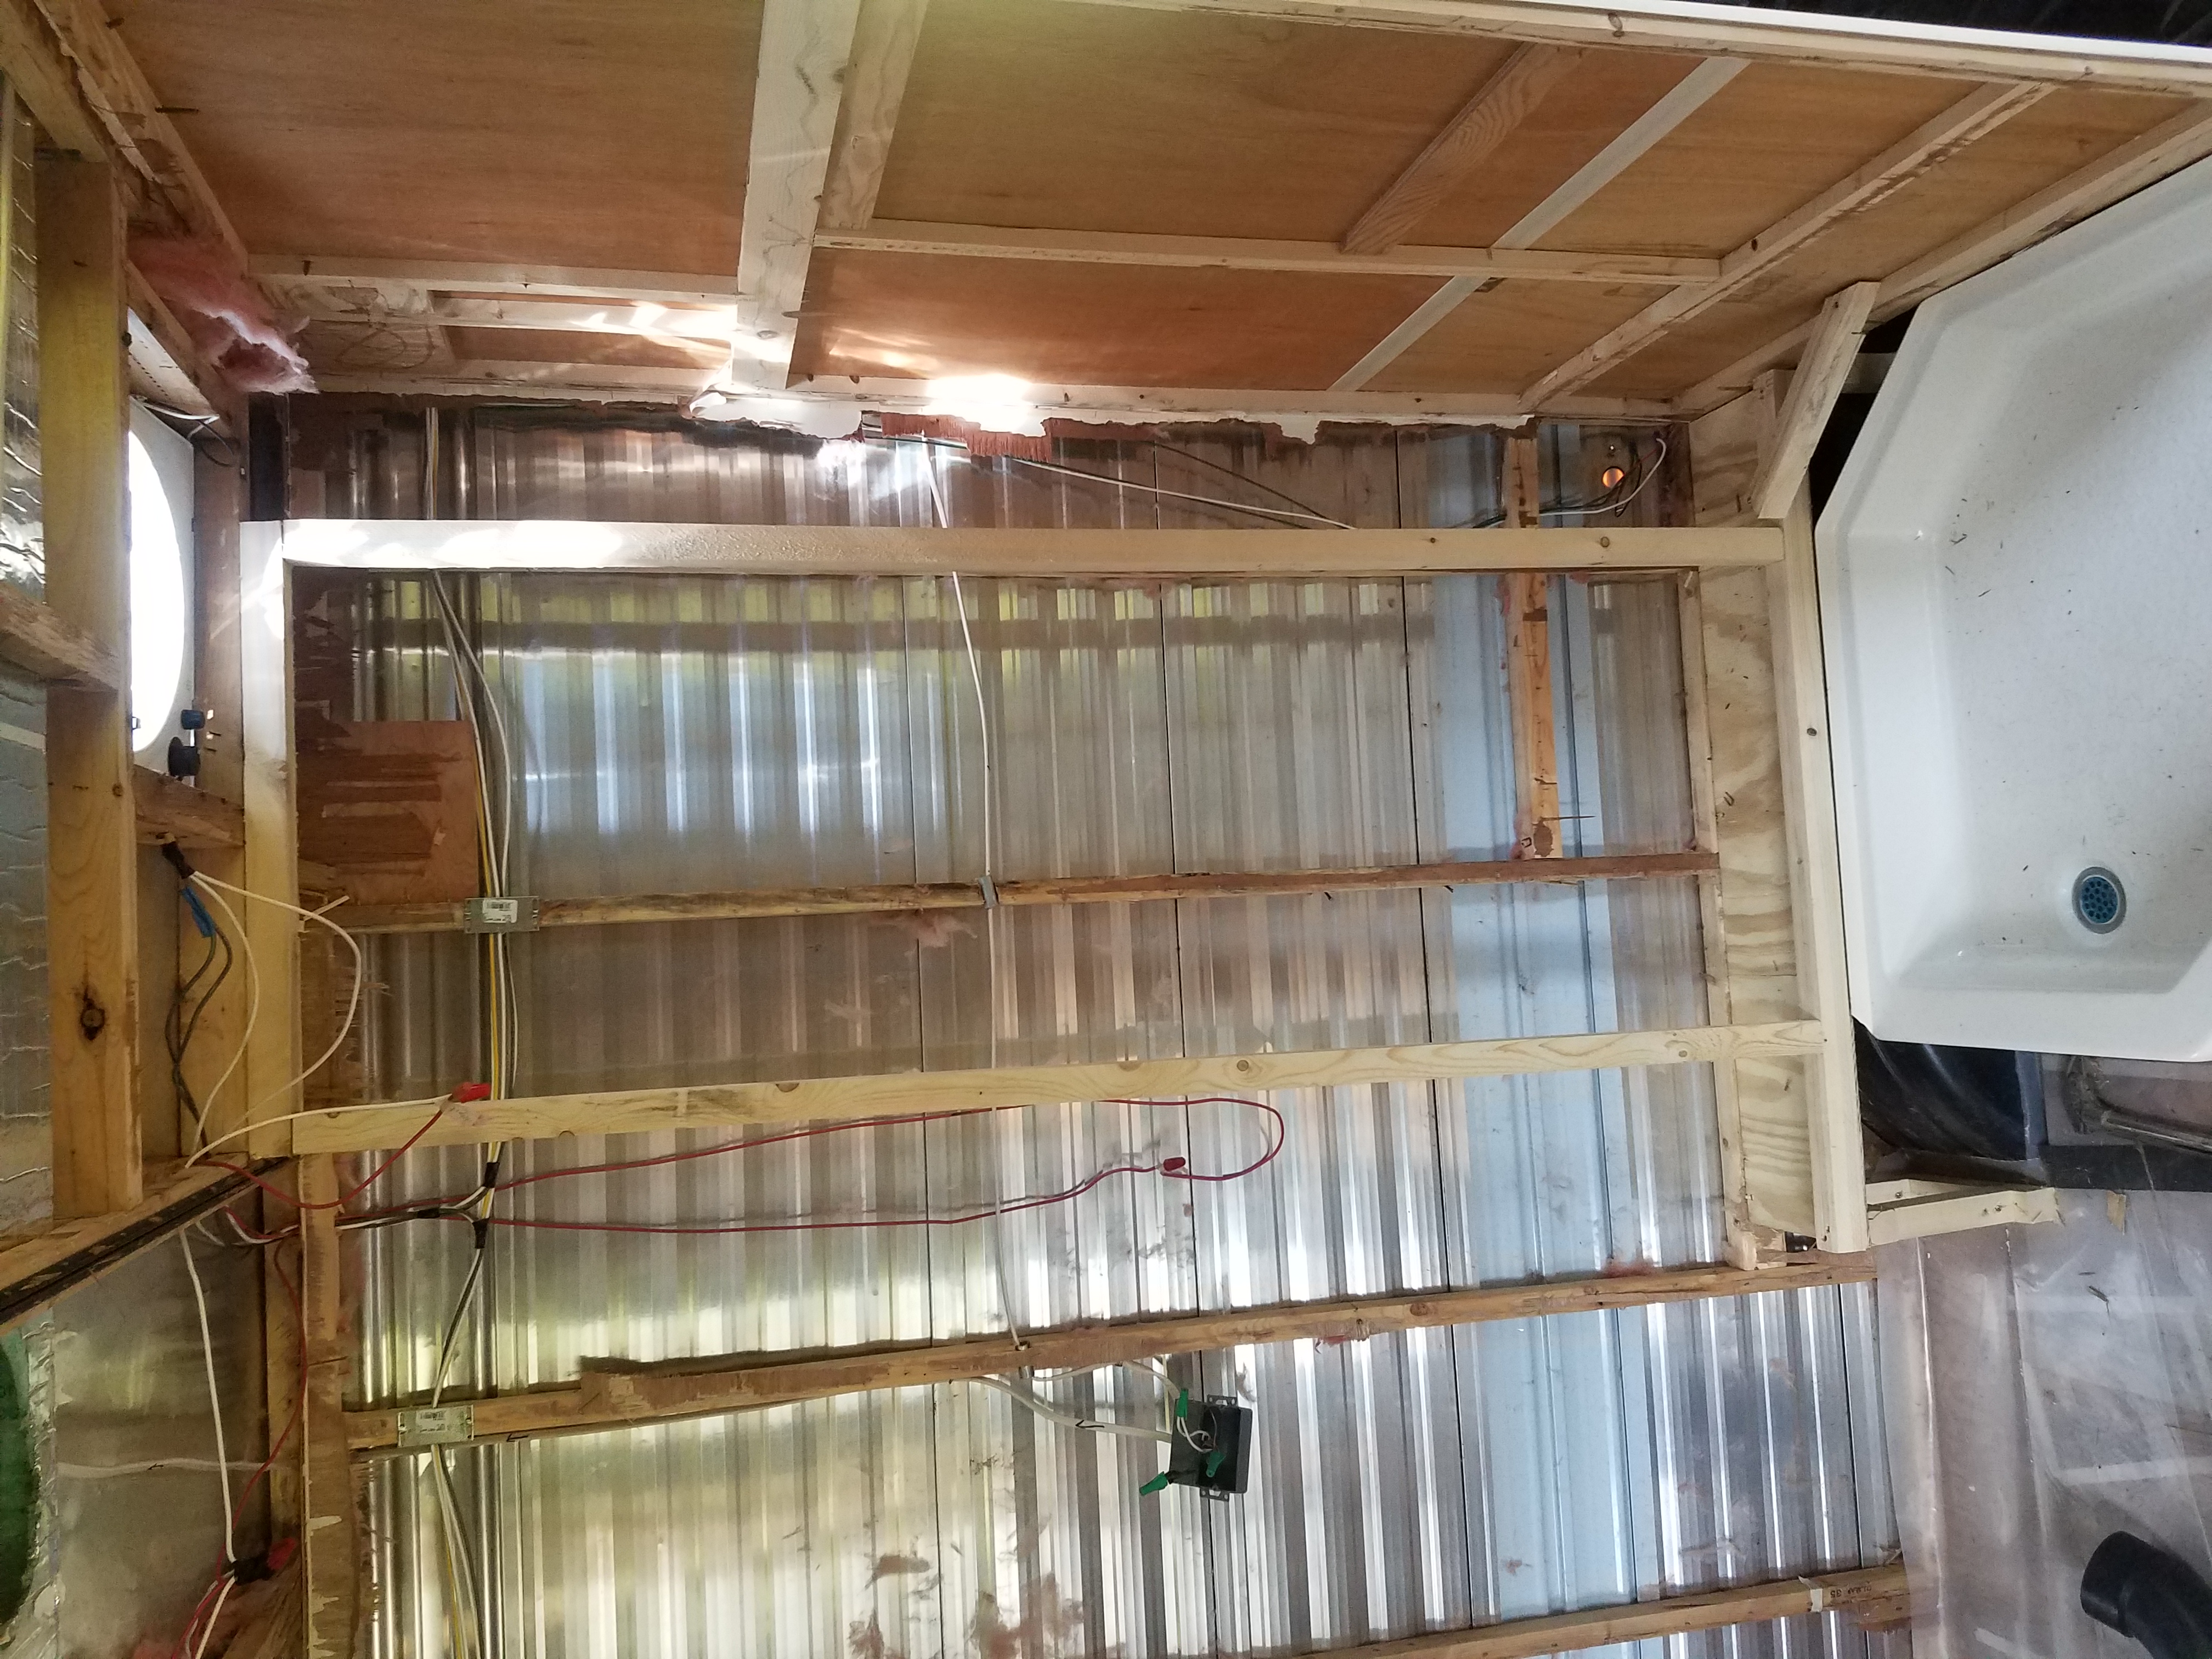
Unfortunately, the vent pipe is too wide to fit in the ceiling, and it won’t be hidden by any convenient shelving (at least not so far). I plan to just paint it the same color as the ceiling and call it a day. I may eventually add more shelving above the toilet which will hide the pipe, but for now, I’m calling it good enough.
I’m about halfway through the rough-in of the hot/cold water pipes for the shower faucet handle. PEX pipes are flexible, light, and easy to cut and assemble. I’m using Shark-Bite brand connectors, but I think they’re pretty much the same as the non-brand ones. The push-to-connect type does not need crimping bands, but they are more expensive. I decided to use the cheaper ones that still use crimping bands. Luckily, I’m able to borrow PEX cutting and crimping tools from my father, since they’re a little pricey when you’re only doing one project.
I’ve split the cold water line in one place to run a water line to the toilet, and then in another place to run a water line through the ceiling and across the camper to where the sink will be. The hot water line is split once to run across the ceiling to the sink. Using the SharkBite crimping tools is very easy and intuitive. It’s a little like building with legos.
I’ve purchased a pressure/temperature regulator for the brand of faucet handle that I like. It turns out that there isn’t a universal one, and each brand only fits its own regulator. I ordered mine on Amazon, as well as the handle and showerhead to match. As this is an RV, I’ve ordered a low-flow showerhead that only uses 1.5gpm (gallons per minute), as opposed to 2–3gpm that most showers use. They also sell 1.25gpm showerheads. Using less water will be good for your utility bill, good for the grey water tank, and good for the planet. Check the reviews, of course, to find ones that have high pressure and don’t feel too weak.
We’re using corrugated steel roofing panels for our shower surround instead of buying a pre-fab one. The metal panels are dark green and were much cheaper than any plastic surround I could have bought. I honestly couldn’t stand the idea of paying $300 for a few plastic panels. The shower pan was too difficult to fabricate, trying to get it to slope to the drain and all that, so I had to bend on that one. But for the shower walls, all we needed was a waterproof surface, which offered us a lot of flexibility in materials.
The biggest issue with using metal roofing panels is that that metal is not as light as plastic, but the roofing panels have a certain amount of structural strength that plastic panels lack and which will benefit the trailer. And they’re not too heavy. I also think they’re going to give the bathroom a little originality. I’m trying to avoid ending up with the cookie-cutter sameness of the trailer in its original state.
We’ll use neoprene washer roofing screws that will prevent water from getting behind the panels when we attach them to the studs. We’re also going to put more of that thick plastic between the panels and the studs as an extra precaution against the metal sweating.
It took me a few weeks between dry-fitting the plumbing and finalizing it with glue. I’m a complete chicken about that sort of thing. Once you glue your pipes, it’s all over. There’s no going back, you’re stuck with whatever you got or you have to start all over. So, I was terrified to commit.
Finally, I double-checked and triple-checked my pipes, figured out what order to glue them in for maximum ease of installation, and started gluing them together. I had one final pipe at the end that was the last chance to make a change and I almost left that one for another day, but then I decided I wanted the shower plumbing Finished and checked off, so I went ahead and glued that one too.
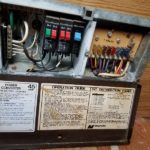
I’ll update you on the finishing of the shower when I get there. I’ve got several projects going at once right now (insulation, toilet plumbing, and some electrical touch-ups) which is making each project go slowly individually, even though we’re making a lot of progress overall.
Additionally, it’s been Really, Stinkin’ Hot in southern Virginia this past week and we procrastinated a bit on the project. Swimming in the pool is a much more attractive way to spend a 105-degree afternoon than sweating in a hot, dusty trailer.
Stay tuned as finish up our multiple projects shortly and see how it all turns out! Next, insulation! The other way to beat the heat (or cold).