Renovating our 1997 Fleetwood Mallard for Full-Time Living (Part 21)
The story of how my husband and I purchased a 20-year-old travel trailer and I DIYed the crap out of it to make it suitable for full-time living. In this series, I’m giving All of the details about the process step-by-step, as performed by me, a 26-year-old woman with No experience in construction. The first installment in this series details the purchasing process and the changes I planned to make. You can find that article in the link below and start at the beginning. Then, follow along in the series by clicking on the link for the next article at the bottom of each page.
Choosing the Type of Flooring
What type of flooring you want in your trailer is a big decision and there are so many choices. As usual for me, I spent weeks thinking about and researching different kinds of flooring, what other people put in their RVs and trailers, prices, features, and our own particular needs. (Yes, weeks, but that’s only because I worked the front desk at a library and had a lot of time during work to do the thinking and research.)
For us, the biggest concern when it came to flooring was the danger of water infiltration (of course). Water splashing out of the sink or shower could leak down through the flooring and start molding and rotting our subfloor. We knew we needed waterproof flooring in the kitchen and bathroom areas.
The easiest solution would be to use vinyl sheets (like linoleum) in those areas and cut them to fit without any seams. However, I didn’t like the idea of splitting up the flooring in the main area. Our kitchen is also our dining area and that flows directly into our living area. It’s already such a small space that changing the flooring and creating more of a visual distinction between the“kitchen” and the “living room” will make each space seem smaller. One floor flowing throughout would create the most sense of space and also be easier and cheaper to install.
However, putting vinyl sheet flooring throughout did not appeal to me. Our subfloor isn’t the most perfect surface and vinyl sheets show every divot, crack, and seam. It also doesn’t have any cushioning or insulating properties and I don’t like the cheap way it appears. I really wanted plank flooring that has the appearance of real wood. I want this trailer to feel like a home, not a trailer. To me, vinyl sheets just scream “trailer!”
There are other options for the flooring to consider. Laminate flooring is MDF (wood chips glued together) covered on both sides by plastic in the form of planks. It’s light and relatively cheap as well as easy to install, but it can’t hold up to extreme temperature changes and it tends to swell and warp in high humidity. Now, there are varieties of both vinyl and laminate that have improved insulation, durability, etc. Also, viny comes in a lot of really cool patterns and designs that give you a lot of decorating freedom. One of these options might be right for you, but neither of them was right for me.
I started looking into waterproof luxury vinyl planks. Luxury Vinyl Planks (LVPs) are made entirely of plastic so they don’t swell up when they get wet and their interlocking installation system prevents water from seeping between cracks and getting to the subfloor. They float on the floor, providing some room for shifting as the trailer shifts during travel, rather than cracking and breaking as glued-down planks could. They also have beautiful imagery and texture to mimic wood in a hundred different shades and treatments. These floors look wonderful, stand up to wear and tear, defend against water, and can stand up to the humidity and temperature ranges in a trailer.
Aaaand… they’re not cheap. Low range prices are about $1.60 per square foot, while vinyl sheeting comes in as low as $.88 per square foot. High-end LVPs can cost $4 per square foot. Even with our tiny square footage (less than 200 square feet) that still adds up. I originally looked at the cheaper range with the budget in mind, but after reading reviews, I didn’t want Cheap flooring that would crack and scratch and not really provide the features that made me go for LVP in the first place. I decided to look at middle-range priced brands.
Buying Flooring
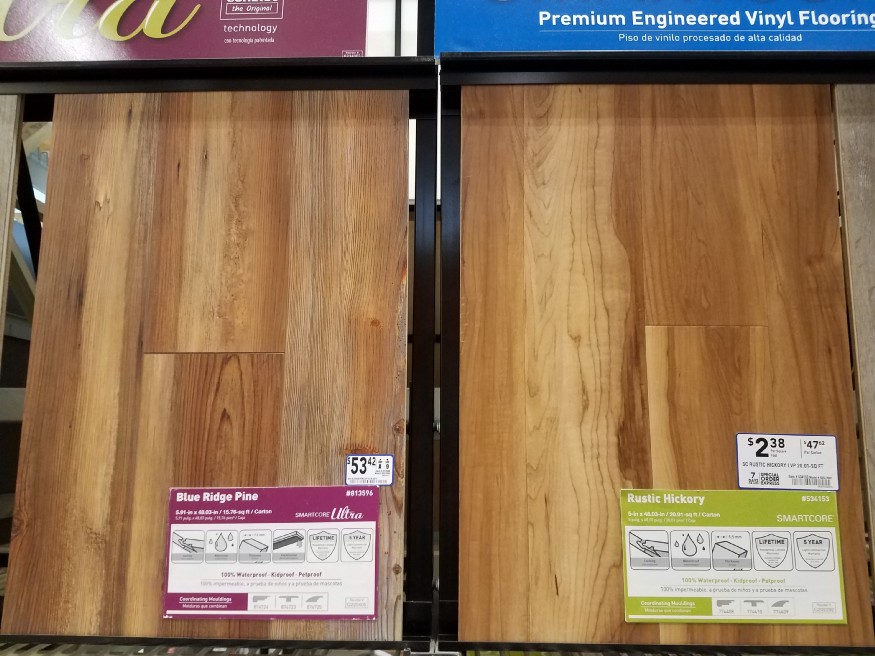
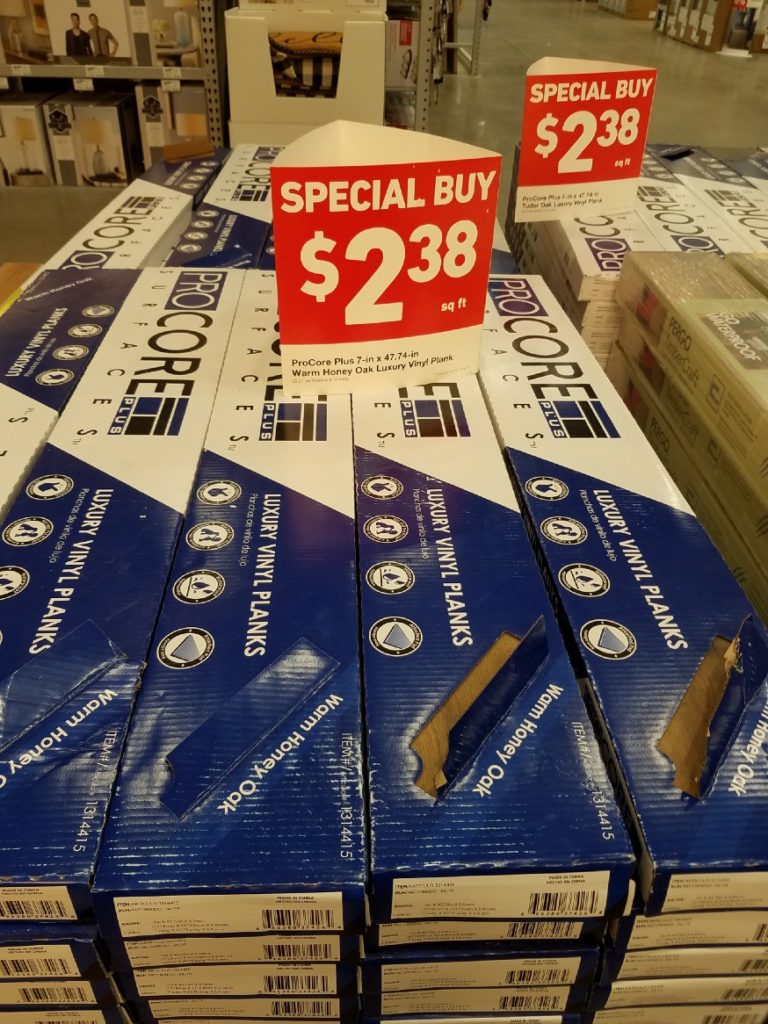
I got really lucky while I was at the store, just trying to get more construction adhesive. There was a clearance on LVP! The clearance items were the “Pro” version of the Smartcore brand. The brand has levels of expansiveness that also correlate with quality. You’ll probably find that most brands do something similar, giving customers a choice of price and quality features. For Smartcore LVP, the Basic version is the cheapest, then Ultra, and finally Pro. I was looking at the basic Smartcore planks, and enviously wishing I had the budget for the “Ultra” Smartcore planks, which came with a built-in pad for insulation, cushioning, and sound dampening. The pad also helps even out imperfections in your subfloor. The planks are thicker and more comfortable to walk on. I couldn’t afford them, though.
These clearance planks were the “Pro” version, which had the built-in pad and also an extra thick protective layer on top to withstand more wear and tear and resist scratches and gouges. They actually had an even higher temperature range tolerance, which is important for trailers that may be stored for long periods without climate control. They were normally $3.60 per square foot (way too expensive) but were on clearance for $2.38, even less than the price for the basic version of the brand!
Of course, the catch was there were only two colors on clearance. One of the colors was a very dark brown and the other color was a very bland greyish-brown called “warm honey oak”. I love the look of a dark brown wood floor. I think they’re striking and warm and cozy. However, I already decided that it wouldn’t be a good idea for the trailer. Dark colors tend to make a space look smaller, and our trailer doesn’t need to look any smaller than it already does. Light colors bounce the sun around and create an impression of space and freedom that we’ll really want in our tiny home.
That left me with the other color. I wouldn’t necessarily have chosen warm honey oak, but from what I could tell through the small viewing hole in the box, the color was very inoffensive, innocuous, and vanilla. It was a floor-colored floor. It wouldn’t be a fashion statement, but it would be very good quality at a great price and the color would go with any color or decoration scheme in the rest of the house. I decided I didn’t care about the color of the floor enough to pass up this deal. I bought 8 boxes and felt like I’d gotten a steal.
Installing Flooring
Then I picked up a box and realized how heavy the flooring was. They don’t put weight in the specifications because most people don’t care how heavy their flooring is. It doesn’t matter in houses as long as it’s not concrete or marble or something like that.
In trailers, on the other hand, weight is crucial. These boxes of flooring were Heavy. I looked online and it seems like LVP weighs about 2lbs per square foot. That’s almost 400lbs of flooring in my trailer! That’s a huge amount of the available weight for something like the floor.
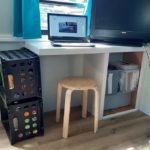
Flooring is important, but it’s kind of a background thing, not something I consider critical for living. A vinyl sheet would be a lot lighter. On the other hand, we may have weight to spare with all of the changes we’ve made to the trailer. We’ve removed a lot of wood by going from cabinets to open shelving and getting rid of the bulky dinette. How much wiggle room do we have to spend our weight on something like flooring? We don’t know. And then I considered all of the reasons that we went with LVP in the first place. The durability, water protection, and wood-like luxury appearance are all important to making this trailer into a full-time home.
It’s a difficult choice to make and, as with most things, there is no right answer. You have to weigh the pros and cons and decide what is important to you. In the end, I don’t regret my choice. The LVP is waterproof, durable, and beautiful. It’s everything I wanted in a floor for full-time living and long-term quality. Incidentally, when we rolled out of Virginia on the way to Oregon, our trailer was almost exactly at the weight limit for what the truck could pull with all of our stuff packed inside it. *phew* We got away with it. However, if we move again, I’ll probably rent a small U-Haul to pull behind the Subaru and take some of the weight off the poor truck.
When purchasing flooring, remember to buy 20% more than the square footage you’ll need. I calculated my square footage really precisely, subtracting all of the areas under the couch, under the bed, under the kitchen cabinets, etc. I have been on a tight budget with this remodel and I didn’t want to waste any money on extra flooring. It was hard to be exact, so I went ahead and bought the extra 20%. The flooring was on clearance and there is a good chance I wouldn’t be able to find anymore if I suddenly ran out. Running out would be worse than spending a bit extra. In the end, I did have an extra box or two. Maybe my parents can use it to re-floor a bathroom someday.
I’m very glad that I didn’t have to install the floor myself. It’s not that installing a vinyl plank floor is necessarily very complicated or very difficult, it’s just that it’s very time-consuming, exacting, and physically demanding. It requires kneeling and crouching for hours on the floor, making a million tiny measurements and cuts, and then pounding each plank into place.
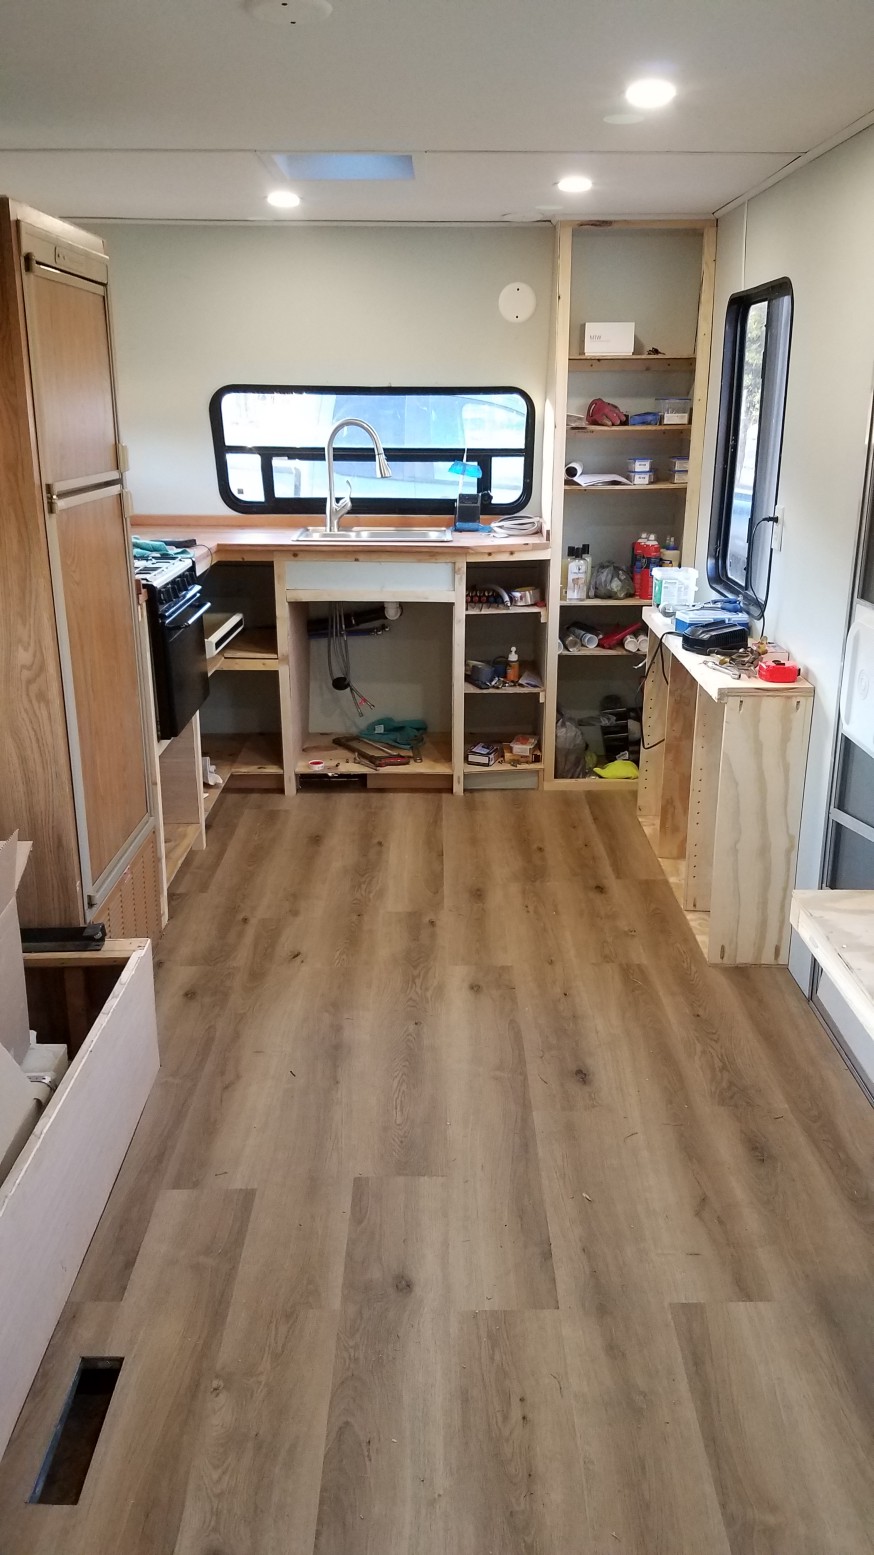
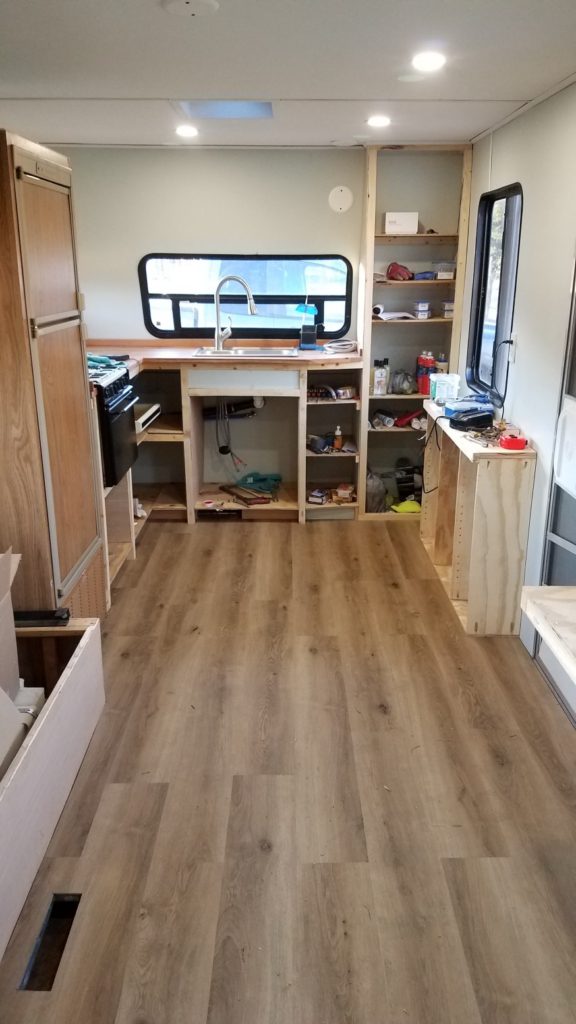
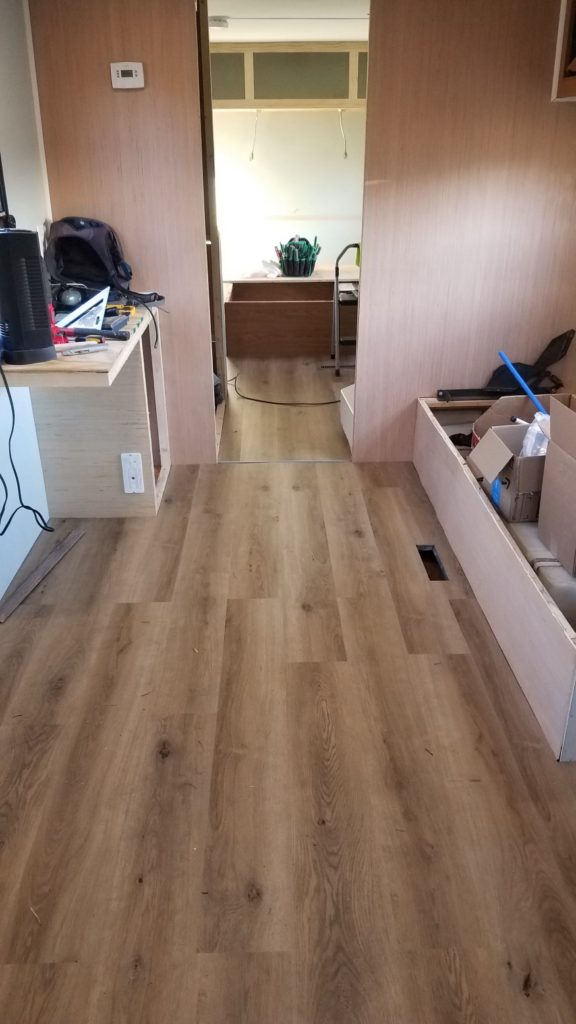
My dad did the work for me during the final, insane month of running around before the move. He used the “chop saw” (miter saw) and jigsaw to make the small cuts for corners, edges, and non-square lines. I know it was difficult to work with the spaces in the trailer because there isn’t much area that doesn’t have an edge or corner, unlike the house where you might have many feet of easy, straight flooring in the middle of a room or hallway. It was extra difficult because the planks are truly square, with 90-degree edges, and not much in the trailer is square. He showed some truly impressive attention to detail and perseverance over about 3 days of working on the floor. Thank you, Dad!
I know, there isn’t much that’s DIY about installing flooring, and I didn’t do anything truly creative with this aspect of the trailer rebuild. I recommend taking a look at some of the very interesting options other DIYers have come up with, including painting and sealing the plywood itself. Saves weight, space, and money!
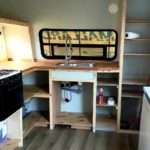
However, I didn’t want to leave out this part of the rebuild since it is an important part of finishing and I did a lot of research to make a decision. There are so many options for flooring and it all depends on your style, your budget, and what you’re willing to sacrifice to have a nice floor. We’re very happy with our LVP flooring and it hasn’t given us any trouble since we’ve been living with it for almost 2 years. The color turned out to be browner and warmer than it looked in the store and it looks remarkably like real wood, which I love. I recommend it, especially if you can get it on clearance!
Stay tuned for some of the rest of the trailer re-build as we rushed to get ready for our big move to Oregon!