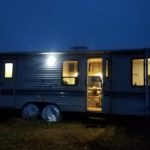
Renovating our 1997 Fleetwood Mallard for Full-Time Living (Part 20)
The story of how my husband and I purchased a 20-year-old travel trailer and I DIYed the crap out of it to make it suitable for full-time living. In this series, I’m giving All of the details about the process step-by-step, as performed by me, a 26-year-old woman with No experience in construction. The first installment in this series details the purchasing process and the changes I planned to make. You can find that article in the link below and start at the beginning. Then, follow along in the series by clicking on the link for the next article at the bottom of each page.
As I was able to start turning my mind towards less critical projects, I was excited to work in the living room. I had left the couch and the overhead cabinets during the entire renovations, so I hadn’t changed much in here, except ripping out the existing cabinet across from the couch. I had a plan for that corner and it was time to get started.
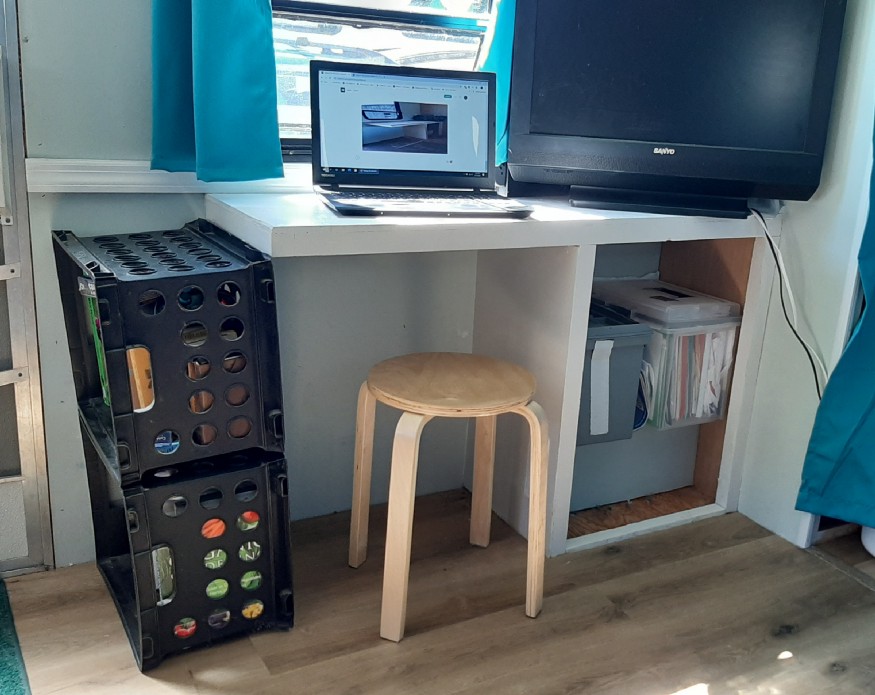
The wall across from the couch is obviously the right place for a TV cabinet! Despite my stated goal for the tiny house life of spending more time outside and watching less TV… I’m still not ready to go completely without one. Also, my husband would probably riot.
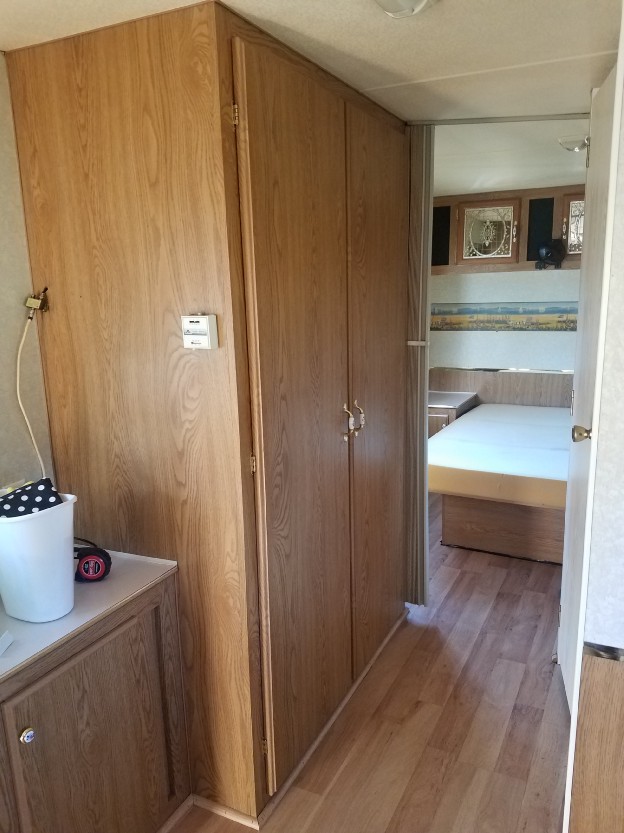
The original TV cabinet was pretty small, and they put a recliner between the cabinet and the door. I have no desire to incorporate a recliner across from the couch, and the old cabinet needed to come out in order for me to build the box over the wheel well. That gave me a great opportunity to make an improvement! I’ll be putting a new cabinet in its place as well as extending that tabletop under the window to act as a desk. I do enjoy writing (maybe self-evident) and my husband has worked from home in the past, so I know having a desk will be helpful to us.
Designing the Desk
This TV stand/desk is a pretty small project and not too difficult to figure out after all of the woodworking I’ve been doing for this project so far. Also, I practiced my woodworking skills by building a desk for my husband for our anniversary. It didn’t come out like the plan, but that, friends, is why we practice! Anyway, he was glad to have a bigger, sturdier desk with storage for his work-from-home job. I was glad to have the practice before building something that would feature permanently in my home. This is the plan I used for practice and it came out wonderfully, considering my inferior building materials and complete lack of experience. Ana White has a lot of lovely designs, and I definitely recommend her work.
The hardest part of this build was that by this time our move across the country was looming very large on the horizon and I had to start rushing everything. I decided that having it all done was better than having a few things done well and most things not done at all. I ended up using the materials I had on hand and doing a lot of shrugging and saying “good enough!” I also wasn’t able to take as many pictures of the process as I otherwise would have. Turns out that packing up your house while also building your new house in about 1 month is more than enough work!
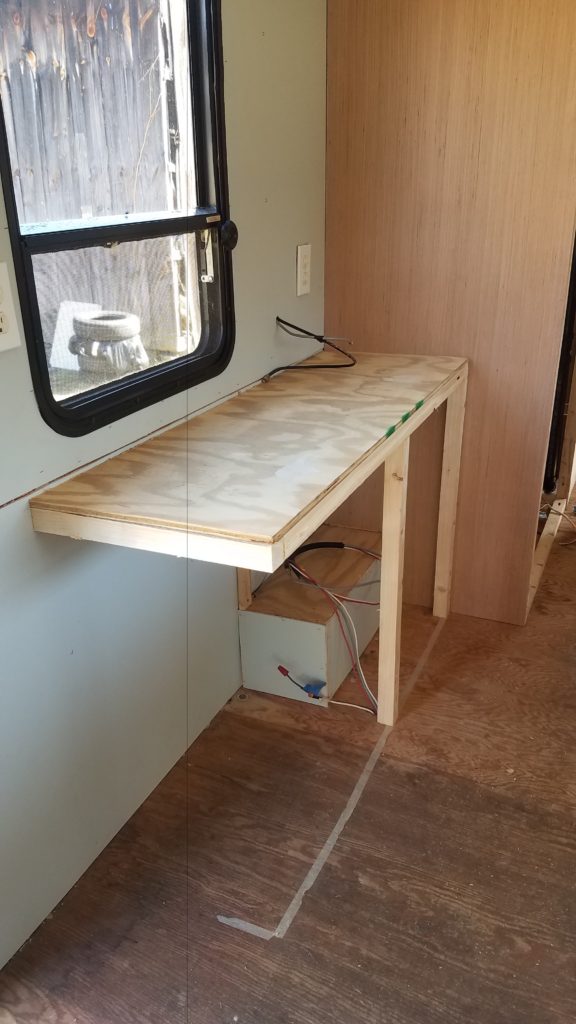
As for my table, my motto was, as always, keep it simple! I decided to build a simple square cabinet to enclose the part of the wheel well that sticks out past the closet. Then, I simply extended the tabletop beyond the square cabinet base to act as a floating desktop under the window.
I made sure to leave 12″ of space between the end of the tabletop and the doorway. I hate the feeling of being crowded when you come in and out of the door, and I want to make sure there’s room for arms full of groceries and puffy winter coats.
The length of the tabletop was determined by the space between the closet and the door, not by any real design. The depth of the table is 16″, as that is the most narrow recommended depth for a desk. It’s just enough room to put a laptop on and deep enough to fit your legs and feet underneath.
The tabletop is 29″ high, which is in the range of the standard height for tables and desks. Luckily, you can find all of this information online! I had to look it up so many times that I have it memorized now. I think if you were actually a carpenter or furniture builder then you would learn these things in school or in your apprenticeship. I can now really appreciate the skills of true experts. I consider myself a semi-competent amateur at best.
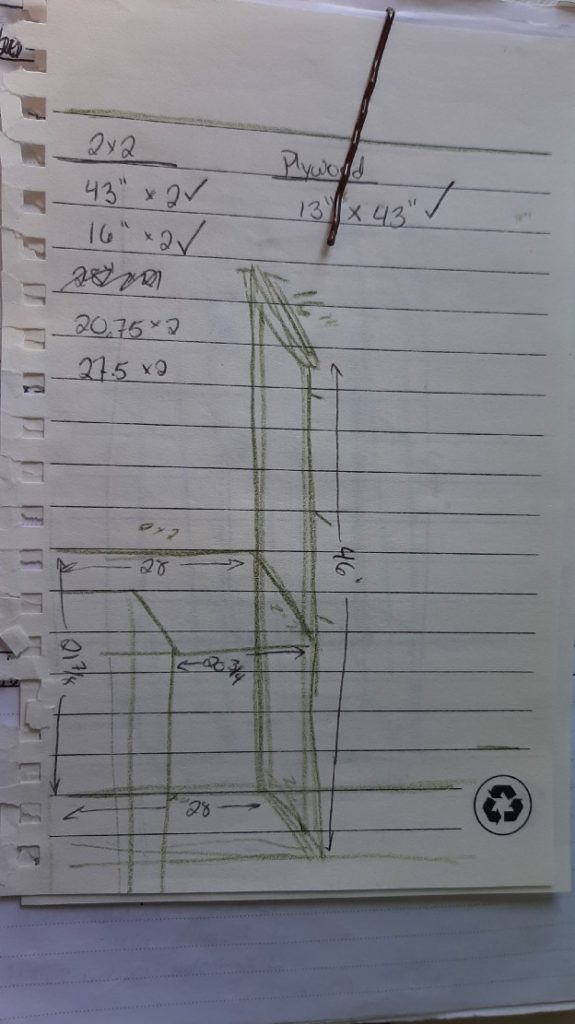
When you’re building, remember to factor in the dimensions of your materials when you’re making your cuts for the final dimensions of the piece. It really, really helps to draw it out beforehand and write down all of the measurements and check your math. I ended up doing this drawing with a green colored pencil… You’ll be surprised what you grab when you’re in the middle of a planning session with your husband and you can’t stop the flow of math long enough to find a proper pencil. You can see that while I drew my supports at 28″ length in the diagram, the materials list shows that I cut them at 27.5″ to leave room for the cross-supports. I recommend making a practice piece to work out some of the common mistakes.
Since I would be attaching the cabinet to the wall, I once again saved materials and weight by only making one side of the box. This method is similar to how I built the kitchen shelves and countertop support.
Two vertical supports in the front outline the cabinet front and outside edge, while the other two sides would be the exterior wall and the closet wall. I added a small strip of wood, only 1×2″, up against the wall on top of the wheel well box to give corner support to the panel that will make the side of the cabinet. It doesn’t need to be a 2×2 because it’s not structural.
As for the cabinet, I might have had to do this build differently if I wanted to include shelving, but the wheel well box made shelving tricky since it is 9″ tall and takes up most of the room in the cabinet. I decided to treat the wheel well as a bottom shelf. I can always add wire shelving without much trouble in the future. Making wooden shelving as I did in the kitchen would have required stronger corner supports to fasten the shelving. Maybe it’s taking a shortcut, or maybe it’s taking the opportunity to save weight and material. It depends on your point of view.
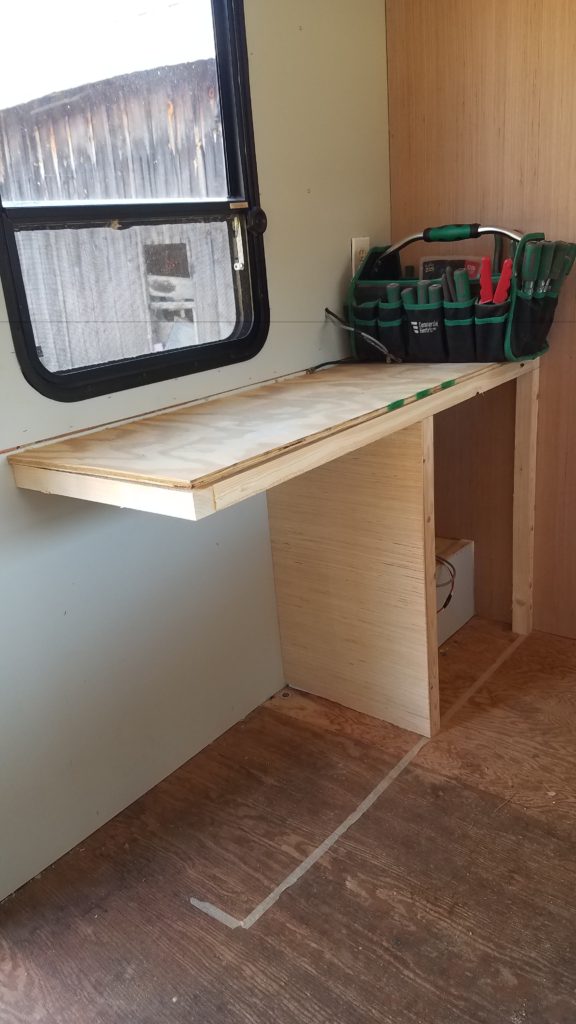
Building the Desk
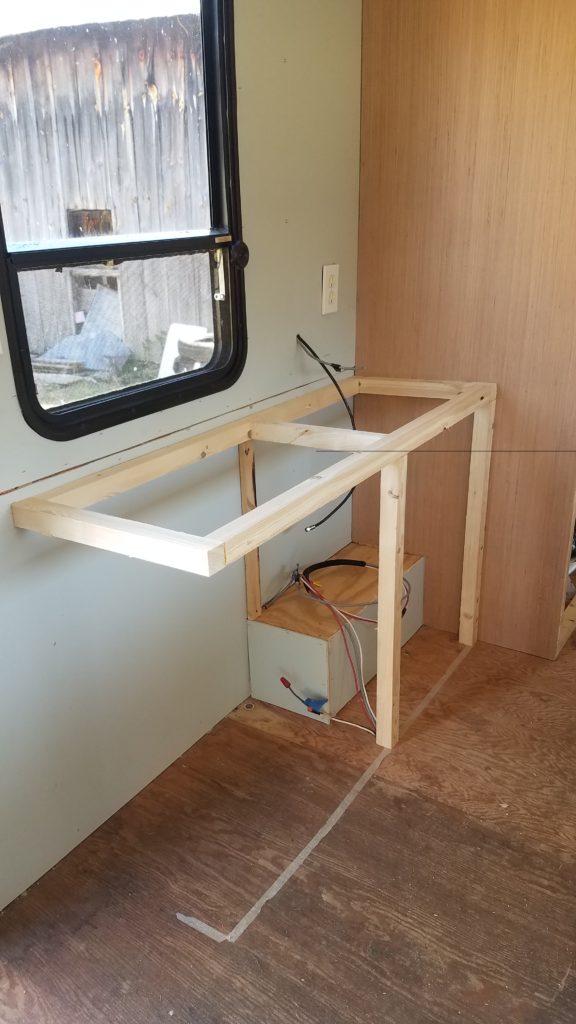
With the cabinet built it was simple to add the desktop supports. I once again went for a simple approach and put together a rectangle of 2×2’s to hold up a sheet of plywood. There are ways to make this prettier, such as the method Ana White used in her design. Also, using quality lumber such as nice hardwood like maple, oak, or sanded plywood like birch will make a big difference in the quality of the completed product. I ended up using cheap plywood and regular pine 2x2s.
You can also do some finishing touches to make it nice as well, like using painter’s caulk to smooth out the joints and gaps, sanding carefully, and routing the edges to add some interest. I did none of these things… but it’s good enough!
The desktop is also screwed into the studs on the exterior wall to keep it firm as it extends past the cabinet base. The square base of the desktop and anchoring it into the wall keep it sturdy enough to work. I would consider adding a triangle support piece under the open side if needed to keep the tabletop firm. These are called corbels and you can buy pre-made ones that look very nice and are usually sold near the shelving units. My cat now uses this tabletop to leap up to his perch and jump down, and I can see it physically move under his thundering leaps. However, I’m not worried about the 2×2’s as they are nice and strong and the plywood will more than hold it all together. The corbel would be to prevent creaking and flexing when you lean on it and for some added decoration.
I used some leftover pieces of 5mm plywood to make the 3rd wall of the cabinet. I left the front open and added a 1×2″ board along the bottom to act as a stop for the cabinet door I’m planning to add. The bottom piece also acts as a boundary for the flooring to butt up squarely.
Finishing Touches
I got some help when I was rushing to finish the trailer for our move, and my lovely sister and talented mother worked together to do a lot of the painting.
White was my default color. I admit I had some severe “decision fatigue” at this point in the project. Having to make a million choices every day about what I was building, how it would look, and how to make it come together left me without the mental willpower to choose colors. Besides, I’m really terrible at decorating and accessorizing. Therefore, I decided to paint everything that wasn’t a wall plain white. Technically, it’s “eiderdown” since that was the shade of white included in my “coastal theme” color palette from Sherwin Williams. According to the color palette, it would match my “sea salt” walls and that was my main concern. If it’s white then it’s easy to paint over if I ever decide I want to make a change.
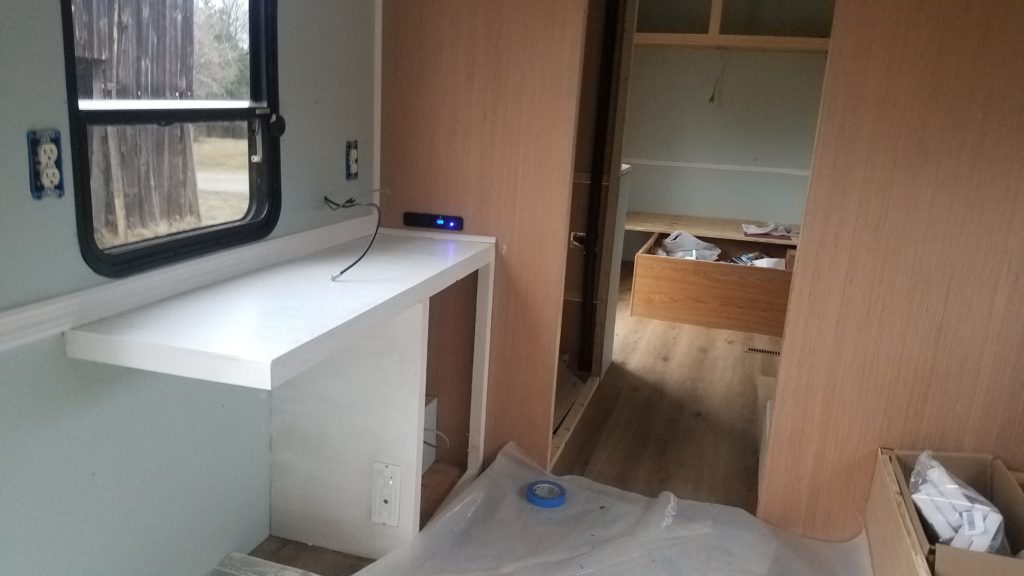
I still don’t have the cabinet door, since I lost most of my borrowed tools in the move. When I do attach the door, it will hinge on the side closest to the closet which will make it easy to open while sitting at the desk. Once I get that door on, it’s really a complete piece. As you can see, it’s easily converted from a TV stand with shelving underneath to a desk with shelving at the side. It does everything I need to do.
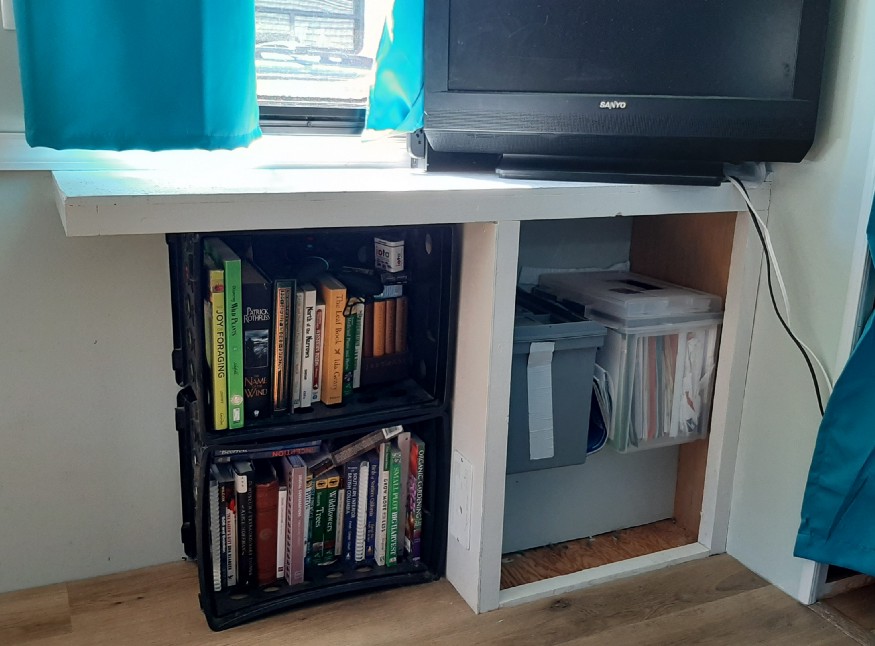
I plan to use this cabinet for office supplies and I do think I’ll add some simple wire shelving to increase storage space. Right now it’s holding out plastic filing cabinets with all of that irritatingly necessary paperwork that the modern world requires for a normal life. I had to leave behind So Many Books when I moved, and it was painful. I only kept my absolute, special favorites as well as some old, unique finds at thrift stores. Those, and our extensive collection of “useful” books such as field guides to birds and plant ID and gardening books.
This project did incorporate a few electric components, as the TV antenna cable came out of the floor and up on the inside of the old cabinet. I didn’t move it, and just directed it up the side of the new cabinet, across the top, and through a hole into the side of the closet to run up to the TV. Keeping wires hidden is part of what makes a house look polished and finished.
I also incorporated the LP Gas Detector in almost the same place it was in the old cabinet. I simply had to cut a hole for the new detector and attach the wires. Easy as pie.
I also planned ahead and put an outlet in the corner just behind the TV. There’s an additional outlet on the wall above the far corner of the table, though in the pictures it’s hidden behind the curtains. It’s the right place to plug in your phone when you come in from work.
Overall, I think it’s a great piece of furniture for the space. Multi-purpose, simple, and light, with storage opportunities, included! Everything the tiny living life needs.
Stay tuned for more updates as I finish the trailer build just in time to move to Oregon!