Renovating our 1997 Fleetwood Mallard for Full-Time Living (Part 18)
The story of how my husband and I purchased a 20-year-old travel trailer and I DIYed the crap out of it to make it suitable for full-time living. In this series, I’m giving All of the details about the process step-by-step, as performed by me, a 26-year-old woman with No experience in construction. The first installment in this series details the purchasing process and the changes I planned to make. You can find that article in the link below and start at the beginning. Then, follow along in the series by clicking on the link for the next article at the bottom of each page
Closet and Bathroom Sink: Connection?
This post deals with building the closet and bathroom sink. These two fixtures are in what I like to call the middle of the trailer, a corridor separating the bedroom and living room areas. The front half of the trailer is the kitchen, dining room, and living room. These are the public areas of the house. The back of the trailer is the bedroom and bathroom, the more private areas of the house. The closet and the bathroom together create a narrow corridor that separates the two rooms.
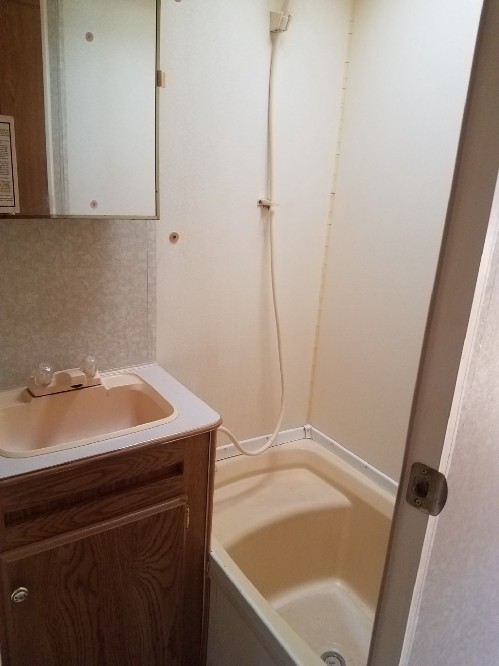
You’ve already seen a few posts dealing with the plumbing and how I’ve moved the bathroom fixtures around to accommodate a larger shower. I had to rearrange the old floor plan and move the toilet. This new move didn’t leave room for the bathroom sink as it was originally placed between the toilet and shower. I allocated that space to the expanded shower.
As a result, I had to entirely rebuild the bathroom sink in a new place. I decided to place the new sink across the trailer in some of the space that used to be part of the closet.
The sink will face the bed and be open to the bedroom. This is a common design in newer travel trailers as it allows multiple people to use bathroom facilities at once and leaves a more open bedroom and more space at the sink. In my opinion, it’s a win-win. My sink will also allow for more elbow room as you move around the side of the bed.
The bathroom sink is going to be built into the closet and all of the plumbing will be run within the closet, out of sight. With this design, in order to build the highly important vanity, I need to build the closet first. Completing the sink was high on my priority list because I wanted to get all of the plumbing hooked up as soon as possible. I can’t test the plumbing until all of the ends are connected, or we’ll have water spurting all over the place.
Remember, I designed all of the “furniture” in the trailer to use as few materials as possible. It is all as simple and light as I can make it. It’s not the generally accepted way to build furniture, cabinets, or counters. Maybe it’s not the best way, I don’t know. This is like an unfinished science experiment.
These designs were meant to save space and save materials, to make every piece of wood or plywood count for as many purposes as possible. I used 1x2s instead f 2x2s whenever possible to save weight. I used 2x2s instead of 2x4s for everything that uses 2x4s in other DIY plans.
In a house, there’s no downside to building things more sturdy than they need to be, but I can’t do that in my trailer. I’m living up to my swamp Yankee heritage as much as possible, so keep that in mind if you’re looking to build your own tiny house furniture.
The Closet
Luckily, the closet is an easy build. A rectangular frame to support the paneling will do the trick nicely. I used 2x2s for the frame and incorporated the box that covers the wheel well in the design. This way the wheel well will be completely hidden in the closet, under the sink, and under the TV stand.
The depth of the closet was dictated by the minimum comfortable width of walking space needed for the hallway (24″). Which left only 24″ of space for the depth of the closet. The width of the closet was decided by the minimum space needed for the vanity on one side (14″), and making the wall of the closet even with the bathroom wall on the other side, leaving 38″ of space. The height of the closet is simply floor-to-ceiling, or 78″. I built the closet to maximize our storage and accommodate all the other needs of the space. It’s made to fit the space, not by any ideal closet design recommendations.
My husband and I disagreed about what should be kept in the closet. I thought it would be great for totes, coats, and shoes. He wanted a clothes rod for our Sunday/interview clothes that need to hang. I was all in favor of getting rid of clothes that need to hang altogether (I’m more of a “jeans -and-t-shirt” girl myself), but he likes to be respectable, not a wrinkled mess. So, rather than decide now, with no real experience with our needs in such a small space, we decided to keep our options open.
Buying a set of wire racks, an adjustable rack support system, and a closet rod cost about $100. It’s not as cheap as using wood and screws, but it gives us the flexibility we need right now. I’ll be able to move the shelves around to the right height and add as much or as little clothes hanging space as we need.
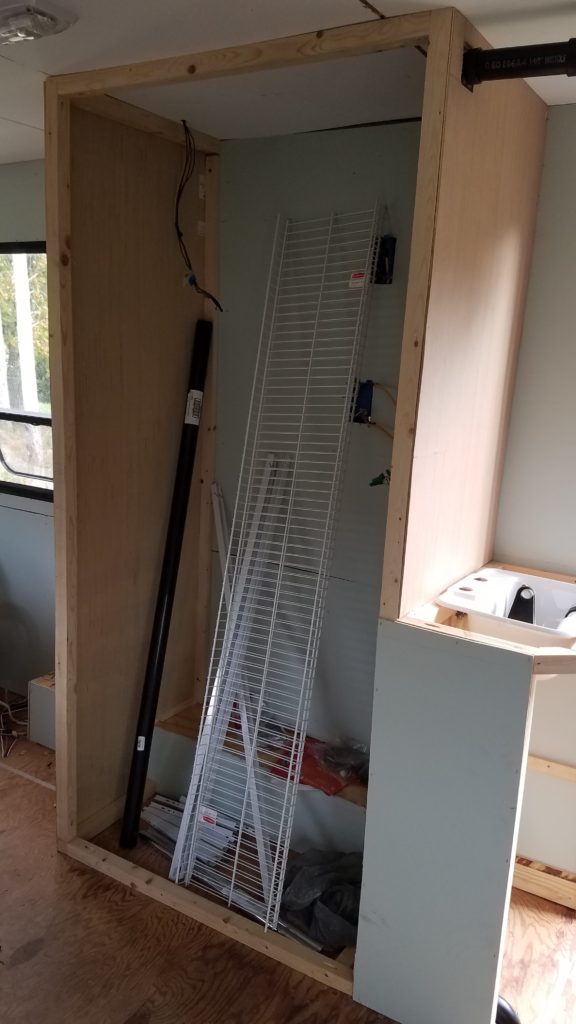
Using the adjustable track shelving makes building the closet incredibly easy. No need to build brace boards or shelving frames, just the basic wall frame to attach the plywood paneling. The only small complication was the box over the wheel-well, but that wasn’t hard to measure out. The adjustable shelving unit will be supported by brackets that screw into the studs on the back wall, so the plywood paneling doesn’t need to bear any weight. I simply measured, cut, and stapled on the plywood panels to finish up the easiest project yet.
We’ll use a heavy curtain instead of a door to cover the closet and hide the clutter. The closet is also the most likely location of the future cat litter box (yay, cats) and we want to keep the smell out while letting the cat go back and forth as needed.
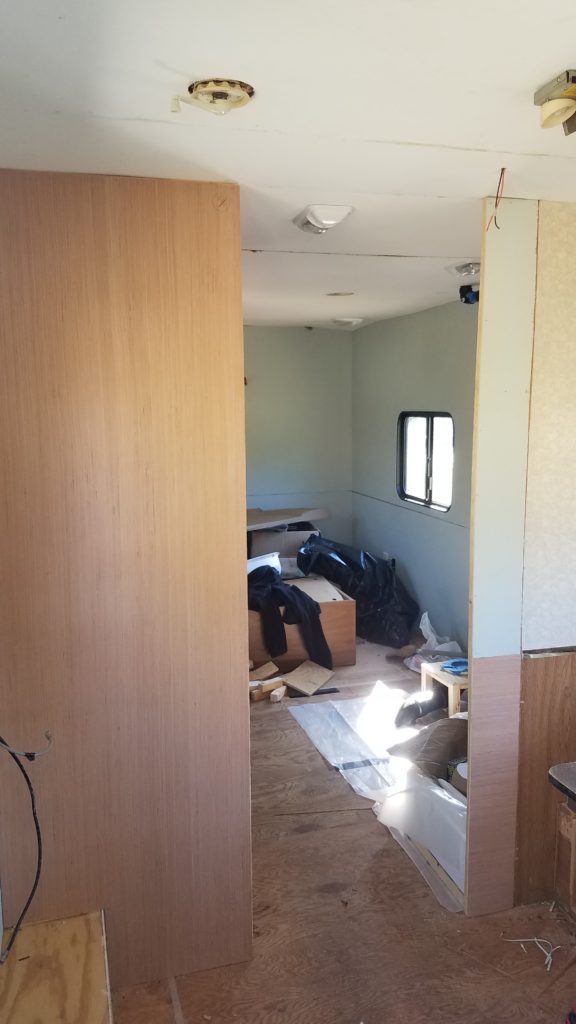
When I installed the wall panels on the closet, it made the distinction between the kitchen/dining/living area and the bathroom/bedroom area very clear. The narrow hallway between the closet and shower provides some separation between rooms in such a small space. We’ll put another heavy curtain between the closet wall and bathroom wall to close off the hallway and provide a little privacy in our bedroom/bathroom area. It will also work to block noise, light, and smells from the kitchen area.
The Sink
To recap from some previous posts, we decided to move the sink out of the bathroom area to make room for a bigger shower. I took some space out of the old closet area and made a sink vanity that faces into the bedroom. This will allow us to use two different parts of the traditional bathroom set-up at the same time, making the tiny space a little easier. Also, a sink as part of the bedroom is standard in most newer RVs and trailers. It’s a good space-saving technique.
Moving the sink to this location was made possible by the blackwater vent pipe coming up on that side of the trailer. It used to go through the closet, and I’m going to use it as a drainpipe to the black water tank as well as a vent. Read more on this in the “Plumbing the Toilet and Sink” post.
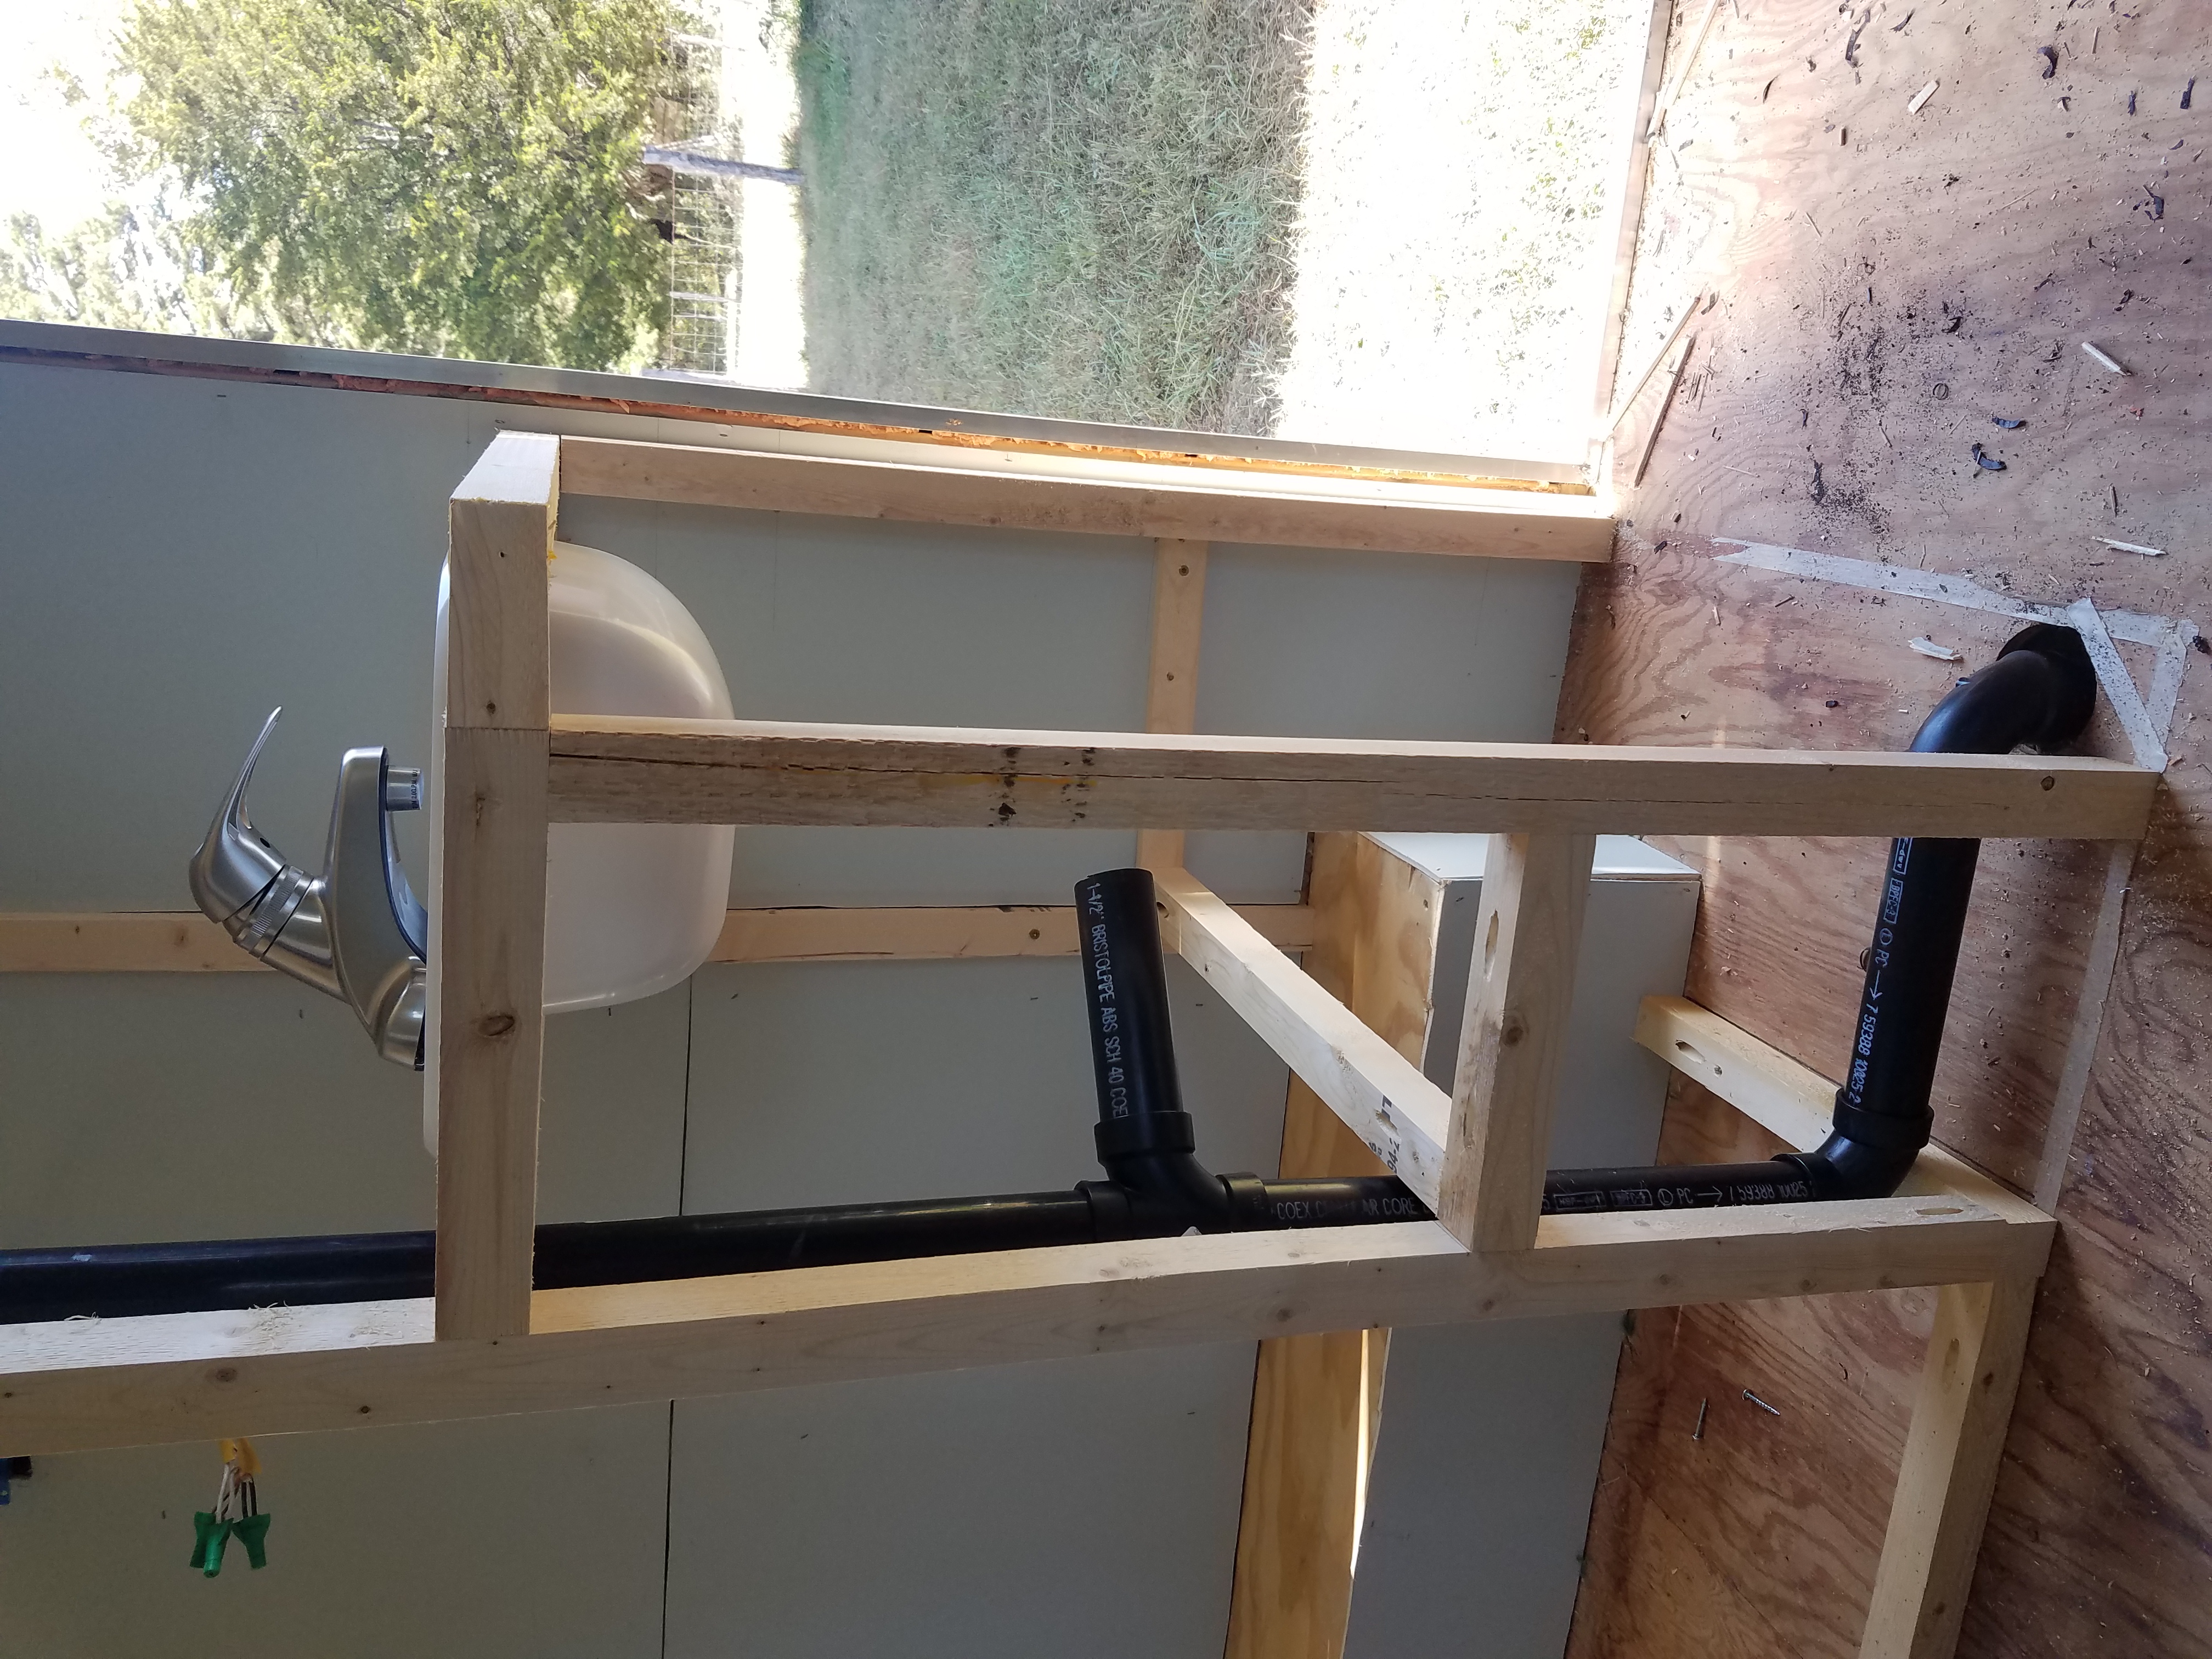
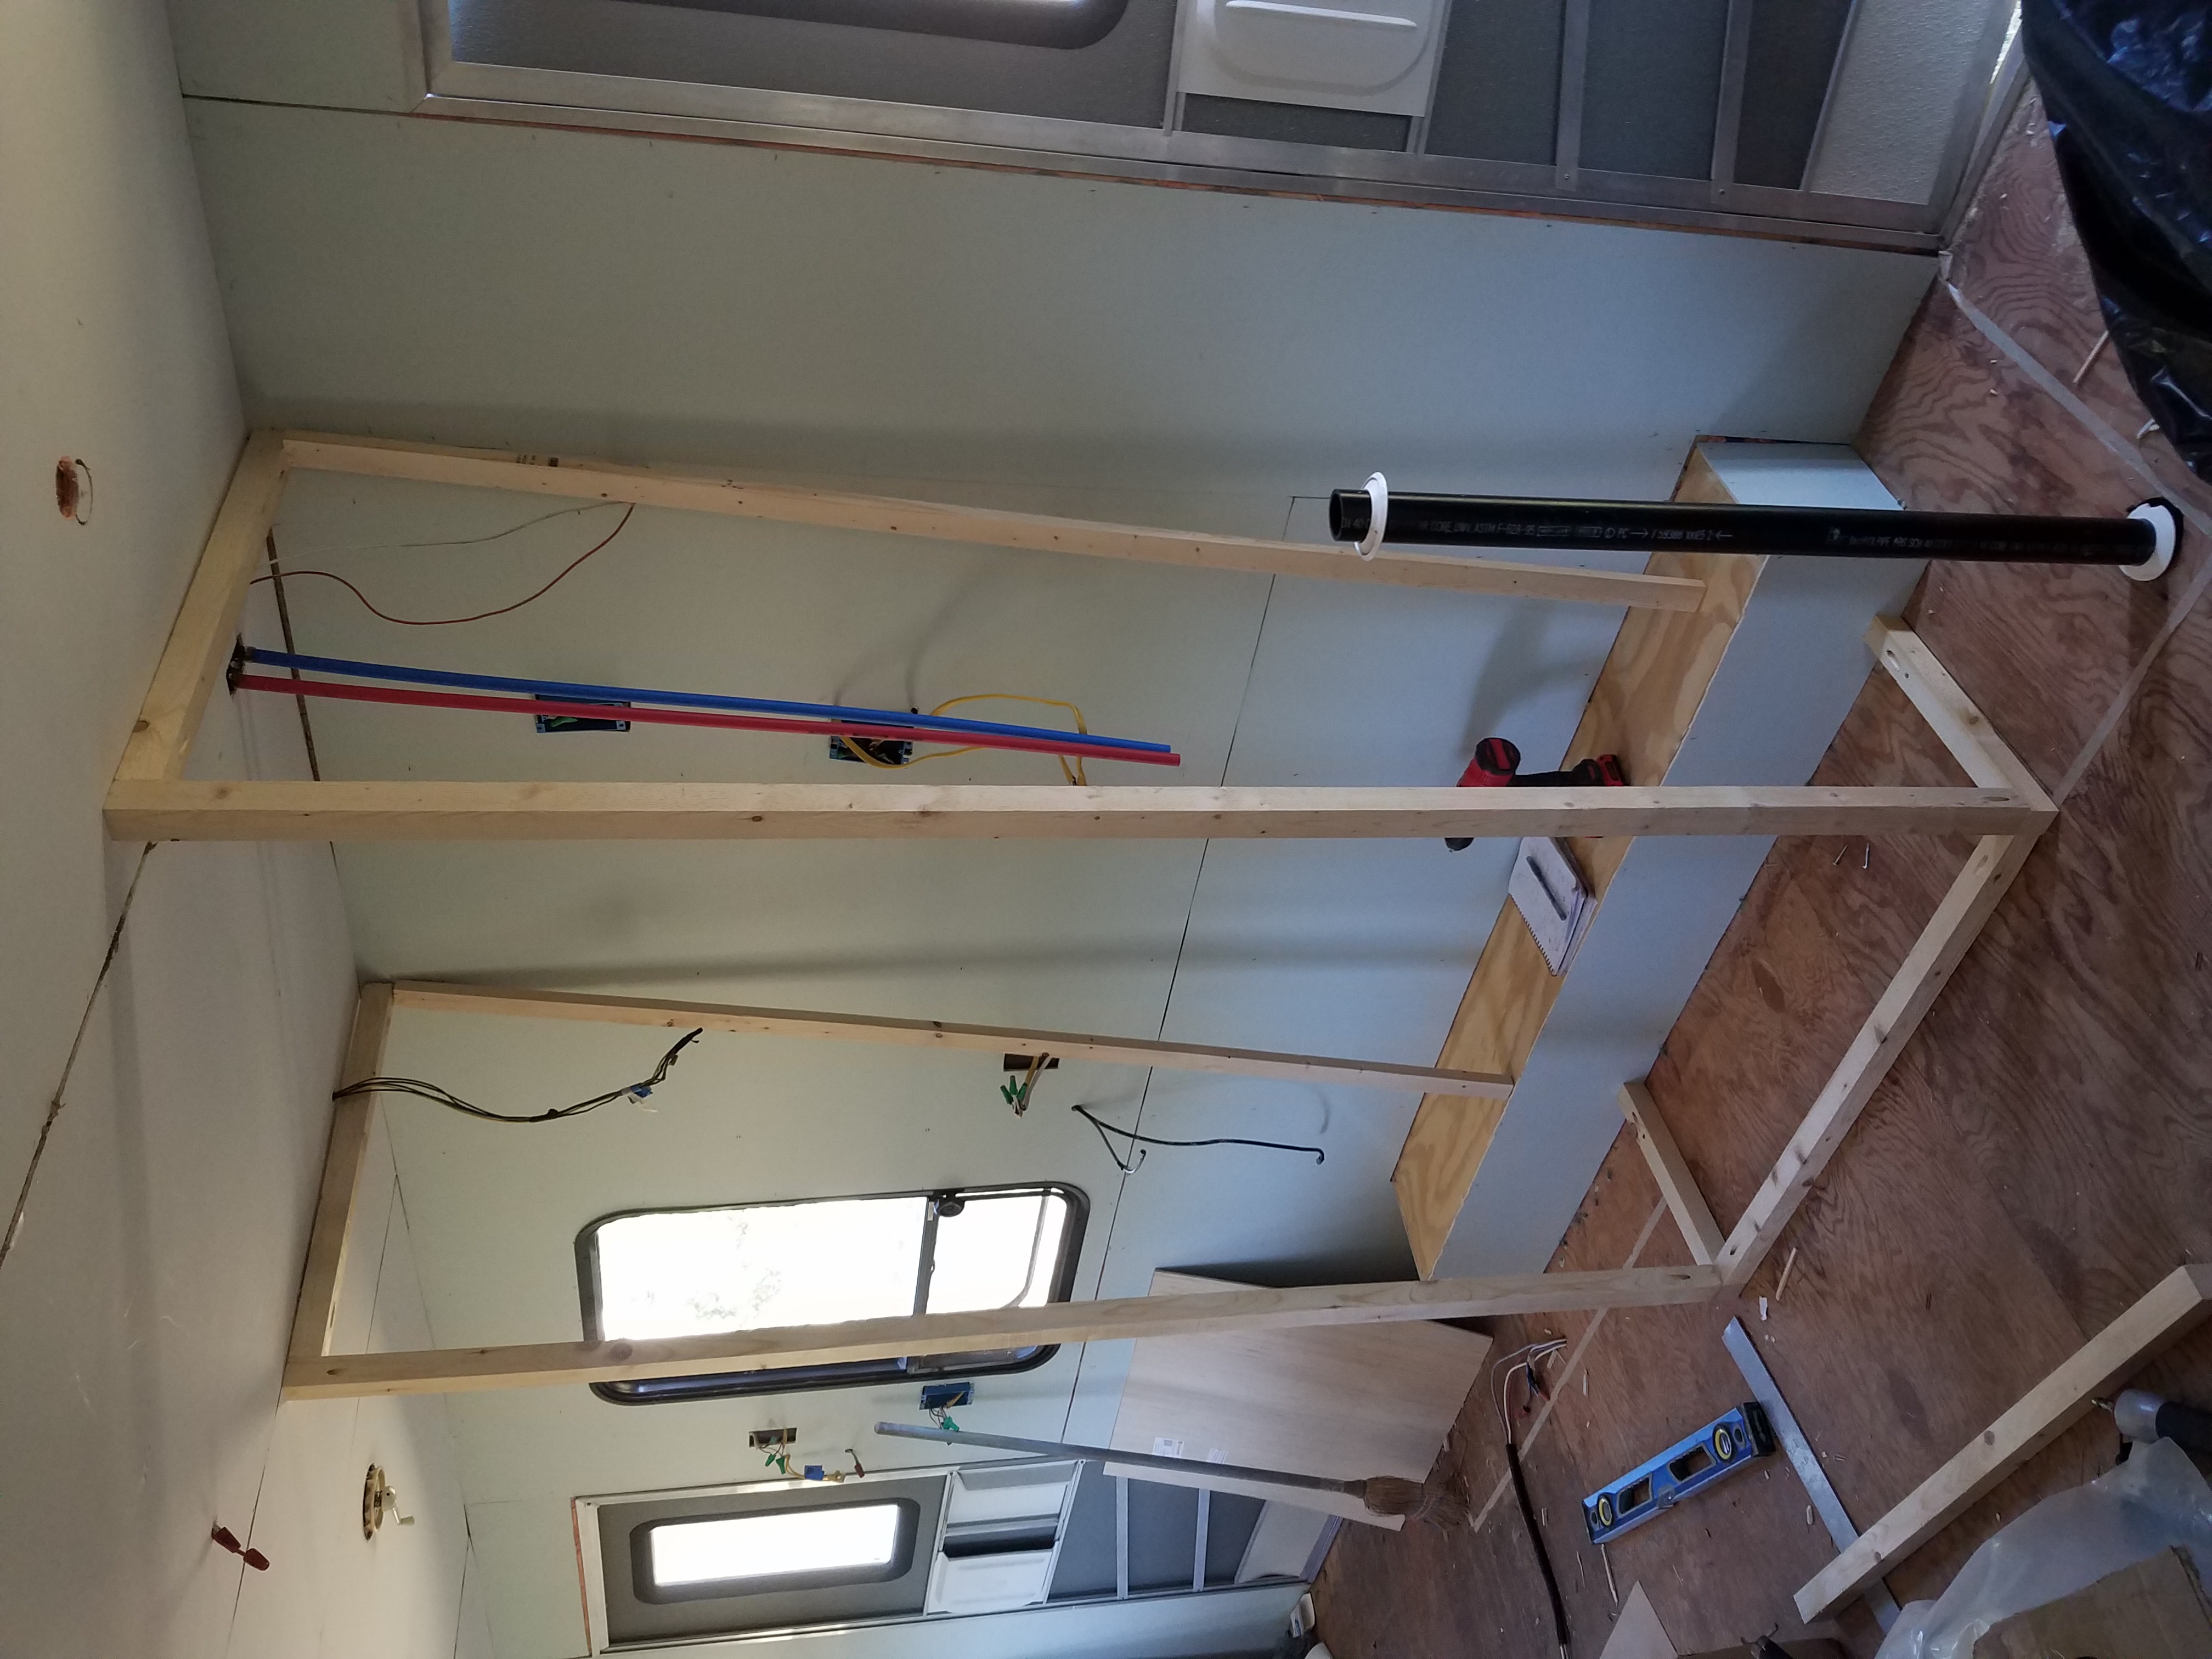
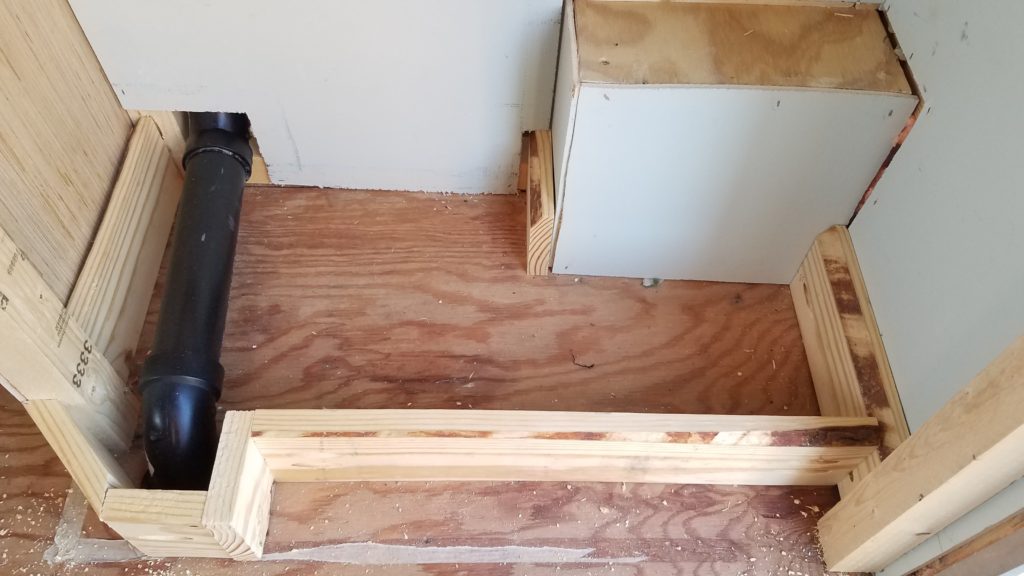
The sink was a pretty simple project since it’s just a countertop with some shelving. As you can see, I built the sink framing while also building the closet framing. These projects were completed simultaneously to make plumbing and framing easier and to save on wood and materials. In this case, the closet wall framing is also the back wall of the vanity. I used 2x2s just as I did with the closet.
This frame was also fairly straightforward. However, it was made a little more complicated when I decided to build an angled corner on the outside edge to make moving through the hallway easier. I don’t like the idea of constantly bruising my hip on a sharp corner in such a tight space.
I had to do a little triangle math to find the length of the corner piece and the angles I would need to cut. It ended up being one 50-degree angle and one 40-degree angle because I didn’t split the difference in length of the boards quite right. I figured this out mostly through trial and error with the chop saw. I think the most common way to cut off a corner like this would be with two 45-degree angles.
The simplicity of building these small pieces of furniture is only possible because of my pocket screw joinery system (Kreg jig). It’s a very easy, sturdy way to butt two pieces of timber together and make a strong right angle that won’t wobble or separate. I can’t recommend it more when you’re trying to build basically anything. I hate buying single-use tools, but the Kreg jig is a very useful tool for a DIYer.
I still want the sink to disguise the vent pipe coming out of the floor, but I also want the sink to take up as little floor space as possible. I designed the angle to be just outside the location of the vent pipe where it comes up through the floor, so the pipe will be disguised within/behind the sink.
I also decided to create a toe-kick for the sink to make the countertop ergonomically comfortable. The sink is attached to the upright supports for the closet, With a simple frame for the countertop, two uprights, and a frame for the shelf, my sink frame was finished.
With the sink and closet framed in, I moved on to rough in the plumbing for the sink. I wanted to get all of the plumbing done before putting on paneling and other finishing touches, like shelves and countertops. My priority for this build is to have as much functionality as possible, as soon as possible, by focusing on the most important thaings. You can read about the process of designing the new sink arrangement in my post about plumbing the bathroom.
Paneling and Shelving
Once I had that done, I started adding the finishing touches.
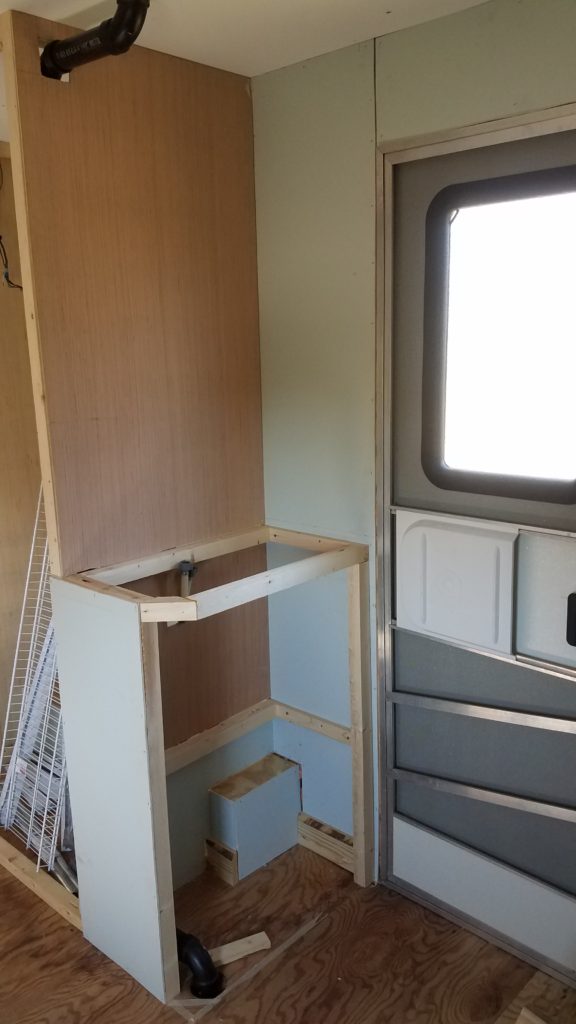
Cutting out paneling to incorporate all of the little edges and corners was time-consuming, but not difficult. I was able to reuse a lot of scrap pieces from when I paneled the walls, which made me happy. I cut them to size and stapled them on, planning to sand, paint, and trim later.
With the paneling done, you can see how the pipes and plumbing are hidden inside the closet. I’m going to install a shelf above the vanity mirror to further disguise the vent pipe on the ceiling. The drain pipe on the floor will be hidden under the bottom shelf and behind the toe-kick, making it effectively invisible.
The shelving in the bathroom sink is a bit tricky due to the bottom of the sink taking up space under the counter. When you’re making under-the-sink shelves you need to leave room for the sink itself as well as any pipes coming out of it.
I decided to make only two shelves so there would be plenty of room for taller items like shampoo bottles. I wanted to have a toe-kick under the vanity, so I boxed in the pipe and used the 1×4 plank to create a 3.5″ high bottom shelf that’s recessed 3″ back from the depth of the countertop. We’ll be able to stand at the sink with our toes under the bottom shelf so we don’t have to lean over as much. Ergonomics are important, people!
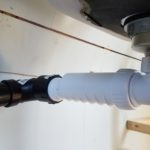
Before I put in the shelf over the pipe, I decided to woman-up and glue the pipes together. Remember, once you glue the pipes, there’s no changing your mind. However, it’s been weeks since I dry-fitted the pipes and I haven’t needed or wanted to move them, so it’s time to commit.
I used multi-purpose glue that works for ABS, PVC, and other kinds of pipes. Some people say multi-purpose stuff isn’t as good, but I’ve heard long-time plumbers say it works fine. It seems to hold pretty well to me, and I needed it to combine the PVC toilet flange with the ABS waste pipe, so I’m going to keep on using it. If it’s good enough for the toilet, it’s good enough for the sink.
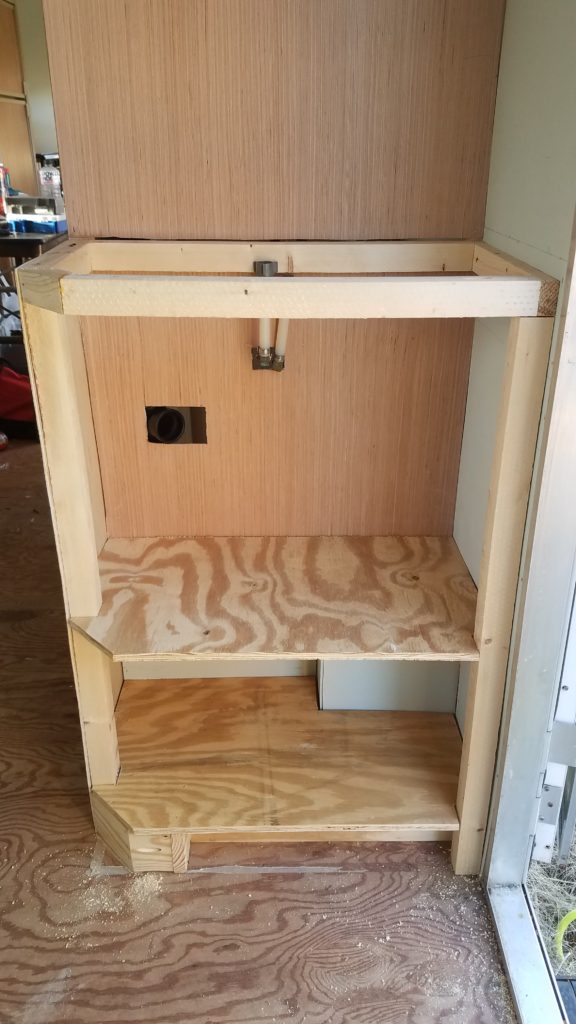
With the pipes finalized, I cut out the plywood for the shelving, working around the box for the wheel well, and fitted it into place. The second shelf was even easier without having to worry about the wheel well box. I stapled the shelves to the brace boards and they’re nice and sturdy.
I can see why you might want to use 3/4″ plywood to avoid the tiny bit of flex I have in the center of these shelves, but I think the 1/2″ will work just fine and save me some money and weight. These shelves will be sanded and painted glossy white later on in the rebuild. I’m planning to do all of my sanding, caulking, and painting at once, closer to the end of the project.
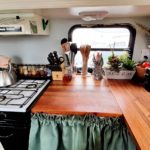
I’m planning to use pine planks (spruce, actually) for the vanity countertop. I want to have as much natural wood in the camper as possible to give it a warm feel. You can buy edge-glued pine planks at the hardware store that come in Paint quality (smooth but the grain isn’t as nice) or Stain quality (smooth and pretty). These are nice because you don’t have to do all of the planing and sanding yourself. I managed to buy a piece that would give me all of the wood I needed for the dining table with enough left-over for the vanity. Savings score!
I’m going to use Minwax Whitewash Pickling Stain on all of the pine furniture to give it a pale finish that will still show the grain of the wood. I like wood grain and I like to know that it’s real wood, not just MDF or plastic. The whitewash gives the wood a pale tone, gentles out the dramatic grain of pine, hides some of the yellow colors, and looks nice.
It’s recommended to use a natural or white stain on pine since it tends to absorb unevenly and strongly. Darker stains emphasize grain, make lighter blotches in areas and make any knots stand out strongly. Light stains hide the imperfections. Whitewash also has a strong beachy/cottage feel that I enjoy. Additionally, in such a small area it behooves one to keep things light for an illusion of more space. Over the whitewash will go a few coats of clear water-based polyurethane to protect the wood from water and scratches.
Rather than doing doors, I’m once again turning to curtains to hide the cluttered shelves and the unsightly bottom of the sink and plumbing. You can buy flexible curtain track on Amazon for cheap, cut it to the length you need and screw it in anywhere you want. It’s flexible enough to curve around anything and many RVers use it all over the place. I’m going to use brightly colored curtains, probably teal (I love teal) for a pop of color.
I’m really pleased with how the sink and closet look so far, and I can’t wait for when everything is painted and trimmed and finished.