Renovating our 1997 Fleetwood Mallard for Full-Time Living (Part 17)
This is the story of how my husband and I purchased a 20-year-old travel trailer and I DIYed the crap out of it to make it suitable for full-time living. In this series, I’m giving All of the details about the process step-by-step, as performed by me, a 26-year-old woman with No experience in construction. The first installment in this series details the purchasing process and the changes I planned to make. You can find that article in the link below and start at the beginning. Then, follow along in the series by clicking on the link for the next article at the bottom of each page.
Plumbing the Toilet and Sinks
Plumbing is pretty high on my list of priorities to finish before we move, for reasons I’m sure you can imagine. However, plumbing is tricky because it requires you to have your infrastructure already built, things like sink vanities and countertops and showers. That meant I had to build things halfway, then plumb halfway, then build more, then plumb more in a sort of back-and-forth manner that I did not like. I’m goal-oriented and I like starting a project and then working on it until it is completed. However, not everything in life can go the way you want.
The lessons I learned while plumbing the shower served me well for the rest of the bathroom remodel. The toilet ended up being pretty straightforward once I moved it to its new position, fairly close to the original position. I’m not getting the bathroom design of my dreams, but I am getting a workable and improved bathroom that won’t cost too much or take too much time to build. Sometimes you have to take what you can get.
The Toilet
Keeping the toilet close to its original spot turned out to be important because it allowed me to avoid cutting a new hole in the black water tank. It also prevents me from having to run a very long and progressively higher-off-the-ground waste pipe across the trailer. That pipe would be taking up space, and space is precious in a 30-foot travel trailer. Also, your toilet can only be so high before you need to start building steps.
By moving the toilet back towards the wall and facing it at an angle from its original position I’m gaining walking space at the end of the bed. I need extra space at the end of the bed because the bed is going to be a few inches longer than it was originally. I was hoping to increase the length of the bed from the RV Queen length of 75″ to a regular Queen length of 80″. I’ll have to decide once I get the toilet installed and see if there will be room to squeeze around it to the side of the bed. In any case, I want as much space as I can get and that means moving the toilet as close to the shower as possible.
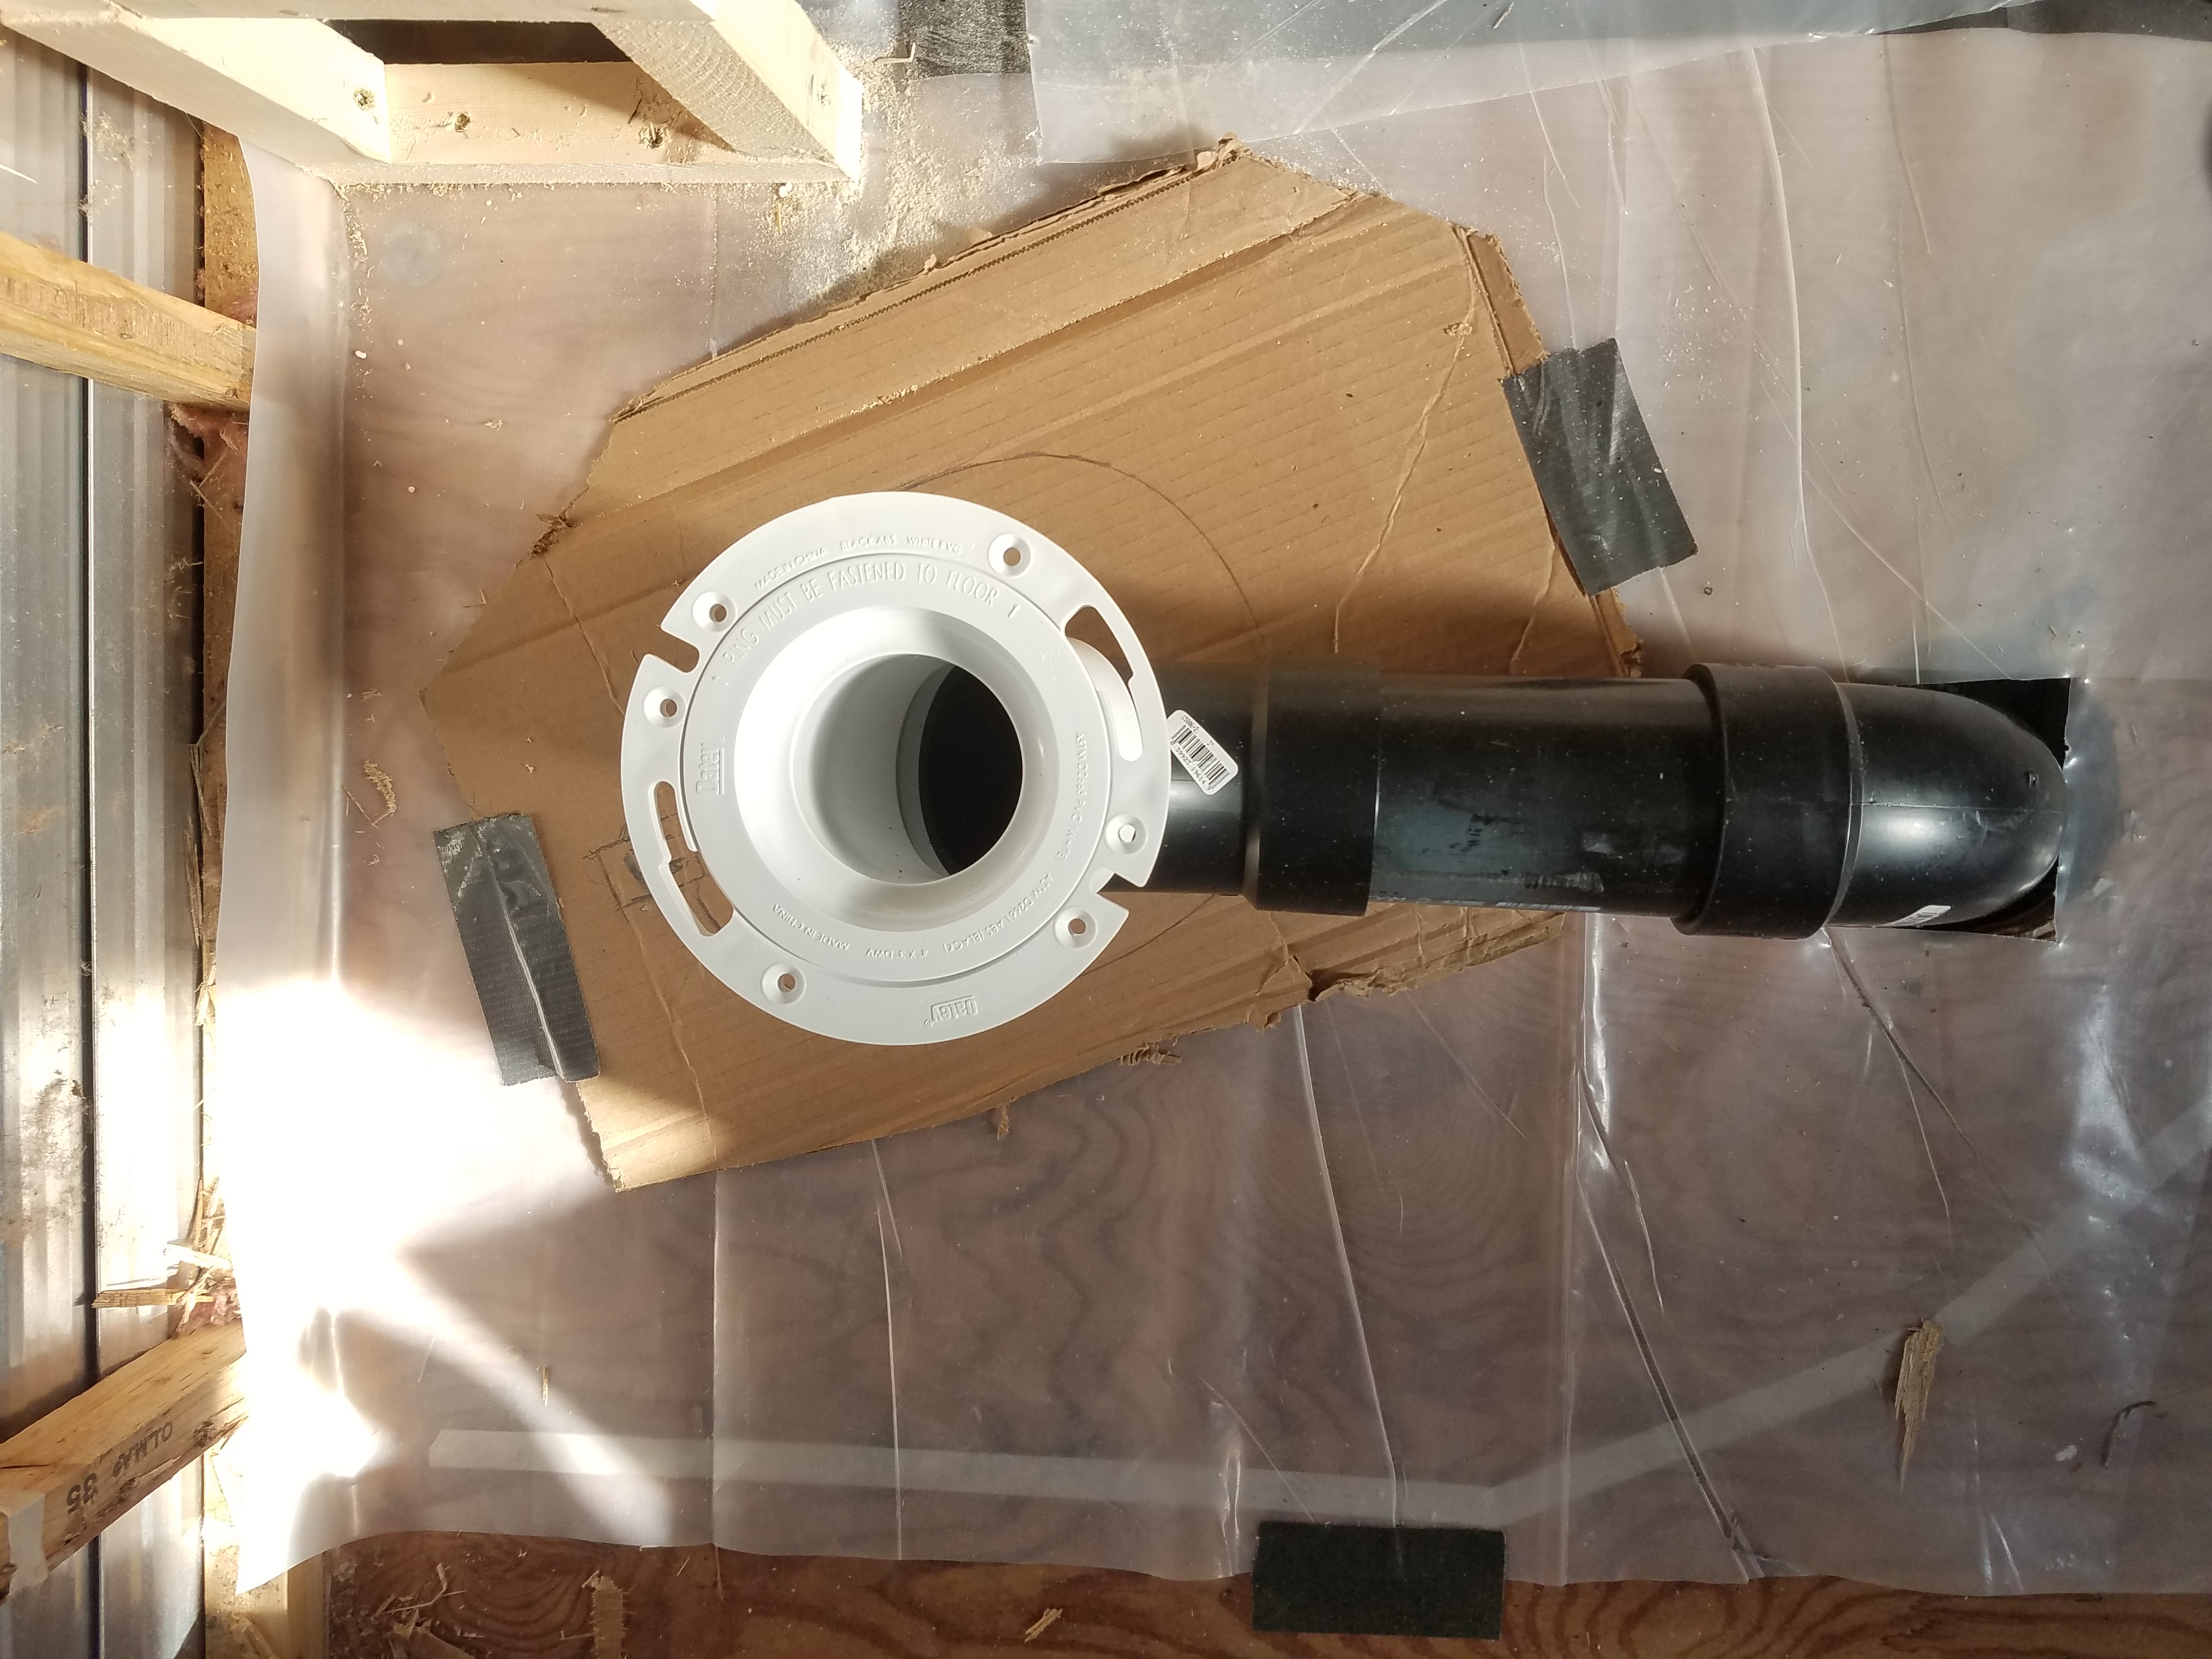
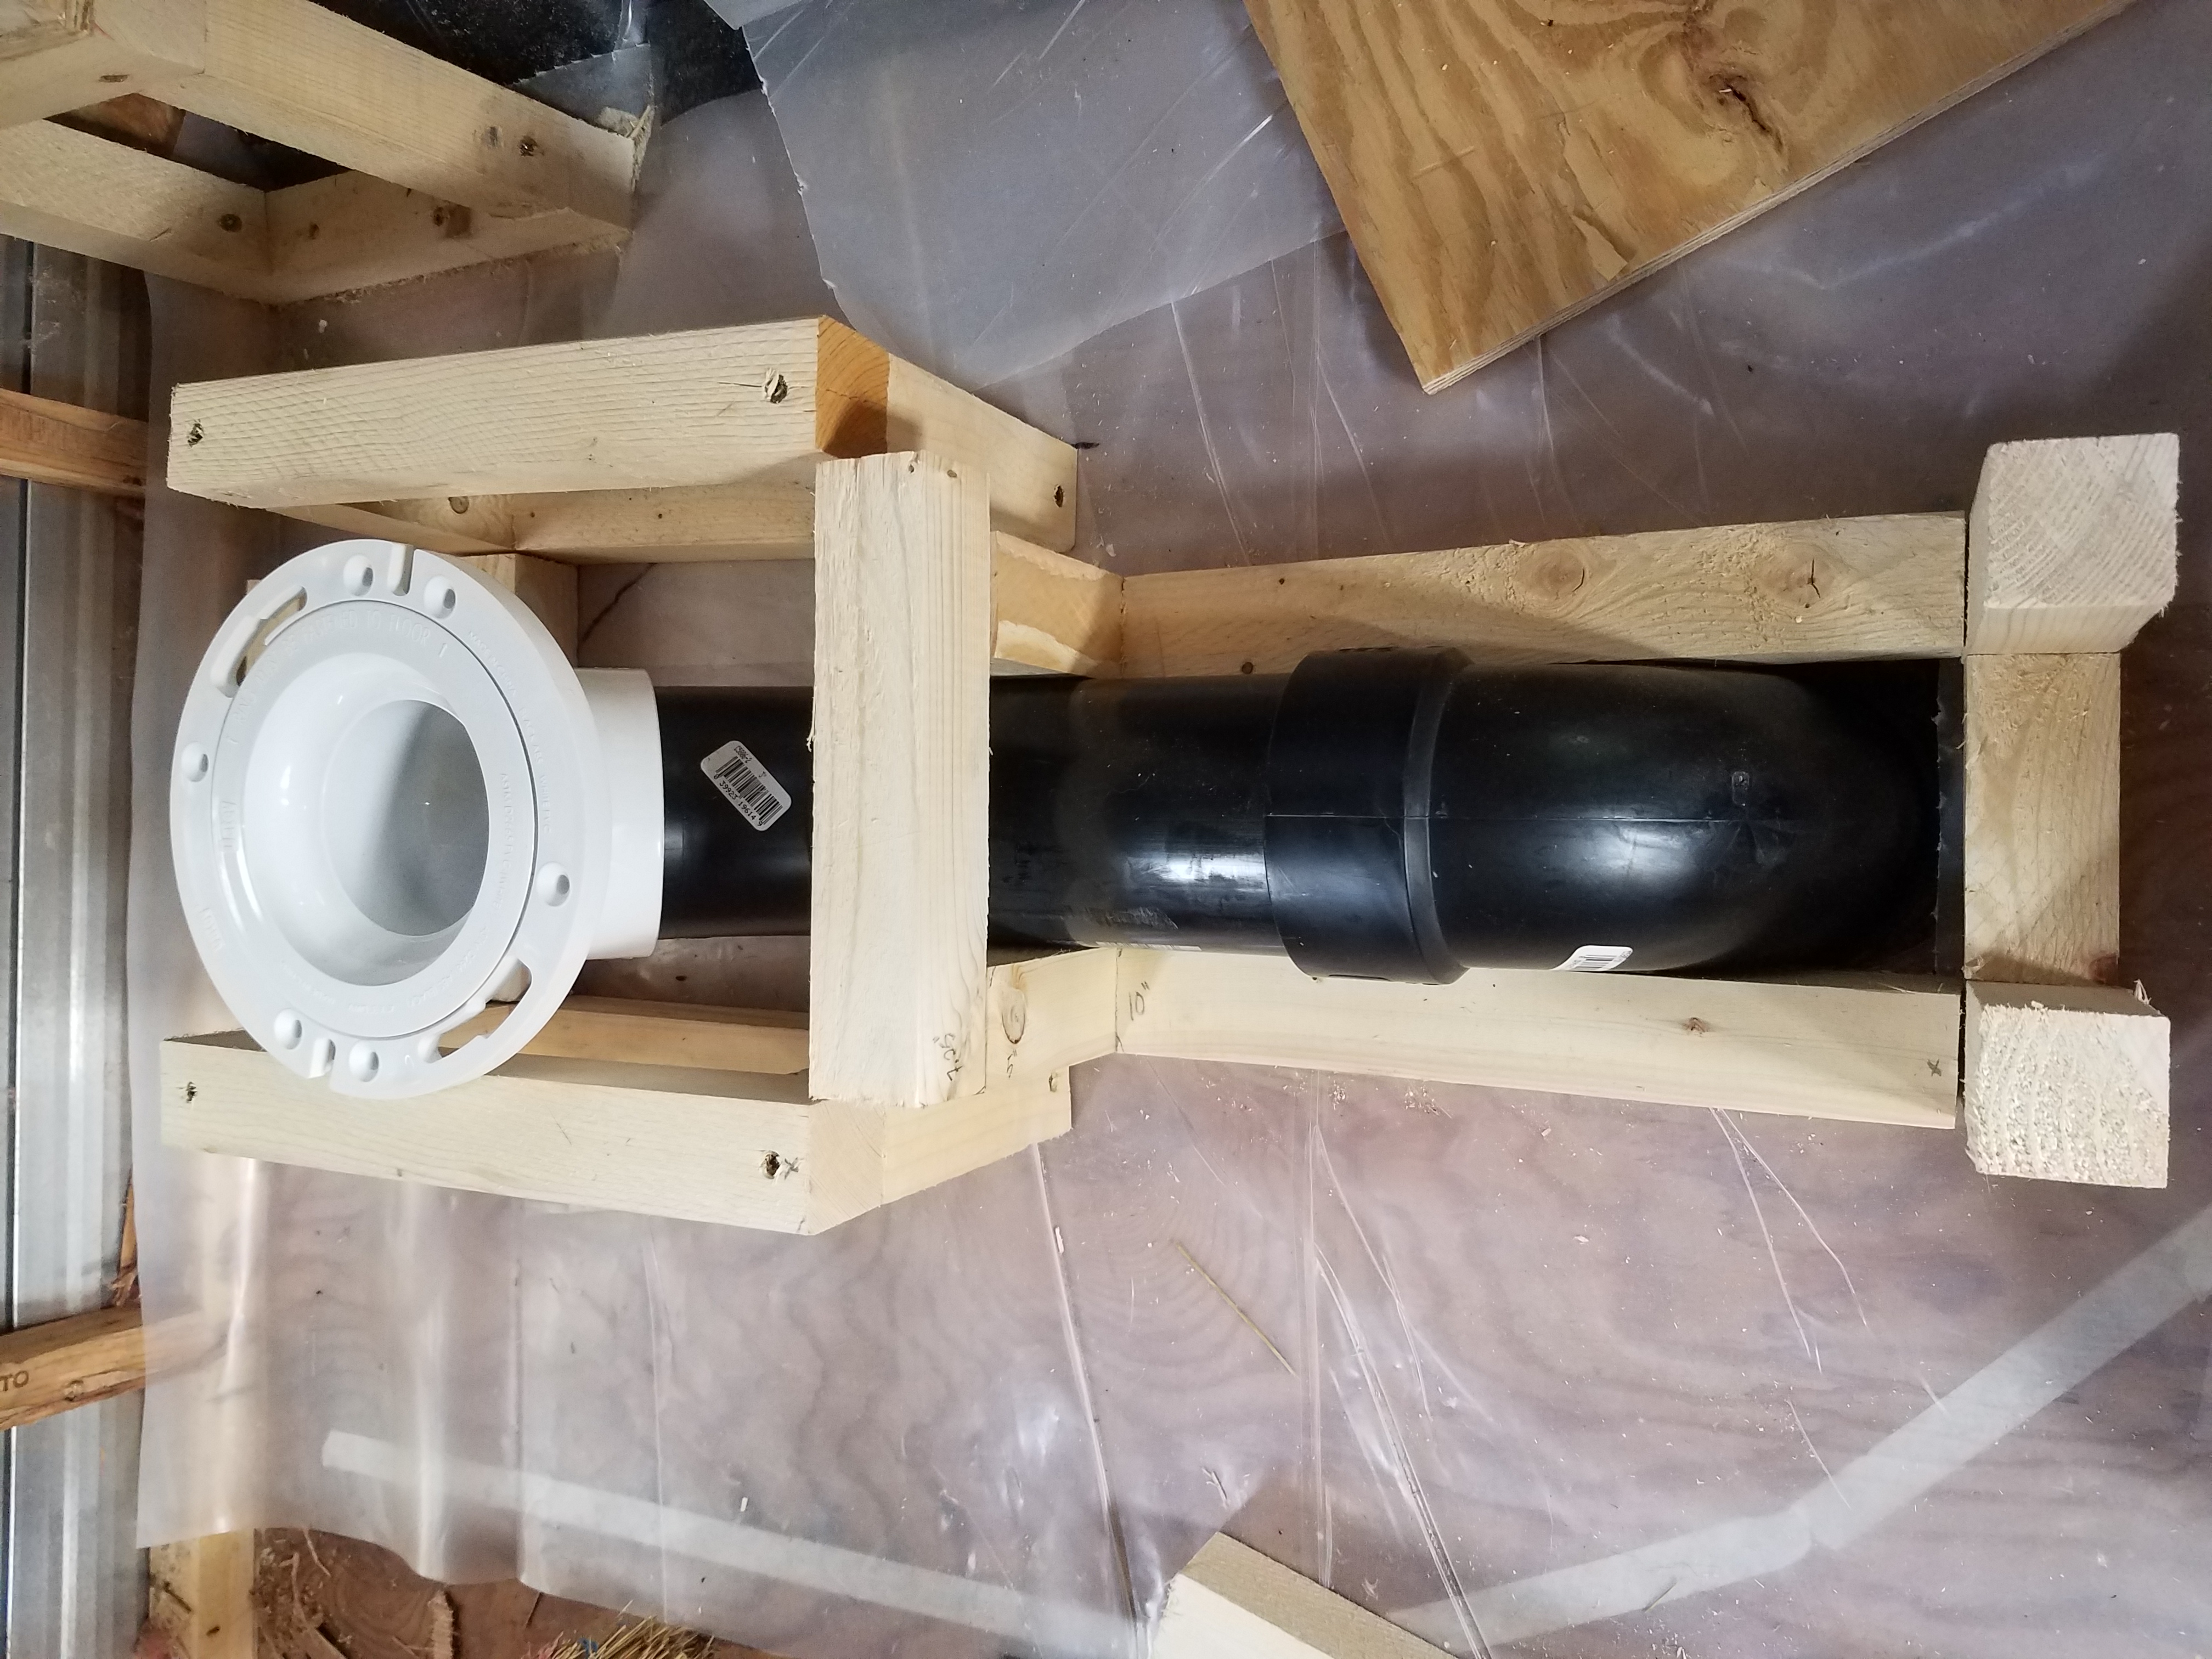
Unfortunately, trying to get as much space as I can at the end of the bed and also not making the toilet too high off the ground are competing challenges. At this point, it’s a difference of inches. As with the shower, the pipes cannot run under the floor as they do in a house. The 3″ diameter pipe necessary for toilet waste has to be above the floor, meaning my toilet platform will have to be at least 3″ high. Getting a toilet flange with an integrated 45-degree turn saves you a few inches of height. They make these for people trying to put a toilet in a tight spot near the wall, and they’re perfect for RVs.
You don’t want to use 90-degree turns in a toilet waste pipe unless it’s for a vertical drop. I used a 90-degree elbow for the vertical drop into the tank and a 45-degree elbow combined with the 45-degree flange to create a more gradual bend at the base of the toilet. You don’t want any sharp bends where solids (poo) can get stuck.
My toilet plumbing arrangement is:
3″ female threaded blackwater tank opening → 3″ male threaded connector/adaptor → 3″ 90-degree street angle → 3″ straight pipe → 3″ 45-degree street angle → 3″ 45-degree angled flange → toilet
When I dry fit the pipes, the added height of the 45-degree elbow and 90-degree elbow along with the 45-degree flange made for a toilet platform height of 7″. That’s not a small platform, but it’s workable. I double-checked to make sure there was at least a 1/8″ rise between the 90-degree drop and the toilet flange to ensure proper gravity flow. Pipes need to rise about 1/8″ every 12″ in order to flow nicely. Too steep and the solids get left behind, too flat and things don’t drain all the way.
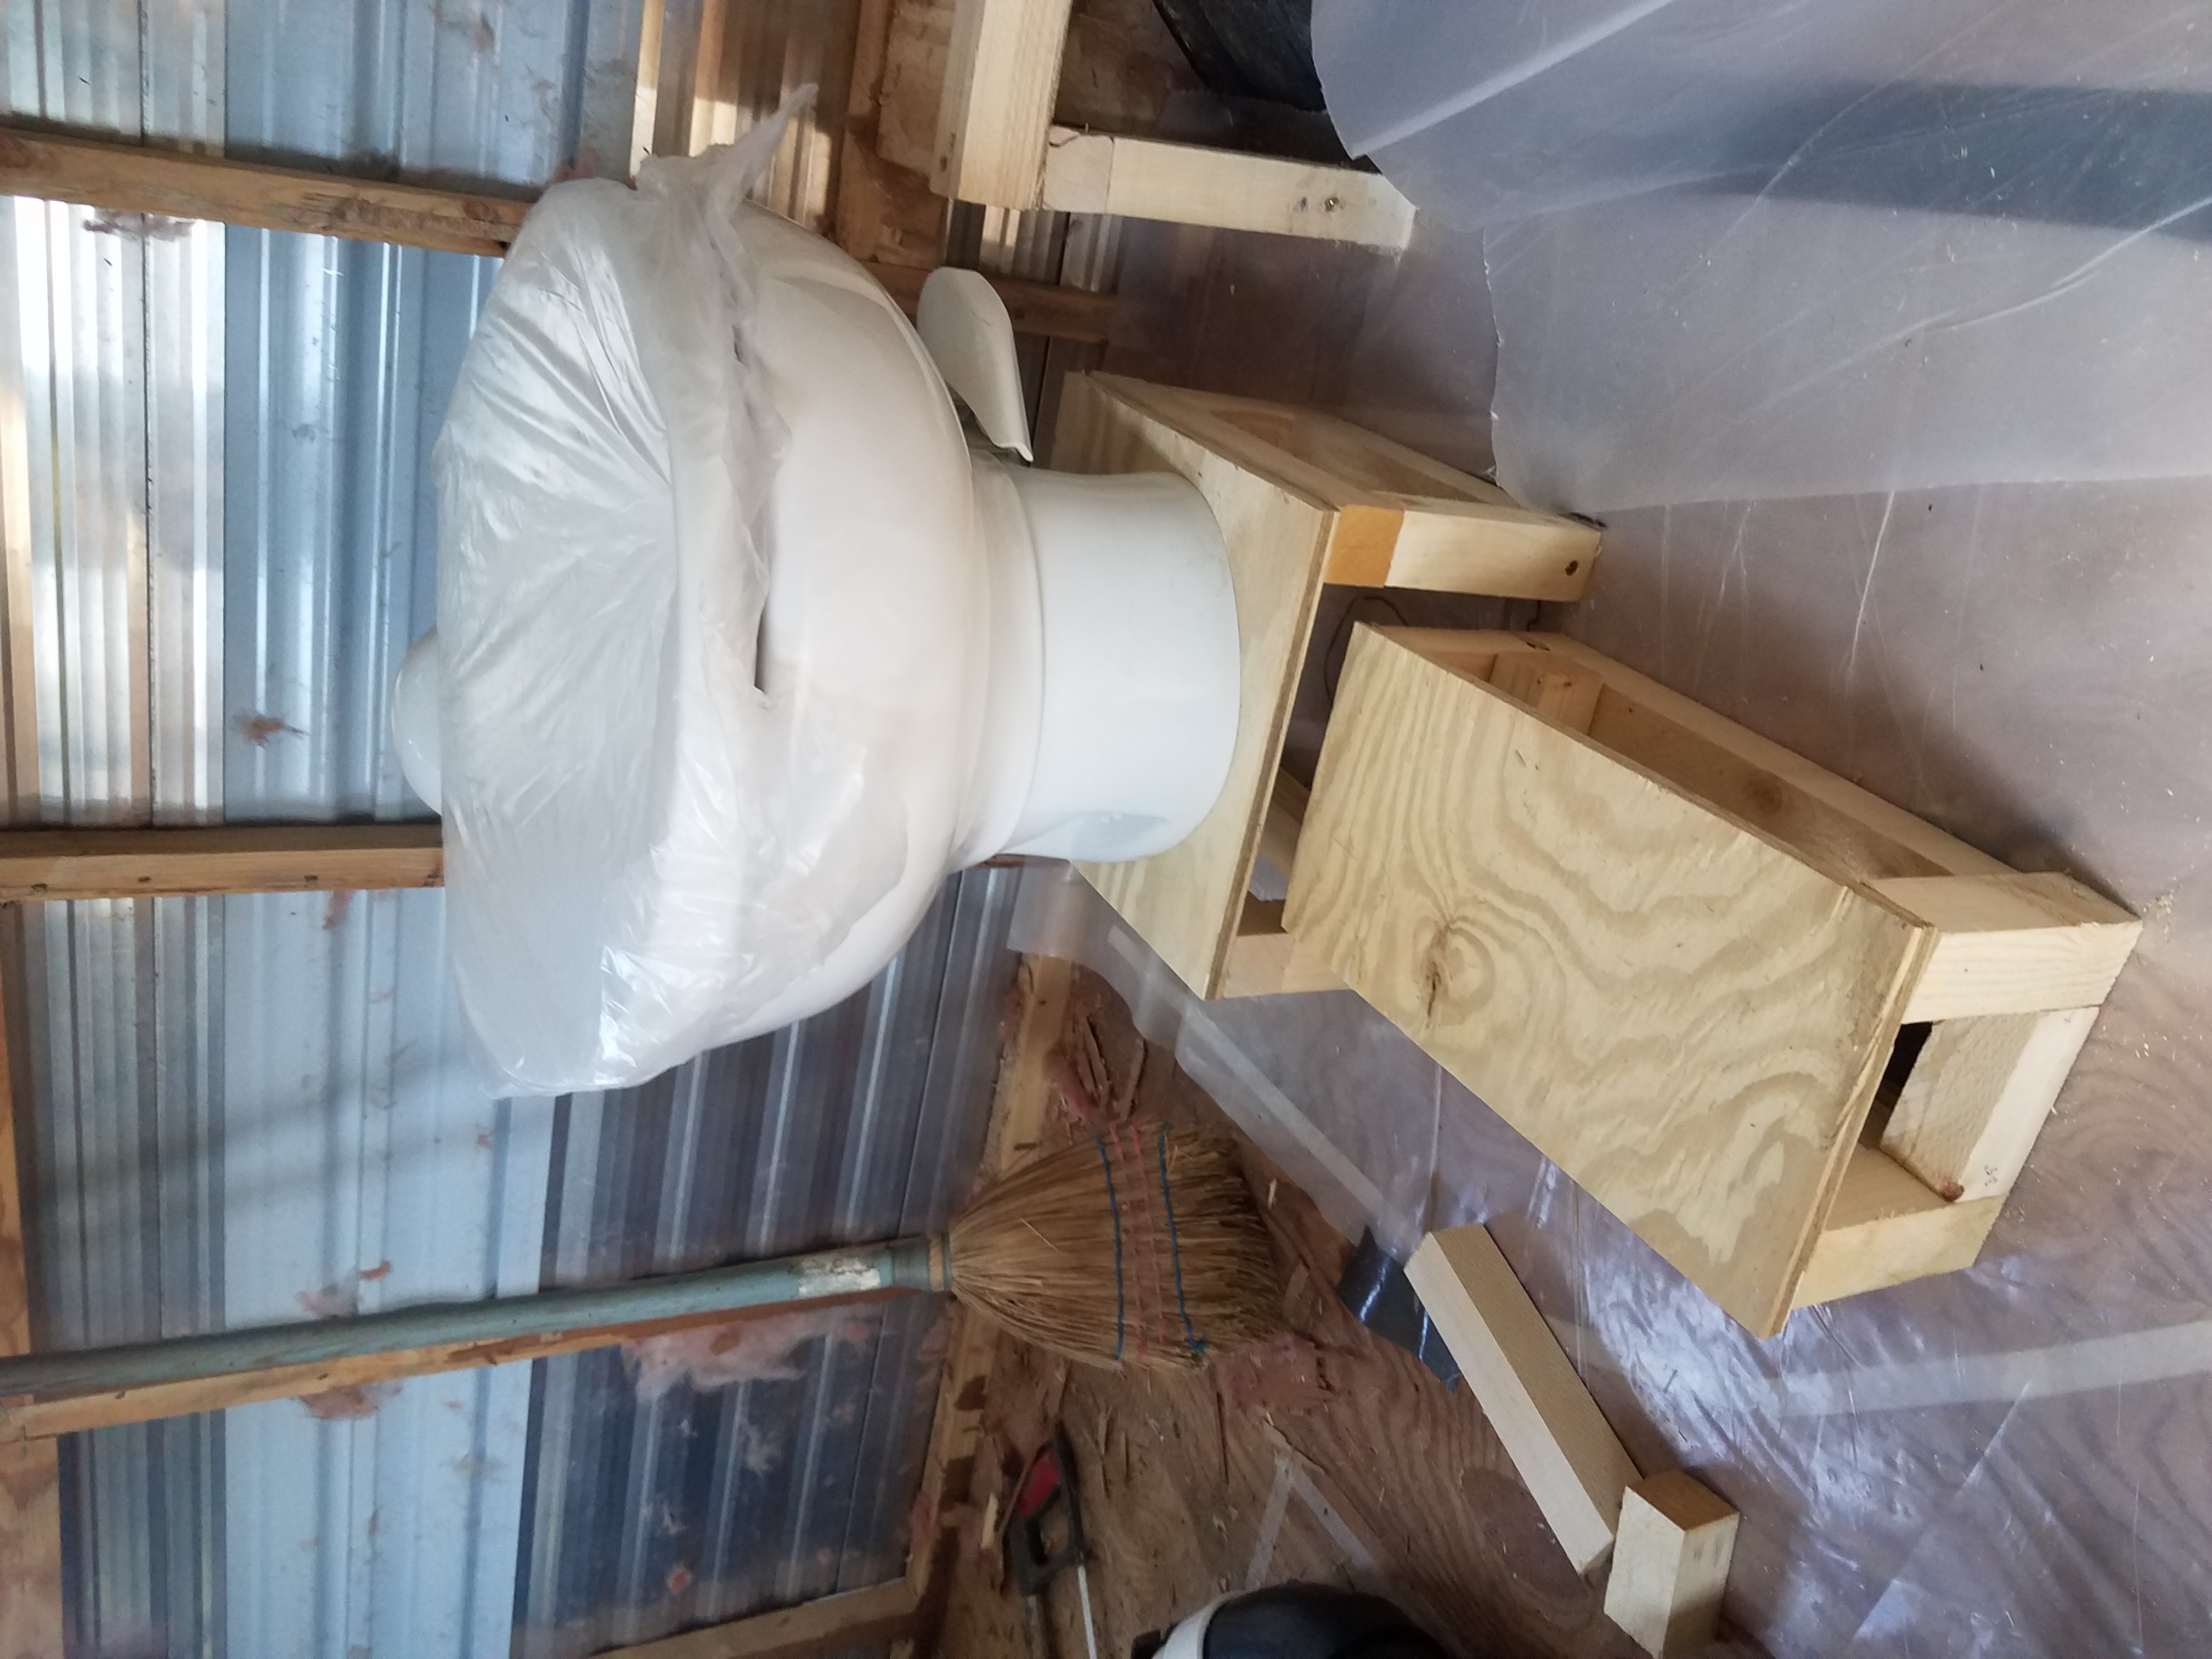
I purchased my new toilet online and made sure to shop around for the best deal and the best model. I ended up getting it on eBay, which is a little weird. You really can find anything on there.
I chose a short toilet designed specifically for RVs to leave space for the extra height of the platform. It’s only 11″ high, making the total height of the toilet seat with the platform included about 18″ from the ground, which is on the high end for toilets but still within the acceptable range. I also decided to buy a slightly heavier model with a porcelain bowl for durability. Plastic may be fine for weekend use in the summer, but I don’t imagine it will hold up well to everyday use.
It has a foot pedal flush which I vastly prefer to the hand flush placed on the bowl. RV toilets don’t have a tank, which means you have to bend all the way down and put your face right near the toilet bowl to push the flush on the side of the seat. Gross. Pedal flushes are more sanitary in my opinion, although old people tend to not like it because it requires you to stand on one foot for a quick second while you push the pedal. I think we can manage.
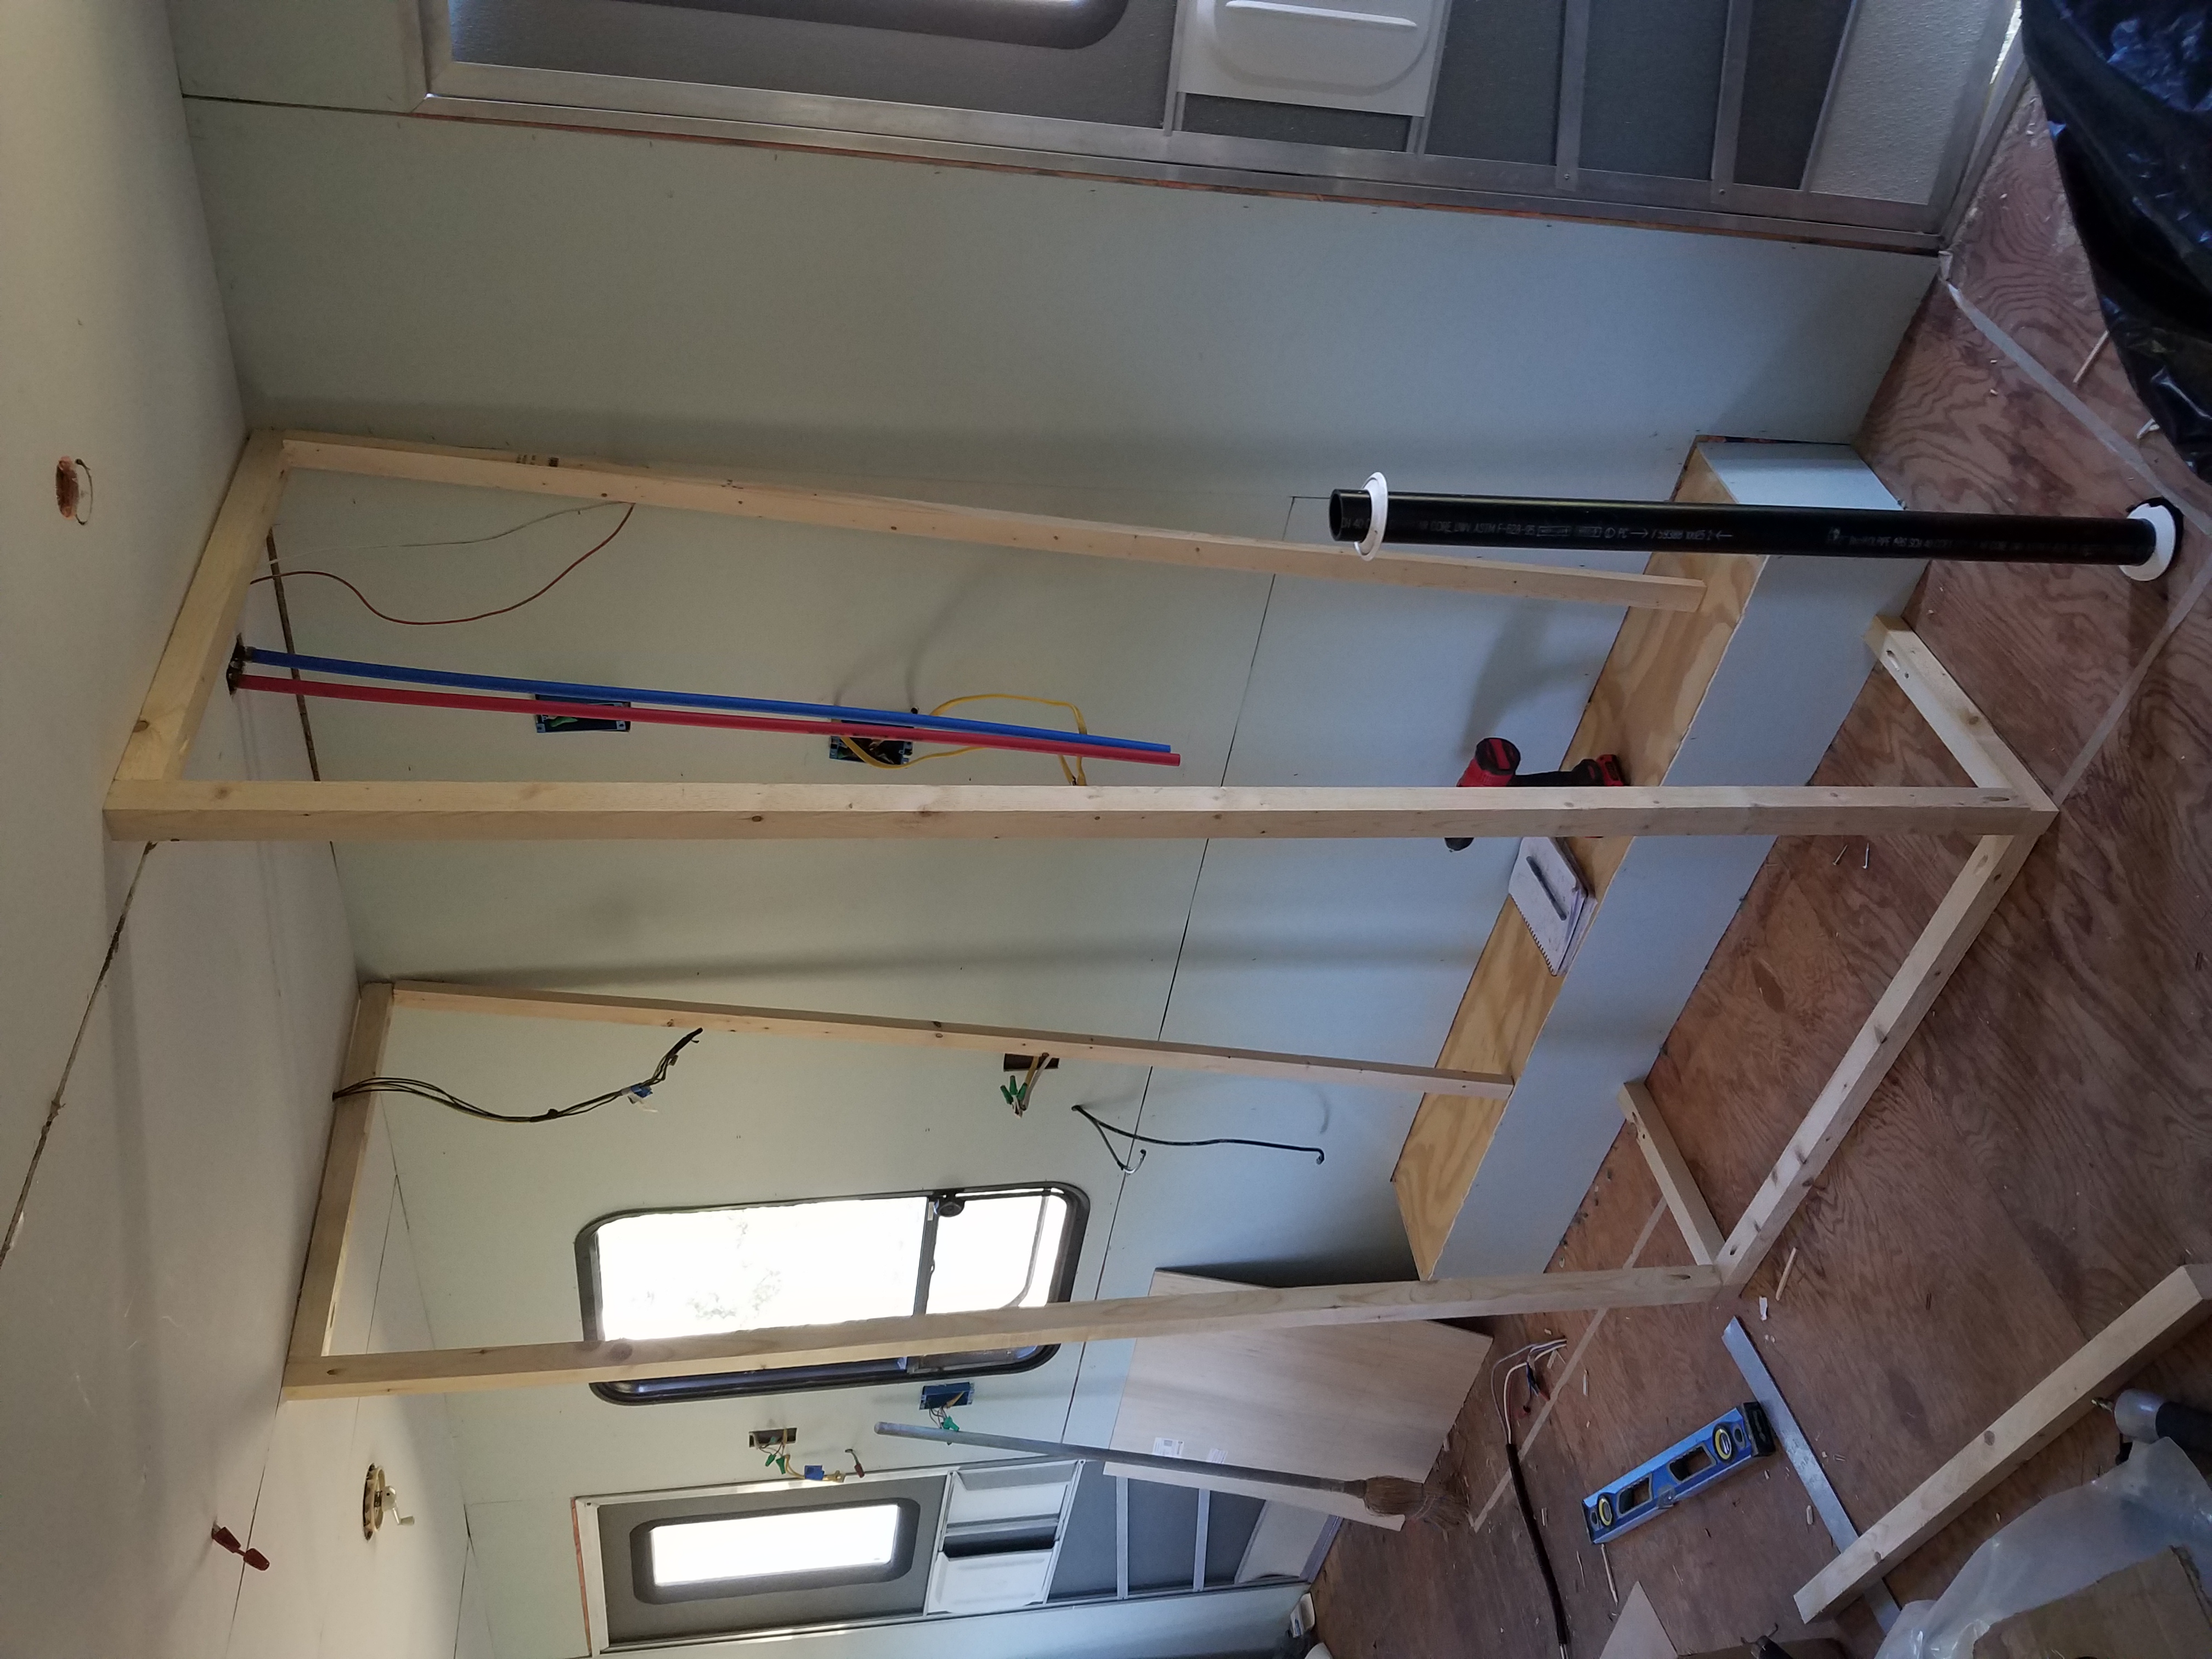
The cold water inlet for the toilet was easy to plumb. I used a 3-way valve on the cold water line for the shower and ran the PEX tubing under the box I built over the wheel well, behind the shower, and then left it sticking out behind the toilet. That will be simple to connect when I’m ready to install the toilet.
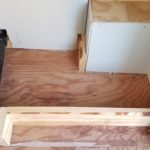
Building the small platform to accommodate the rise in the toilet waste pipe was a simple matter of measuring a box for the flange, and a smaller box to cover the short run of pipe between the flange and the hole in the blackwater tank. I made the cuts, jointed the boxes using pocket holes and glue, and then fastened the boxes to the subfloor. The flooring will go around the boxes and then be glued on up the sides and on top of the boxes to achieve a waterproof finish. I might end up extending these boxes to connect with the shower, making a larger platform. But that will depend on how comfortable we are after using it for a while.
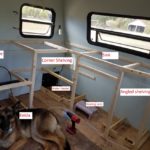
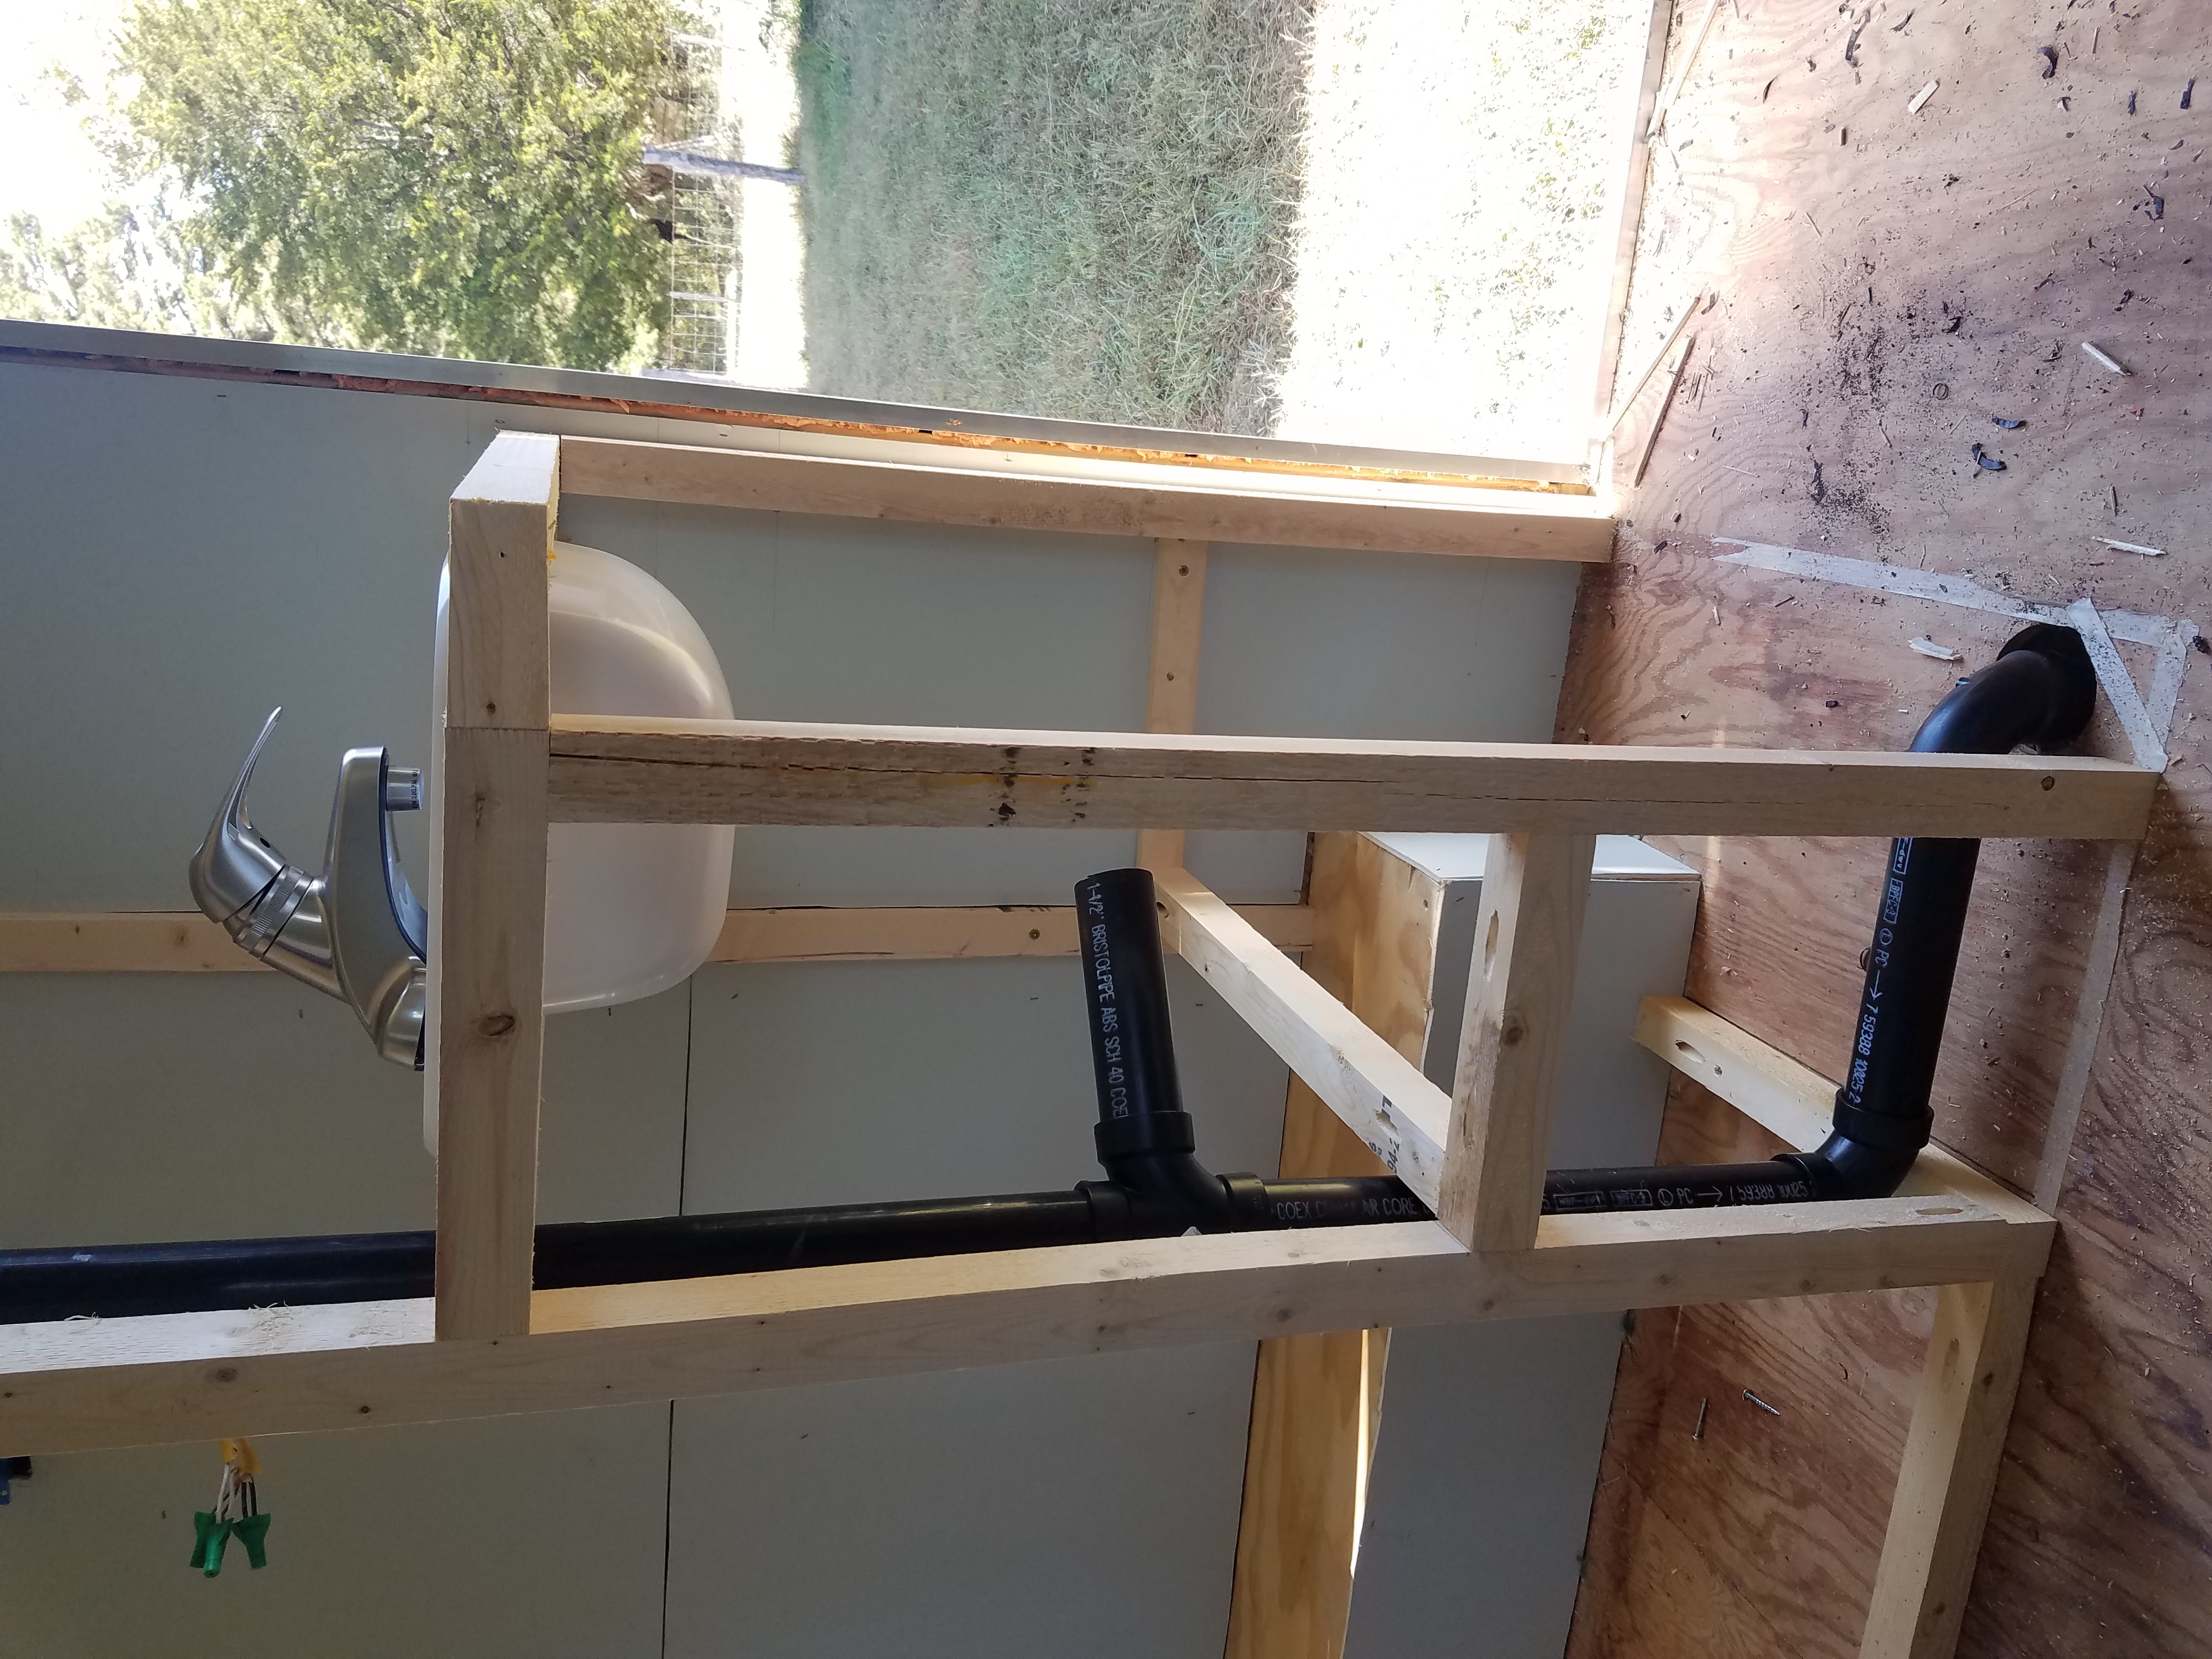
The Bathroom Sink
The sink area is a bit more complicated. By moving the sink completely away from its original position, to the other side of the trailer, I had to get creative with how to plumb it. My original plan was to pull up the floor and run the hot and cold water lines through there, but my dad suggested going along the ceiling. Sometimes you just need a fresh set of experienced eyes. Running the lines through the ceiling saves me all the work of having to cut and remove the floor and also makes them much more accessible if we ever need to work on them for some reason. It’s also a more insulated space so I won’t worry too much about the lines freezing.
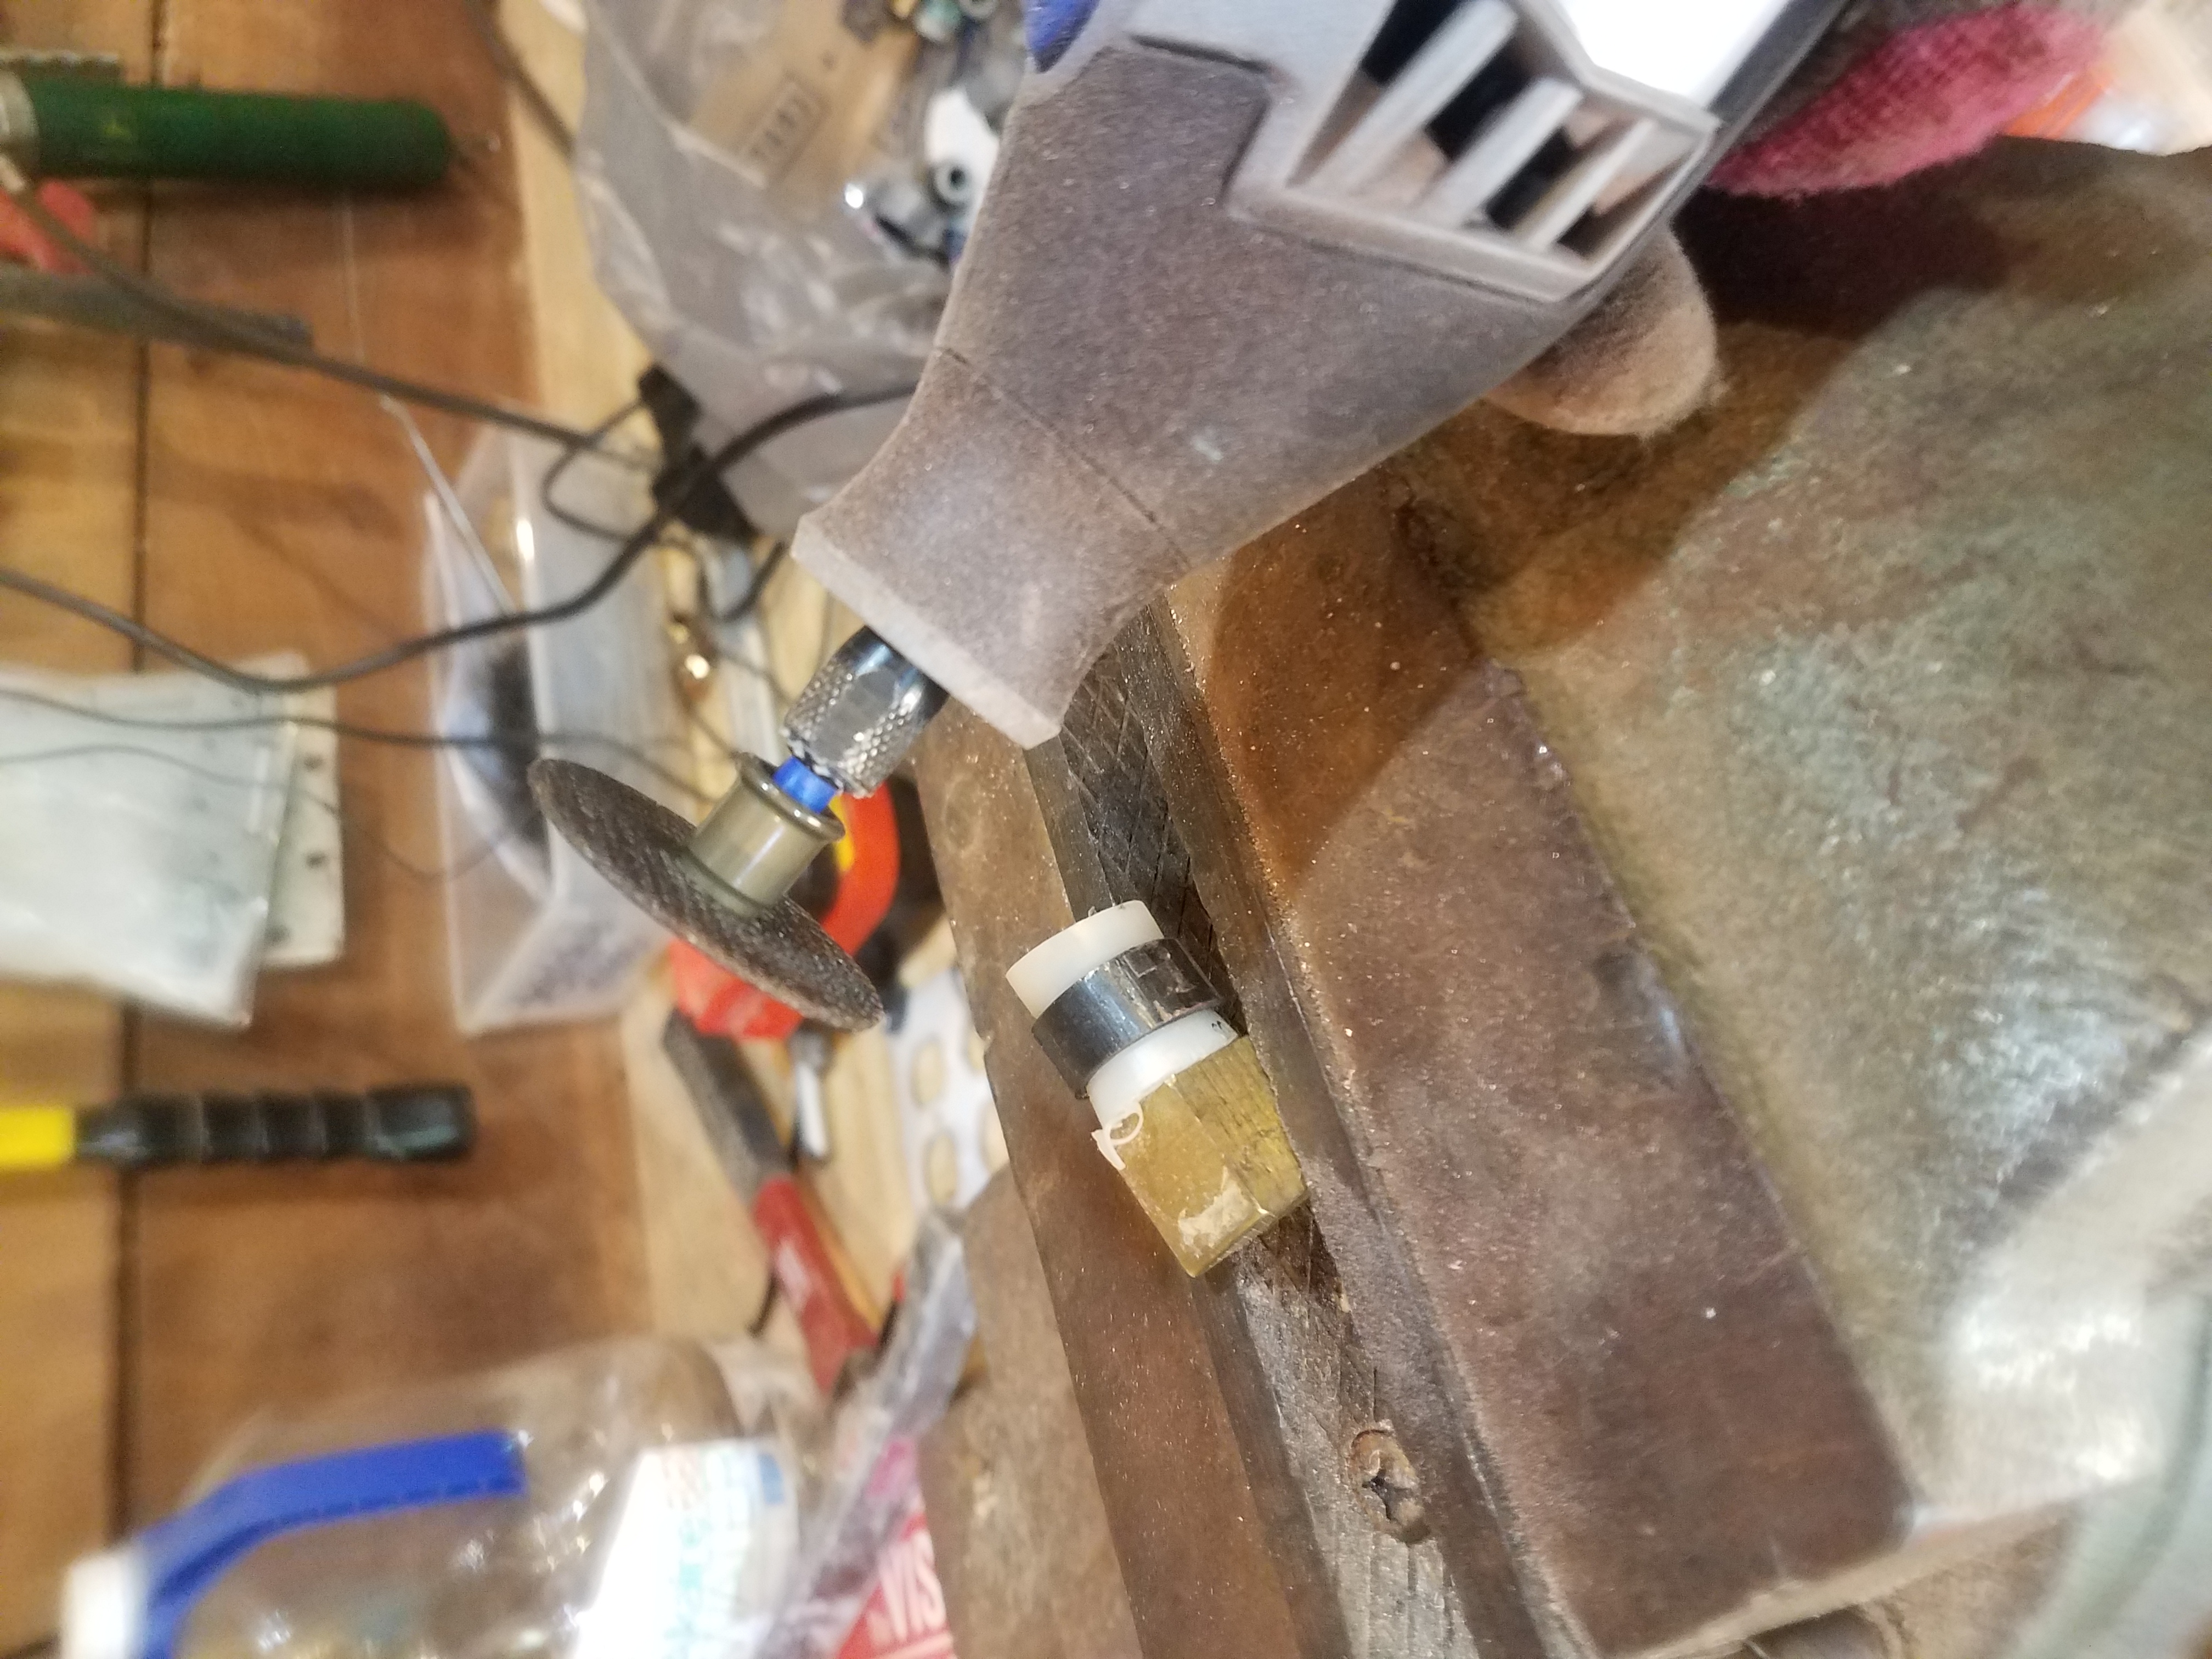
The only issue is that plumbing supplies are Expensive. It can be almost $3 for a copper PEX connector, never mind having to buy the crimping tool ($60) and the crimping rings. Rather than spend money like it grows on trees, I took the time to salvage the PEX connectors from the old PEX lines that I cut out of the trailer.
This is pretty tricky, but I ended up going on the advice of some random guy in the Lowes who was willing to chat with me about PEX plumbing for 20 minutes. I bought a tiny circular blade for my Dremel and used it to carefully cut the PEX crimp rings off of the old tubes and then pulled the connectors right out, no problem. The guy at the Lowes also recommended using plastic connectors rather than copper ones in order to avoid corrosion from hard water. I’ll keep that in mind when I need to purchase more connectors.
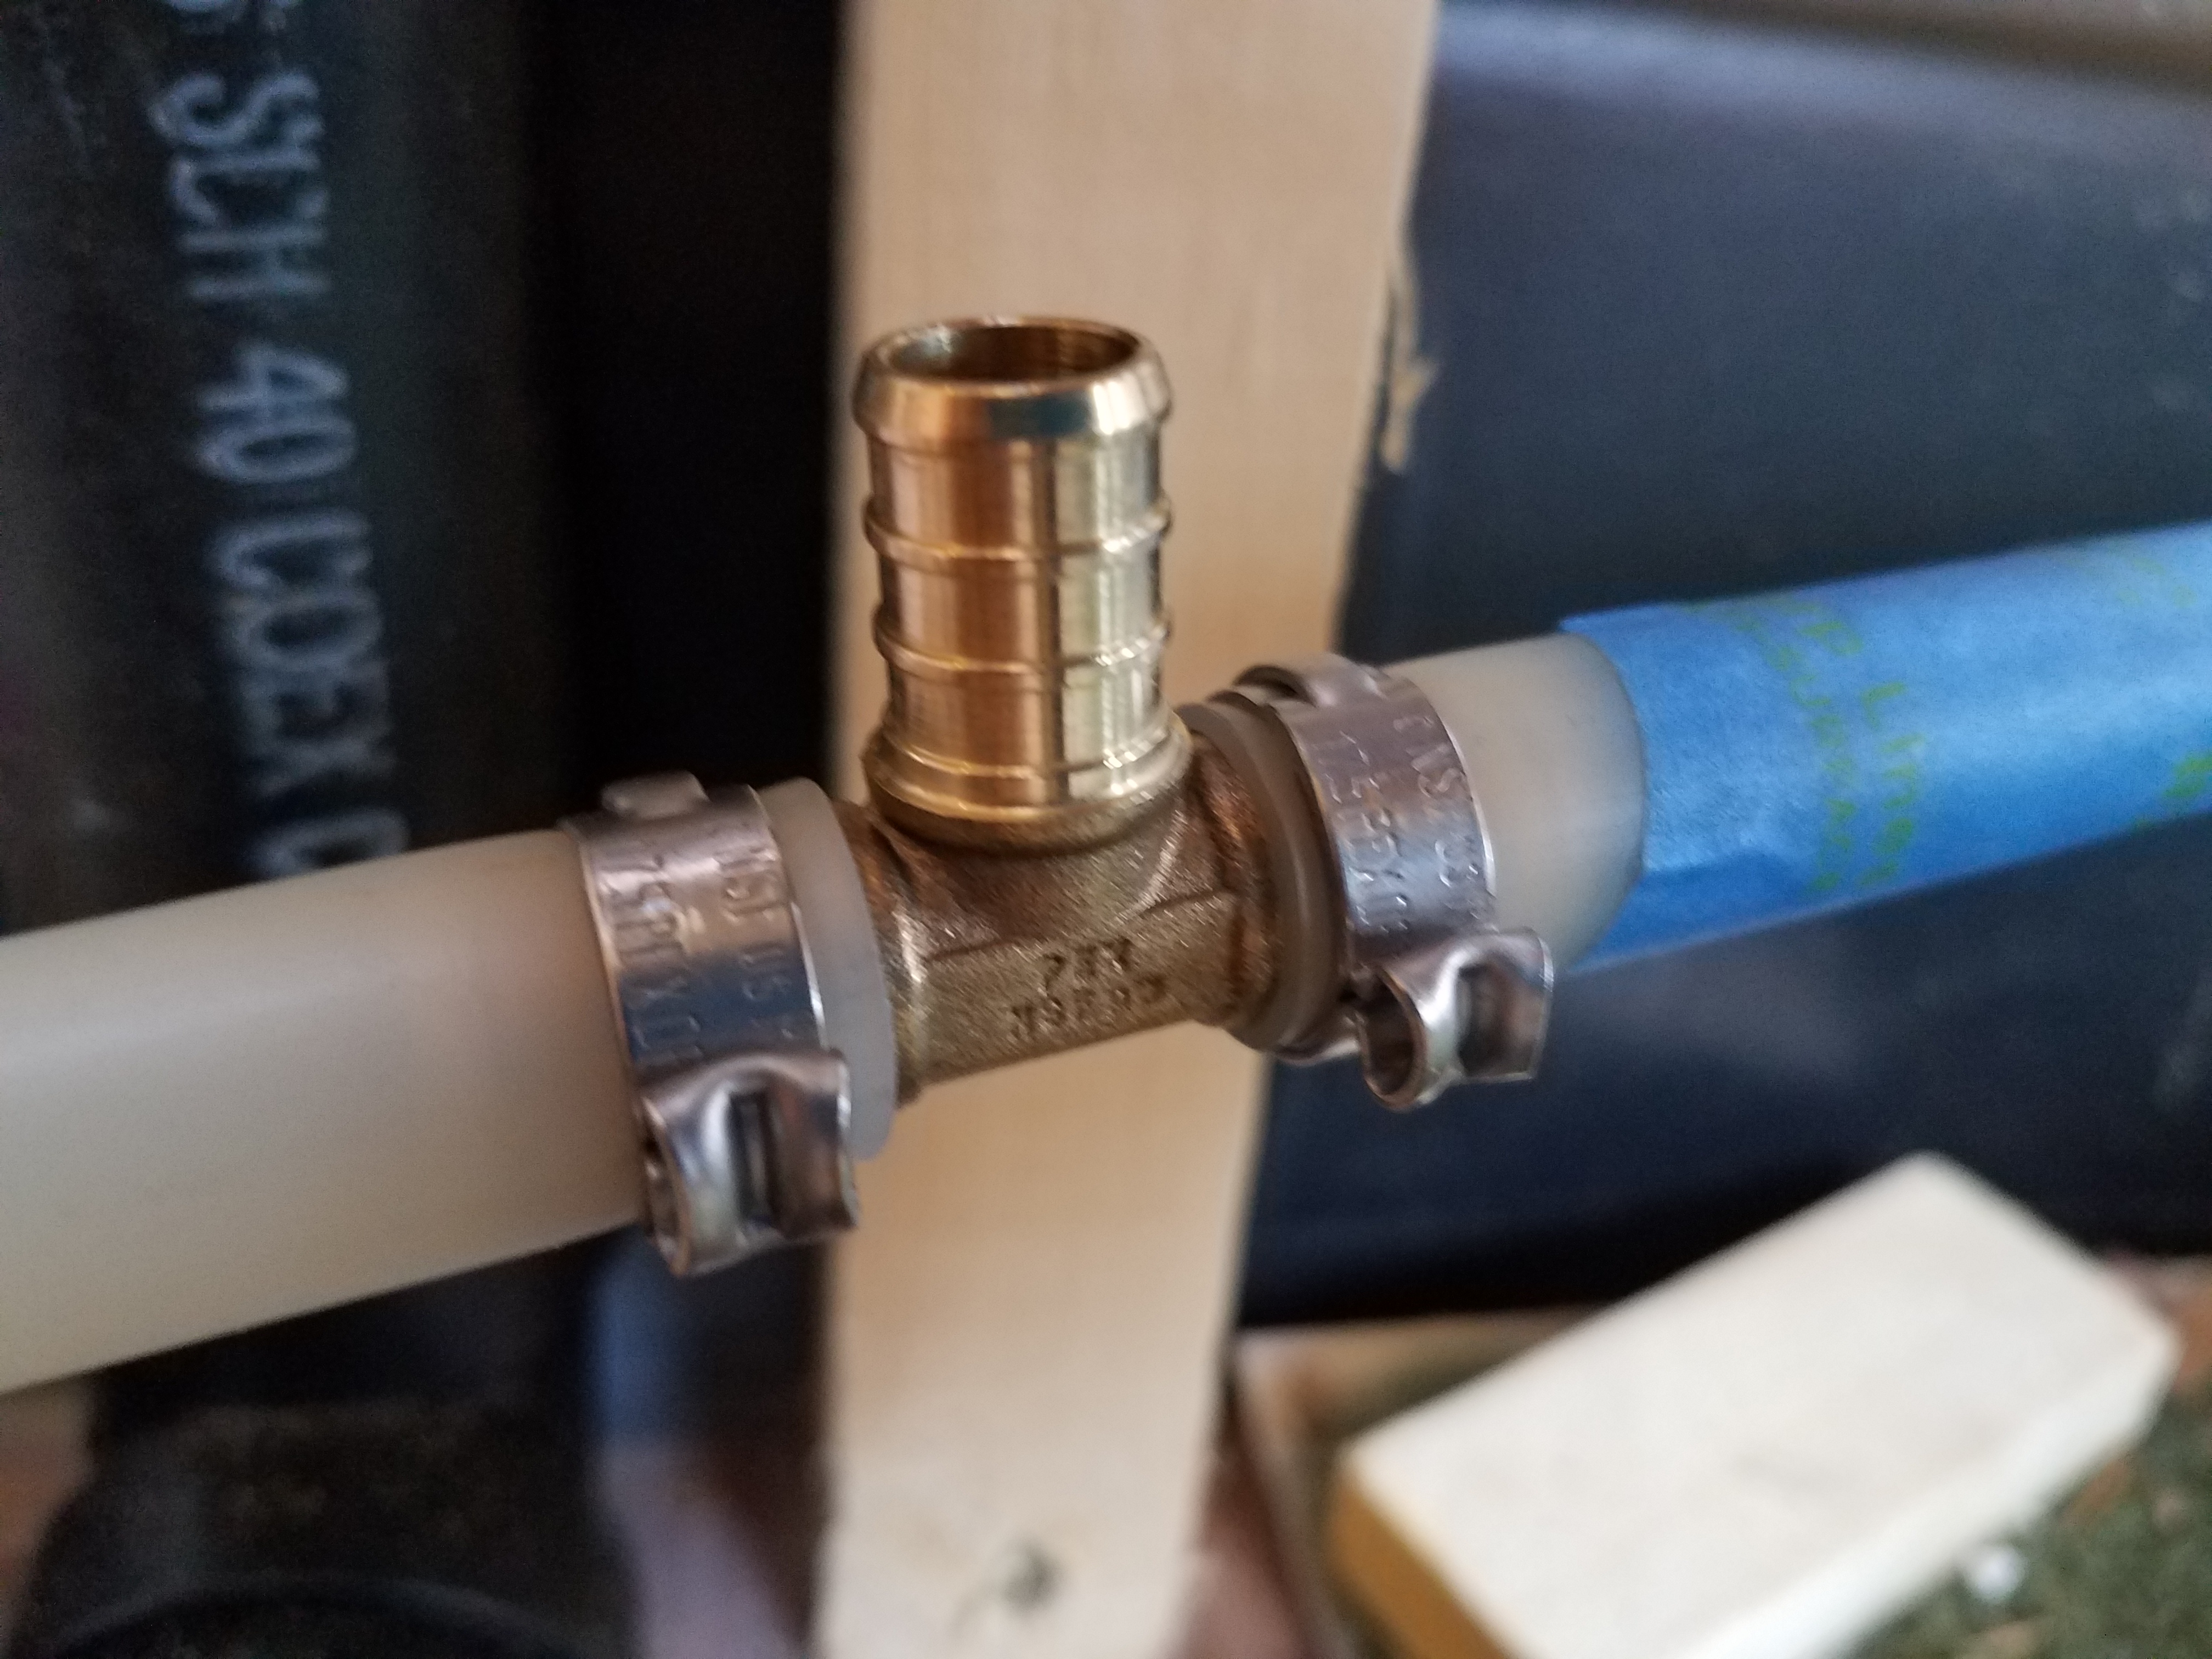
It was simple to extend the water lines from the shower with 3-way PEX connectors. I routed the lines up the wall, across the ceiling, and then down out of the ceiling on the other side of the trailer. I put the lines inside the closet since they would not easily fit behind the wall. This way there will be plenty of space for connections and it will be hidden in the closet.
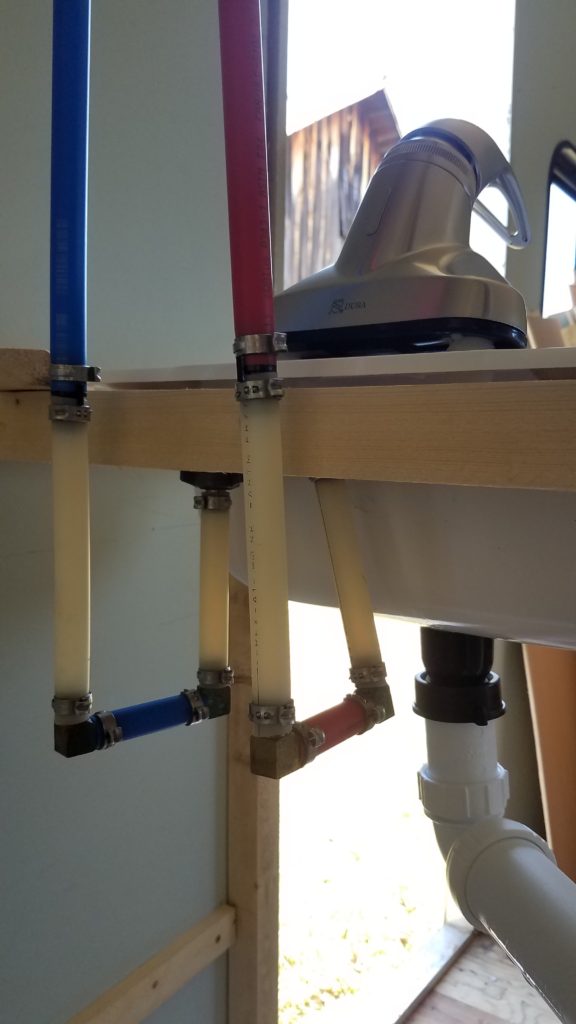
Connecting the PEX water lines to the faucet is pretty simple. The faucet comes with threaded extensions sticking out below the sink. I salvaged the threaded PEX sink connectors off of the old plumbing, so I can simply extend the pipes to right below the faucet, crimp the connectors on, and then screw them in. This is made even easier by the fact that PEX is flexible, so I don’t need to be exact in my measurements.
Salvaging the old plumbing parts has been key to making the plumbing work easily. When they put the trailer together they had all the right parts to go with extra small, extra flimsy plumbing like they don’t have in houses. You can’t find these things at Lowes very easily. Trailer plumbing is just not like house plumbing in a lot of ways. Re-using is fantastic. My trailer was used so little before I bought it that all of these plumbing fittings are good-as-new. It’s saving me money and the time and effort of looking up the right parts to use.
The waste pipe for the sink required some compromises. It would be impossible to run the waste pipe for the sink across the floor to the grey water tank. The pipe wouldn’t fit below the floor and even if it would, I’d have to cut through all of the floor joists to make it to the other side. That’s really not an option.
Instead, I decided to use the black water tank vent pipe as a waste pipe outlet for the sink. It will still be able to serve as a vent pipe and it’s really perfectly placed for the sink. The downside is that the black water tank will fill up more quickly since water from the sink will go into it. We intend to be hooked up the entire time we’re living in the Wind Rose, so I don’t think it will make a big difference. If we were going to be boondocking, we’d just have to use the kitchen sink instead.
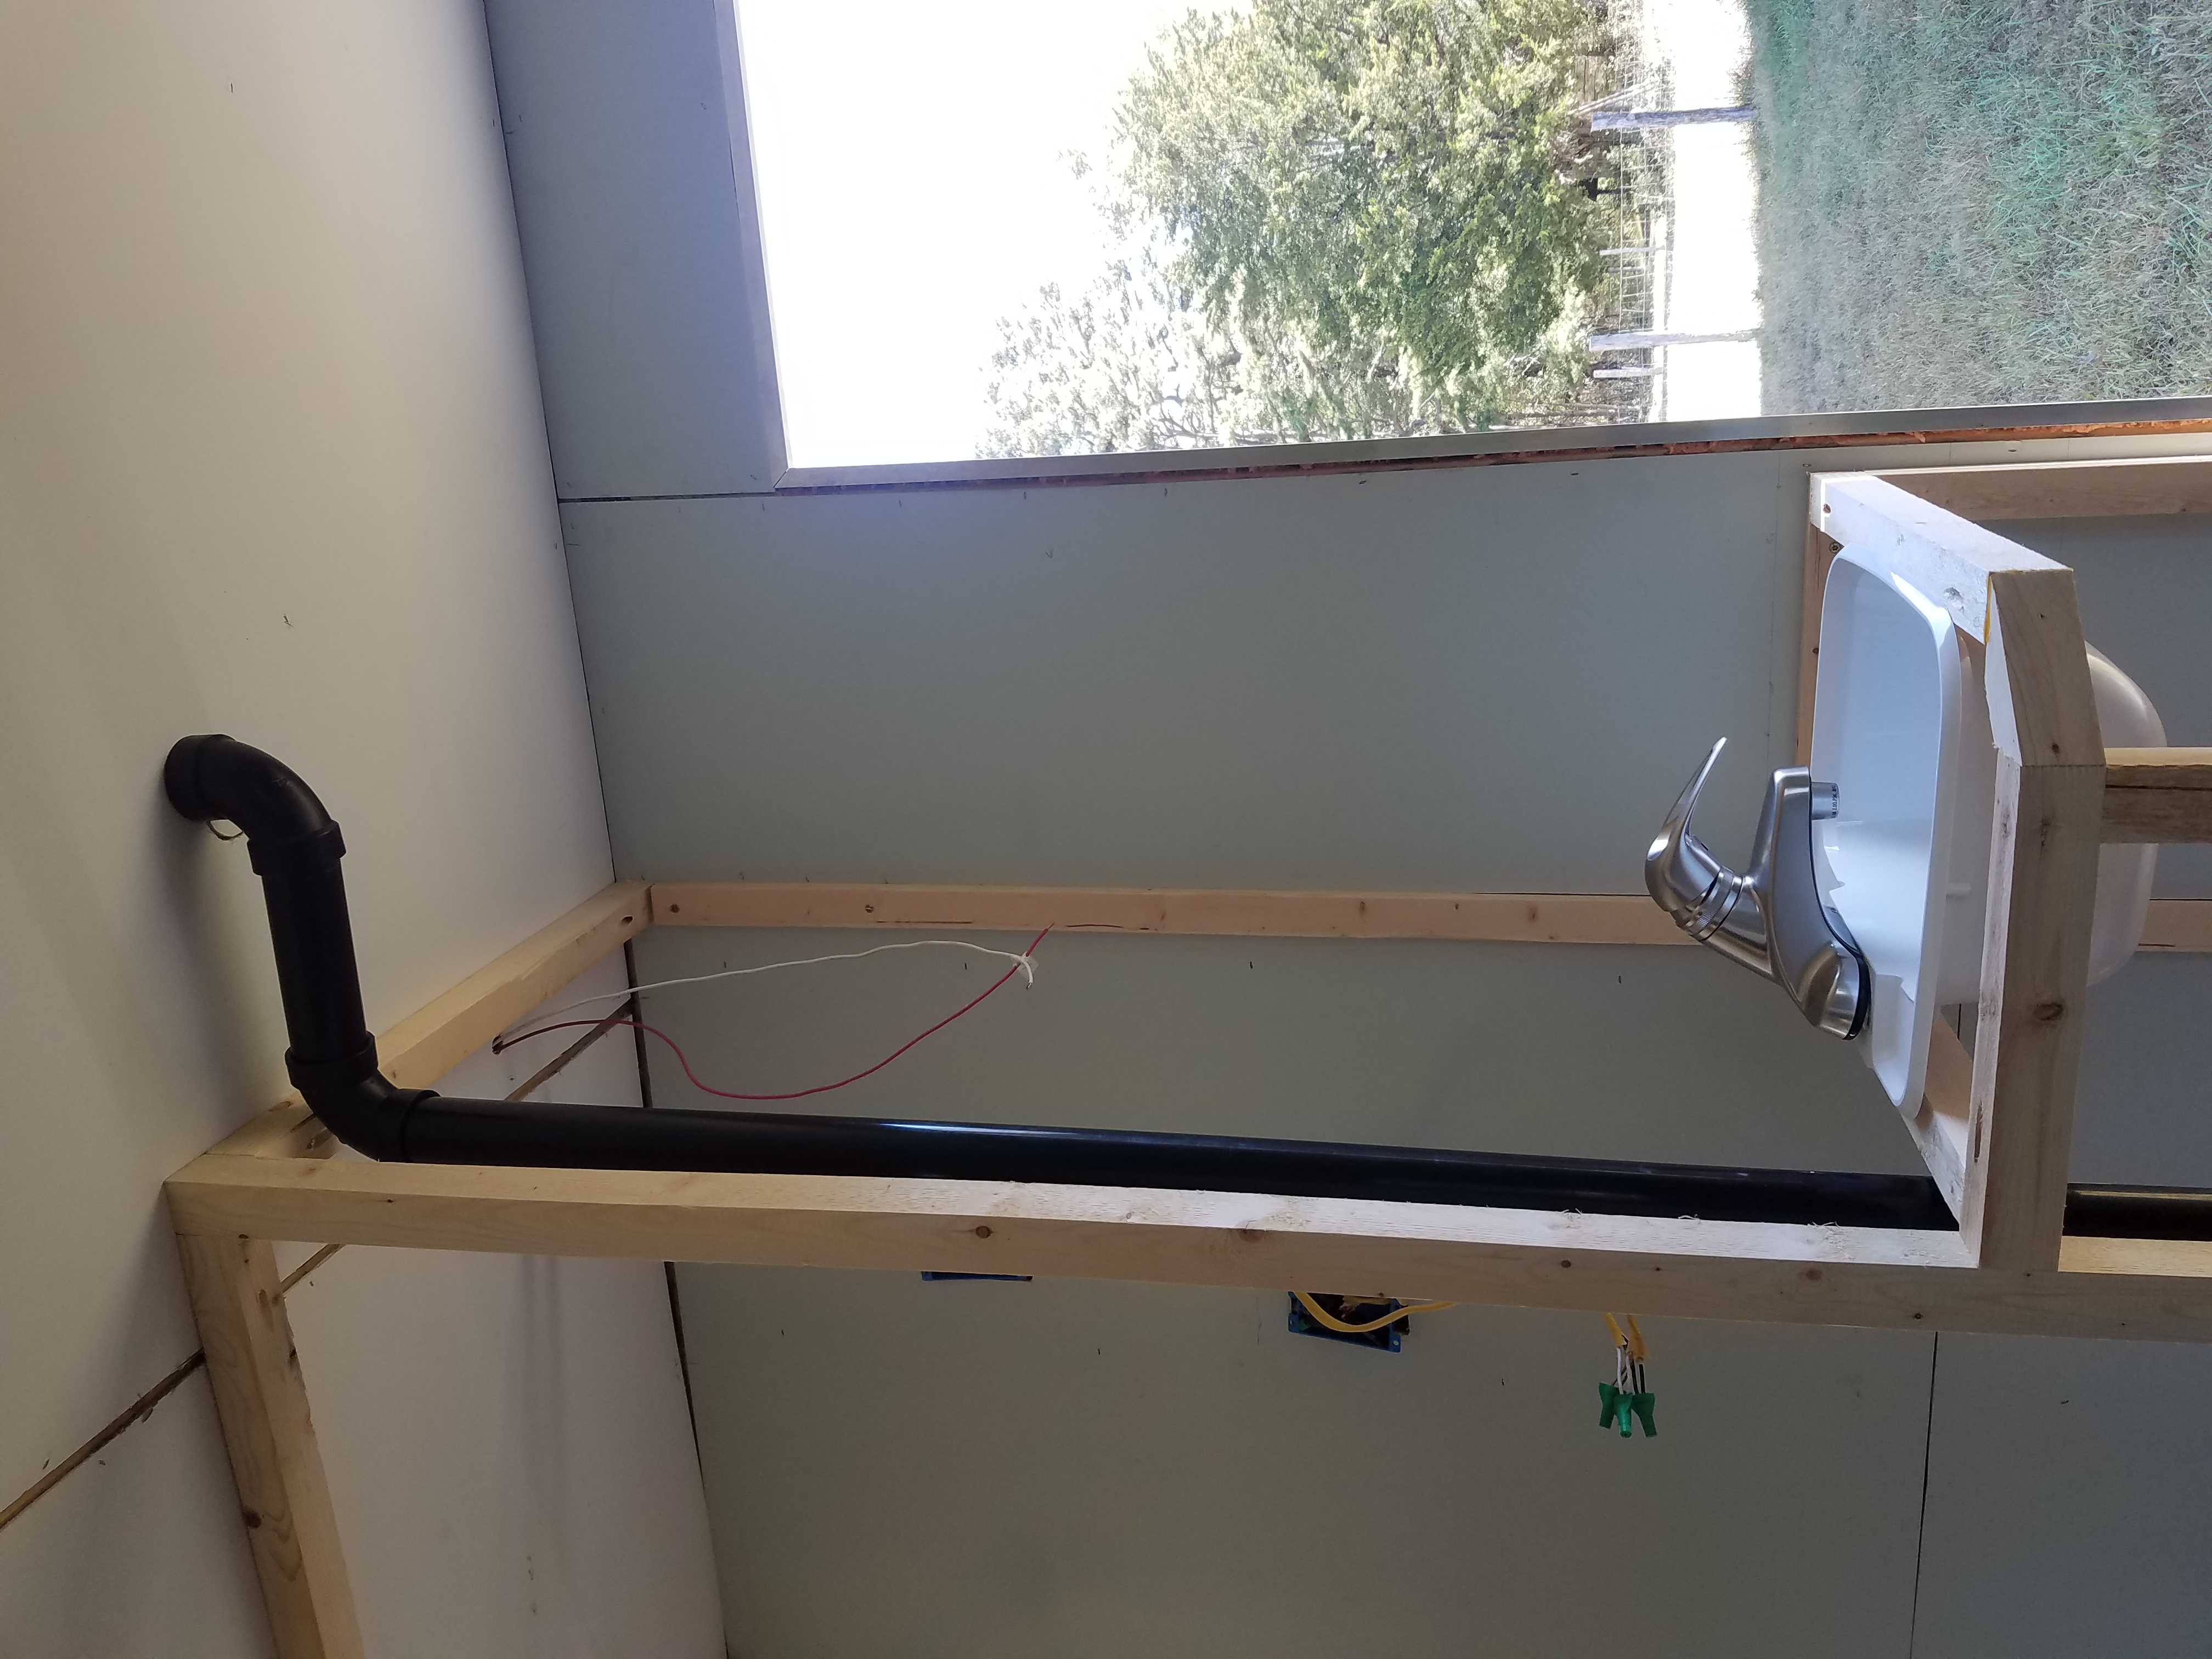
Using the vent pipe as a drain required moving it out of the way of the new sink and also putting in a 3-way connector for an additional inlet. I created a jog in the pipe, ran it up the inside of the closet, added the sanitary Y fitting, and then ran it up to the ceiling and back out to the vent. The water from the sink will go into the 1–1/2″ pipe and enter the blackwater tank through the original vent hole.
However, the sink water will not block the entire pipe, and will most often be dry, leaving the pipe to act as a vent through the ceiling. It’s a really elegant solution to a tricky problem. I wouldn’t have been able to move the sink without the blackwater vent being available as a drain.
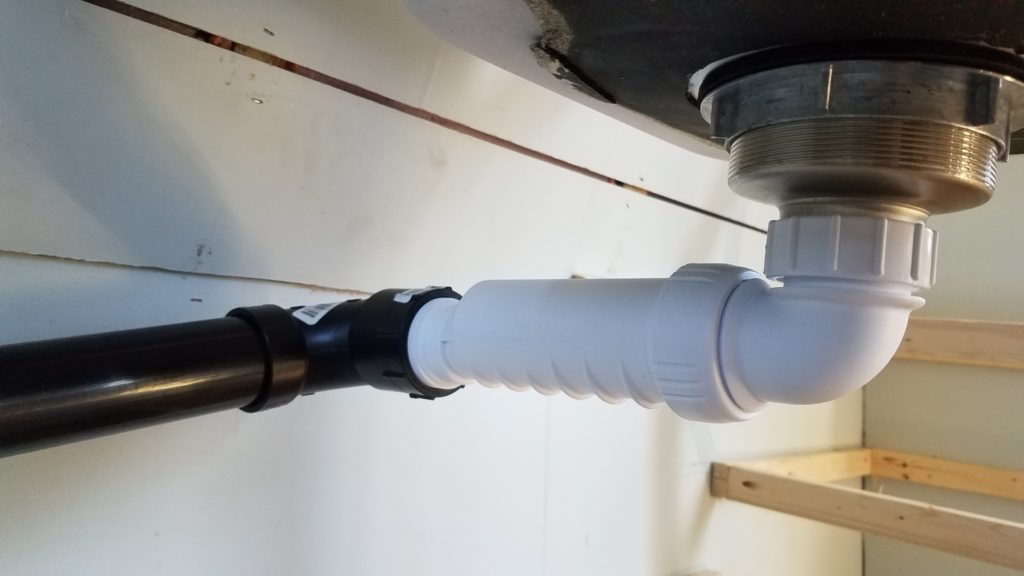
Once the sink vanity was roughed in, I was able to run the plumbing hook-ups to almost the exact connection point for the sink, although a full connection will have to wait for the countertop and sink to be fully installed. I’m using the HepVo vent again for the bathroom sink. The HepVo vent is genius and I strongly suggest you look it up. No p-trap needed, also no individual vent. And it’s smaller! Perfect for RVs and tiny homes and trailers.
The drain pipe that came with the sink is a 1–1/4″ pipe that is not Schedule 40 ABS, but some much flimsier RV version of pipe. That means it won’t interface nicely with my Schedule 40 ABS vent pipe. I had to find a series of adaptors to make it work.
My sink plumbing arrangement is:
Drainpipe → 1–1/4″ constriction adaptor with a female-threaded end → screws into the HepVo ABS adaptor piece with the constriction device removed → 90-degree angled HepVo adaptor → screws into the HepVo vent itself → 1–1/2″ female-threaded adaptor → 1–1/2″ ABS pipe → sanitary Y fitting → 1–1/2″ pipe that goes down to the black water tank and also up to the vent in the roof.
I cut the original sink drain tailpiece to make this whole crazy mess take up less space. But, for the record, I wish they would just use normal-sized pipes on their sink drains. Having to use all of these adaptors to make it fit the HepVo is ridiculous.
The hot and cold water input pipes were easy. I simply routed the lines from the ceiling down to the faucet through the inside of the closet. I used 4 extra 90-degree fittings in order to make the PEX jog around the shelving in the closet. I knew it would be annoying to have those pipes blocking the corner of the closet. It was worth the extra $15 not to be constantly annoyed by a pipe that’s in an inconvenient place. I also recommend using plastic fittings. They’re cheaper and they don’t corrode, which is great when you know you’re going to have hard water.
The Kitchen Sink
The kitchen sink was much simpler than the bathroom vanity. Purchasing a regular sink, such as you’d have in a house, allowed me to use regular plumbing methods as well. The sink drain had a threaded end that fits nicely into the HepVo 90-degree adaptor.
Kitchen Sink Plumbing: Sink drain → HepVo 90-degree adaptor → HepVo → 1–1/2″ female threaded adaptor → 90-degree street elbow → run of pipes to the grey water tank.
The drain plumbing runs around the corner, behind the fridge and couch, and into the gray water tank. Luckily, I only moved the kitchen sink a few feet around the corner, so I simply added an extension to the existing drain line to get around the corner.
The cold water PEX tubing comes from the freshwater tank under the couch, behind the fridge, and along the wall to the hot water heater. Then it also goes forward to the kitchen sink. The hot water comes out from the water heater and goes in both directions, forward to the sink and backward to the shower/bathroom sink. It was a simple matter to extend the PEX tubing to the location of the water heater, add a 3-way connector, and then extend it around the corner to directly under the sink.
These pipes will run along the wall under the kitchen counters and be out of sight and out of the way of the shelving. From the floor under the sink, I simply extended the lines up the back wall to the kitchen faucet.
The final step, once I have everything the way I want it, is to glue all of the fittings together. Once you’ve glued ABS pipes together, there’s no getting it apart. The only thing you can do is cut it apart and start over. I like to leave gluing until the last possible minute just in case I need to make any changes. Also because irreversible actions make me nervous.
The only thing you don’t glue is the HepVo vent and the threaded HepVo adaptors. You need to be able to unscrew the HepVo and clean it out every so often or unclog it if that happens. You won’t be able to snake your drain without destroying the HepVo, so you have to remove it to clear clogs. Instead of gluing, just follow the directions and use Teflon tape on the threads to ensure a watertight connection.
In my opinion, plumbing has some fairly simple rules you need to follow and as long as you do that, it’s pretty straightforward. I did read a few plumbing books, not just the How-To ones, but also the ones that explain why you need to do things. Also, the plumbing needs of the trailer are very simple, without any tricky things like connecting to the city sewer or dealing with multiple drainage stacks or whatnot. I have yet to test the plumbing since that will have to wait until everything is installed, but I will update this with any issues (hopefully none) that I encounter.
UPDATE: Hey friends! My husband and I have now been living in our little trailer-turned-tiny-house for over a year now. Also, that year was 2020. Yep. So you know we really Lived in this trailer. I worked from home at my tiny flip-up dining table for the whole year and even had to share the work-from-home space with my husband for 3 weeks. Just the two of us in our little house on the Oregon Coast.
The point is, I can now affirm that we haven’t had Any plumbing problems. It’s been all roses here in the plumbing department. Everything is working as it should. No clogs in the toilet or sink, no leaks that we’re aware of. We’re going to have to replace the bathroom faucet soon because it’s very cheap plastic and it’s already falling apart, but that’s a $20 and 10-min job. I give this project and the plumbing decisions we made two Big thumbs up and my personal stamp of approval.