Rebuilding the Wind Rose: Part 3
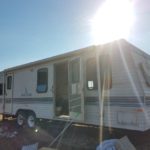
This is the story of how my husband and I purchased a 20-year-old travel trailer and I DIYed the crap out of it to make it suitable for full-time living. In this series, I’m giving All of the details about the process through every step, as performed by me, a 26-year-old woman with No experience in construction. The first installment in this series can be found at the link below, detailing the purchasing process and the changes I planned to make.
With the initial assessment of the Wind Rose completed and a partial list of what needed to be repaired ready, it was time to start working. I decided to address the water damage issue first since that would either be the Worst damage or the Easiest damage to repair. If it was the Worst, then it would mean a Lot more work and it was best to know ahead of time.
There are five areas in the trailer with evidence of water damage; all four corners and under one window. Addressing the water damage at the corners is going to be a big job because I have to remove the overhead cabinets, the kitchen cabinets, the dinette, and the bedside tables in order to get at the walls. I’m putting each “job” together in these articles for the purpose of a clear explanation, but it was Not as straightforward as that. All of the work I talk about here was done over many days. I work part-time as a librarian so I could only work on the trailer for 2–3 hours a day, with the occasional full Saturday thrown in.
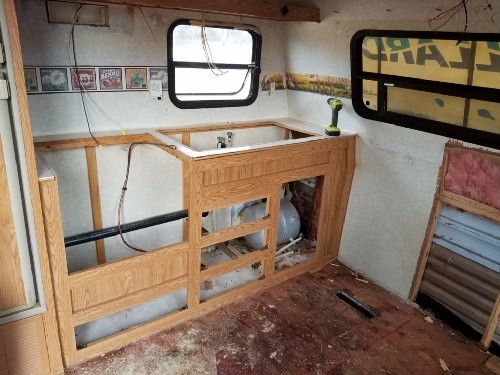
I started by removing the dinette because it was the easiest to get at and I wanted to get rid of it anyway. The dinette provides storage space under the seats and turns into a bed, which for a lot of families can be really helpful. For us, it isn’t. We still have the jackknife couch if we need to sleep a guest (or a few kids), and the dinette is not comfortable as an everyday seating area. Also, it takes up a lot of floor space and wall space that I need for my kitchen counters.
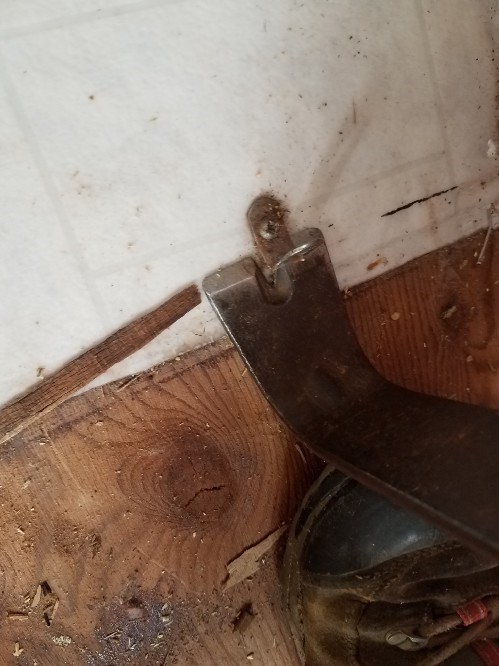
Taking it apart involved my power screwdriver to get out the brackets that connected it to the floor. I also had to unscrew the table from the wall. The rest of the dinette was held together with staples, and it was pretty flimsy. A few kicks and good hard tugs and I had it apart.
I kept the table, just in case, but the rest of the wood was so flimsy. It was particle board and luan over 1×1 framing. It splintered at the least force and ended up going on the burn pile. I also kept the stuffing from the seats but trashed the ugly seat covers. The dinette seat against the front wall doubled as a storage compartment with outdoor access. You can see the metal hatch on the right lower corner. I’ll want to keep that outdoor access (maybe litterbox area?) so I just left it for now.
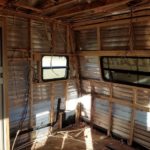
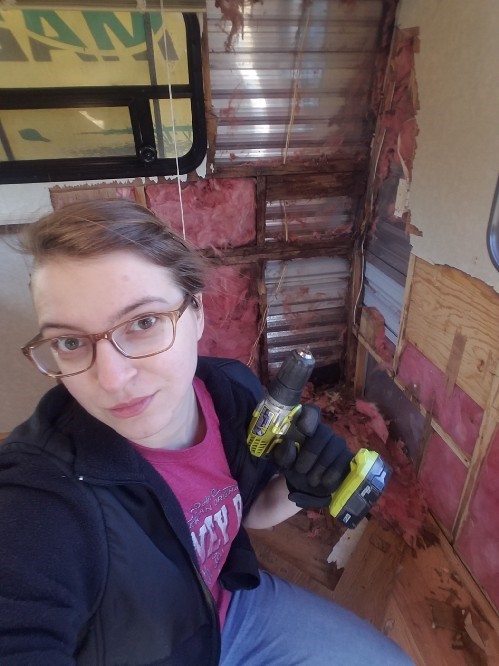
I decided not to be precise or gentle in removing the luan paneling. Luan is very thin and flimsy and it had been stapled and then glued to every stud, which would make removing it cleanly a very tedious and long job. So I used the back side of a hammer to make a hole between the studs and then used a crowbar to pull it out. I broke off the luan panels at the seam and then wherever was convenient.
I also removed the insulation to reveal the back of the exterior aluminum siding. Yep, that’s all there is to the trailer wall. Thin luan, insulation, and then aluminum siding. Very flimsy and simple compared to a house! You can also see some wiring back there for the outlet and the running lights as well.
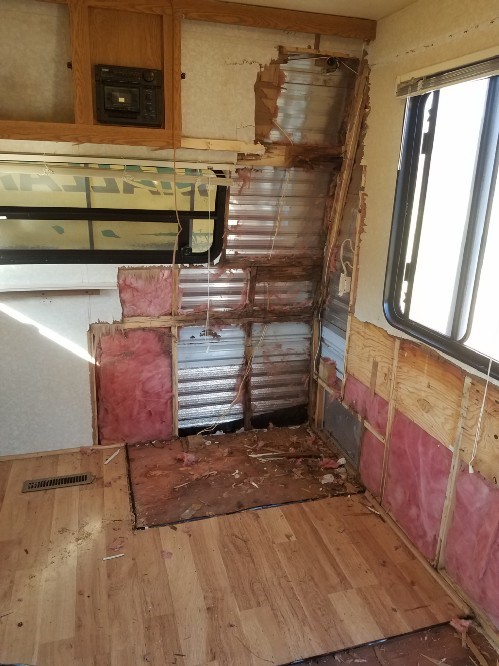
What I found behind the wall almost made me cry. There was Extensive water damage to the corner of the trailer! In the picture, you can see some nice, yellow studs under the window. if you follow those studs to the right, you’ll see where they turn dark brown in the corner. The dark brown wood is rotted and falling apart from water infiltration. Curse you, water infiltration!! I had been hoping for a simple repair of paneling, but obviously, it would be a much bigger job than that. Every rotted stud needs to be removed and replaced with new, strong wood framing. As it was, my trailer would have fallen apart at the slightest touch.

Apparently, there was a slow leak that had been going on for a long time, rotting these timbers. Interestingly, none of the studs were wet when I opened the wall. And with the rainy year we’ve been having in Virginia (rainiest year EVER recorded) it definitely would have been wet if it were still leaking. So apparently the previous owner had fixed the leak but either didn’t know about or ignored the extensive damage the leak caused. For my part, there’s no way I was going to leave my trailer with crumbling and rotten supports.
The next step was to assess the full damage. I had to cut up and remove the overhead cabinets to uncover the studs all the way to the ceiling. I needed to know if it was the roof leaking or the siding. From what I saw, I think it was the siding at the corner. There must have been a little leak where the siding meets in the corner that, over 20-years, rotted away the studs. The long stud that supports the corner of the trailer, where the siding is stapled on, was completed rotted. Unfortunately, so was the footer stud that runs along the whole bottom of the trailer and supports the floor. I was dismayed at the extent of the water damage. On the other hand, it was only in the front and hadn’t spread to the framing on the sides.
I moved on to the other front corner. In order to access that I had to remove the rest of the overhead cabinets, take out the sink, and then remove the kitchen cabinets. The kitchen cabinets are all one piece, so I also had to remove the stove and the microwave, which is over the stove. That was a few days of work, taking apart the utilities and carefully storing the appliances so I could reinstall them later.
The sink was easy to remove once I discovered the little clips that were screwed on underneath the counter. The hot and cold water pipes just unscrewed (left-loosey, righty-tighty) and I left them sitting on the floor. The stove was more involved and required unscrewing several pieces of trim in order to access the interior and unscrew it from the cabinet framing. I didn’t have any manuals for the 20-year-old appliances so I just looked at it and did some trial and error with the screwdriver. Then the propane line had to be disconnected (more unscrewing) and threaded back through the holes. I also had to remove the hood, which involved cutting the electrical lines that control the light and the fan.
As soon as I realized I was dealing with electrical wires I unplugged my camper from shore power, flipped all the circuit switches to Off, and then went around front and disconnected the neutral side of the battery. AC and DC power were both completely disconnected and I was sure to be safe from electrical shock. I had an electrician’s combination tool to do wire snipping, so that was easy. I’d like to say that I taped and labeled the wires, but I didn’t have any tape, so I didn’t. You should though.
After that, I was able to commence prying (crowbar again) the cabinet framing away from the walls and tossing it out the door. I saved the cabinet doors and all of the hardware because, waste-not, want-not. This was hard, sweating, muscle-pulling work. There were a Lot of staples in those cabinets and it was a trick to find the right direction to pry from for the path of least resistance.
There were also a lot of screws to unscrew, in brackets connected to the floor and connecting frame to frame, as well as for the cabinet doors and the drawer guidance hardware. Unfortunately, the design of these cabinets made it impossible to disassemble them without breaking them. Staples everywhere. Also, lots of particle board that broke easily. I ended up trashing all of these cabinets, which is too bad because they were in pretty good shape. I also decided to pull up the vinyl plank flooring because I didn’t want to keep tripping on it and it had to be done eventually. Under the vinyl was a water barrier of black plastic and under that was a plywood sub-floor.
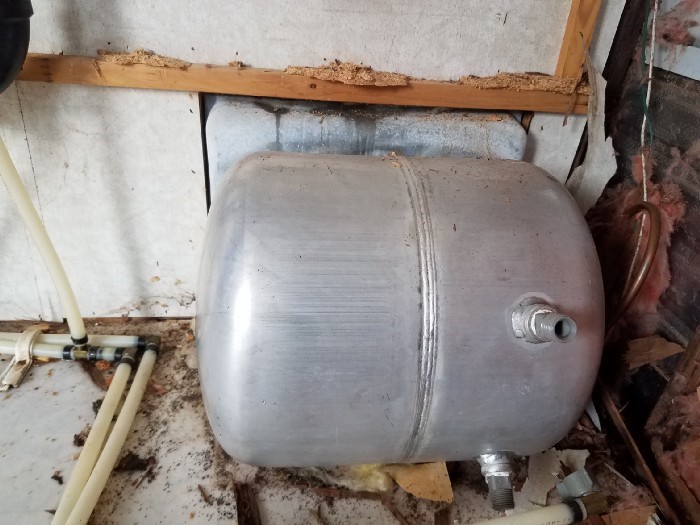
Next, I removed the water heater which was under the sink. I already planned to upgrade from a 6-gallon water heater to a tank-less or on-demand water heater. I like hot showers and I don’t plan to ration my hot water for the next few years. An on-demand water heater is also more energy efficient because it’s only on while you’re running the water and only heats exactly as much as you need. Luckily, there are liquid propane tankless water heaters because electric ones draw too much electricity for our little 30amp system to handle and tend to have a reputation for not getting the water hot enough, fast enough. More on that when I actually purchase the new heater.

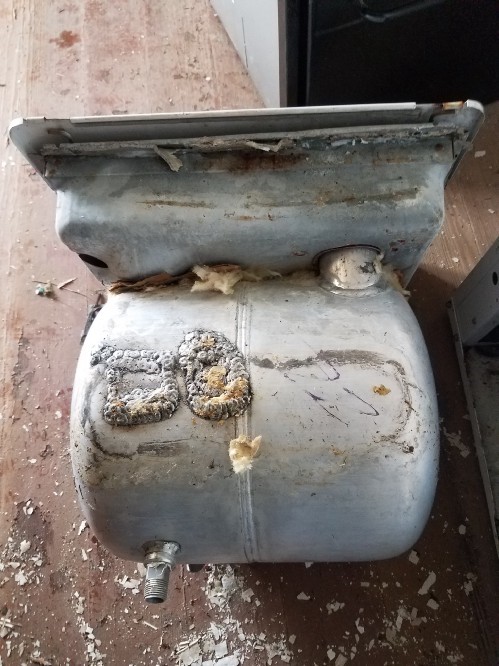
The water heater was sitting on the floor with a mostly-rotted cardboard box around it filled with insulation. I had to go around the outside and remove the hatch door so I could pull the heater out. Those bolts were Rusted and very difficult to remove. Obviously, that hatch wasn’t doing its job when it came to waterproofing the heater. I unscrewed the water lines and the propane line and then I just shoved the heater out the hole in the side of the trailer. It was heavy and still had some water in it, which I tried my best to drain through the water pipe hole.
I put the heater into storage since it works perfectly well and I’m sure I can find a new home for it. I covered up the hole in the siding with a piece of black plastic that I found under the vinyl flooring and some duct tape. Renew-Reuse-Recycle.
With the water heater out and the cabinets removed, I could finally pull out the paneling and see how bad the damage was one the left front corner. Well, it was as bad as the right front corner. With both corners exposed and all the paneling removed from the front wall, I could see that the water damage extended almost across the entire front of the trailer. I inspected the frame a little closer and realized that in order to replace the rotted wood, I’d have to take the front aluminum siding off completely, exposing the trailer to open air during the repair.
That was a big job and kind of intimidating. I decided that since it was January, I would put off opening up the siding until spring and better weather. So, after several days of hard work, I had the kitchen area demolished and a complete idea of the kitchen area water damage inside my walls. 20 years of a slow leak did some serious damage. That made me pretty nervous about the water damage in the back corners! I was also worried about being able to seal up the trailer to prevent damage like that from occurring again. But, as my mom pointed out, I get another 20 years out of the trailer I can be pretty happy no matter what. Good point, mom.
Using this trailer for the next 20 years would be amazing. I’m going to repair all of the rotten wood and everything else with the goal of getting 20 years of use out of it. I’m not going to take half-measures and I’m not going to do everything the cheapest or easiest way. I’m going to do things the right way, the smart way, and plan for it to last.
Click on the link below for the next chapter of the Wind Rose Reno! More demolition to come!