Rebuilding the Wind Rose: Part 2
This is the story of how my husband and I purchased a 20-year-old travel trailer and I DIYed the crap out of it to make it suitable for full-time living. In this series, I’m giving All of the details about the process through every step, as performed by me, a 26-year-old woman with No experience in construction. The first installment in this series is called “How to DIY an Old Camper For Full-Time Living”, detailing the purchasing process and the changes I planned to make.
Tires
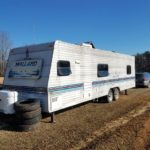
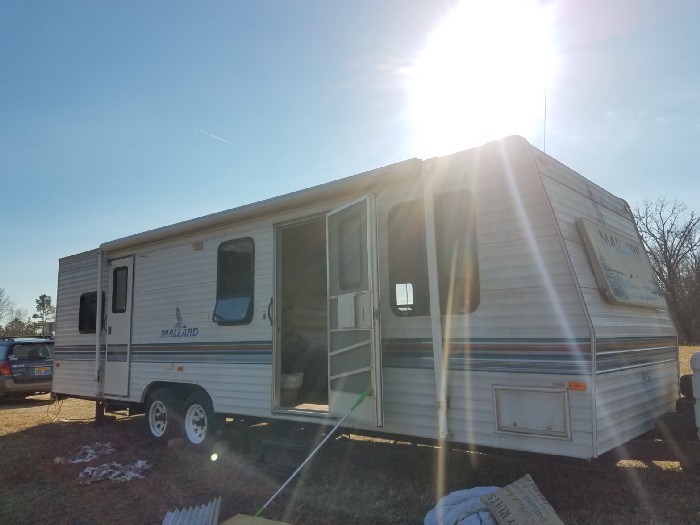
With our new-to-us 30ft travel trailer safely parked at the farm, it was time to get started on all of the improvements I was dreaming about. Let’s get down to business and I’ll discuss the improvements that had to be made to our old trailer.
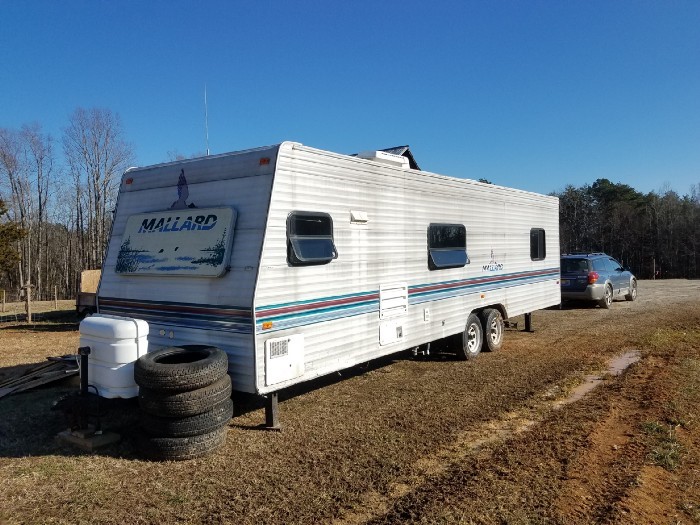
Before we could even drive away with our freshly-purchased trailer we had to buy new tires for it. The tires that were on it had deep dry rot cracks where they were touching the blacktop. The owner said he hadn’t moved it in 7 years and by looking at those tires, I could tell. There was moss growing in the cracks on those tires.
Now, you only have to Google “travel trailer flips on the highway” once in order to get a full understanding of how bad it is to blow a tire. I had a horrifying vision of spending $3,500 on the travel trailer of our dreams after months of searching, only to watch it turn into a heap of splintered wood and aluminum on the side of the road before we even got it home. The owner tried to say he didn’t think they were that bad, but I flatly refused to take it until we could get new tires. My research on the subject says to replace your trailer tires every 5 years, even if you’ve hardly used them. Dry rot is not safe and it’s better to be safe than very, very sorry.
We agreed to give the owner a $1,000 down payment/security deposit to show our intent to buy it, then we took the title (so he couldn’t sell it to someone else) and came back the next day for the tires. We ended being able to find a place that would switch out the tires for us (even though it was a Sunday and the day before New Years). So after hours of waiting for them to squeeze us in, we headed back with brand new tires to put on our travel trailer. Those old tires? The people at the shop told us they were from 1996. Original, 20-year-old tires! I’m so glad we didn’t take the chance and drive away with them.
We paid $300 for the 4 new tires, which were fairly inexpensive (not Goodyear). We figured if we were going to replace them every 5 years then we didn’t need a super long-lasting brand. Also, we’re planning to live in our trailer mostly in one place, so they don’t need to be able to withstand a lot of wear.
Exterior Repairs
There were a few immediate problems with the travel trailer that would have to be fixed even if I wasn’t planning a complete renovation. The big one was the roof re-seal. These 1990’s travel trailers have aluminum roofs, which are slightly heavier than rubber or fiberglass but much more durable and reliable. The aluminum roof on the Wind Rose was a big bonus in my opinion. I’d rather have slightly fewer clothes packed into my trailer than a leaking roof that needs to be replaced every 5 years (and costs $1,000 every time).
However, even an aluminum roof can leak at the seams, such as the edges of the roof and around any vents or holes. There were two fan vents on our roof, as well as one vent for the black water tank and one vent for the grey water tank. There was also a hole for the air conditioner and the vent for the refrigerator. In the front of the trailer the aluminum siding curves over and meets the roofing aluminum on top, which helps prevent wind-driven rain from getting in while it’s being towed. But it also leaves a seam and a low spot where water collects when you’re Not driving it. So all of those were weak spots in the aluminum roof that would need to be carefully caulked and sealed.
By painting the aluminum roof every so often (5 years) with a waterproof, white, elastomeric (rubber-ish) coating you can ensure that it won’t leak and also help reflect the sun away from the roof, keeping you cooler inside. This 20-year-old trailer had never had an elastomeric coating applied and much of the caulk sealing the vents and edges was dry and cracked. I would need to scrape away all the rotted caulk, unscrew all the vents, re-apply putty tape or butyl tape (they’re almost the same thing), screw the vents back on, apply caulk to the edges, and then paint the entire roof with the elastomeric coating.
That wasn’t going to be a small job. Especially annoying was that I don’t have a garage or barn to work in, so I would need to wait for good weather and a few days in a row of at least 50 degrees (to cure the elastomeric coating). Since it was January, I knew that would mean waiting a few months for nice spring weather. I put “roof re-seal” on the list and put it out of my mind until spring.

The other exterior jobs mostly involved using caulk and butyl tape to reseal all of the holes in the siding; running lights, doors, windows, vents, hatches, and ports. You don’t realize how many holes are in your “waterproof” aluminum exterior until you have to reseal them all. I’ll have to go along and scrape up the old caulk, remove whatever the attachment is, add butyl tape, screw it back on, then apply fresh caulk. Hopefully, this kind of extensive re-seal will be a one-time job. Every year I’ll plan to go around with some caulk and touch up any areas that need it, but that will be much quicker.
All of my research (reading blogs of other travel-trailer-DIYers) indicates that water infiltration is a constant and ongoing problem that needs to be addressed continuously, or you risk losing your trailer to rot and mold. Keeping everything nicely caulked and sealed and keeping a vigilant watch on your roof is key. I’m definitely starting to feel like a homeowner now. I remember my parents worrying about the roof and the windows leaking and now I understand the stress of trying to keep your home from deteriorating around you!
Finally, I want to wash, sand, and then repaint the aluminum siding. I love ducks so I was really pleased that our trailer is a Mallard, but I’m not a huge fan of the 90’s blue and maroon striping. I’m not sure what I want it to look like yet, but I know I want it to look like a home, not a trailer. But that will be one of the last steps since it’s purely cosmetic and doesn’t need to be done before we can move in.
Utility Repairs
One of the biggest worries when buying an older trailer is the condition of the exterior utilities. Your electricity, water, and propane all come from outside and they’re subject to weather and damaging UV rays. In our case, the propane tanks are 20 years old which makes them too old to legally refill. They need to be replaced and we’re probably going to replace them with slightly bigger tanks. More capacity will mean fewer trips to refill propane.
The bigger problem is the condition of the rubber tubing that connects the tanks to the appliances in the house. The rubber tubing on our propane tanks is as hard as a rock. I’m pretty sure that’s a bad sign. In addition, the battery mounted on the tow hitch is small and somewhat older. While it’s working, for now, I’m still putting that on the list for an upgrade. A newer, deep cycle gel battery will give us more capacity for when we’re not plugged into shore power.
We also needed a converter plug so we could plug our 30amp power cord (imagine the cord for your refrigerator) into a normal house-sized outlet (15amp). That, at least, was an easy fix. I ordered one on Amazon for less than $20. Keeping the battery charged by connecting the trailer to “shore power” is beneficial even when you’re not really using any power. Running down the battery below 80% can damage it permanently.
As for water and sewer, I’m going to leave buying new hoses and hook-ups for later, when we are ready to start using those utilities. During the reno, everything will be disconnected and turned off anyway. As a stroke of luck, the sewer in our 20-year-old trailer was Pristine! I don’t think the black water tank (toilet) had ever been used and the grey water tank (sinks, shower) was equally clean. That’s a big relief because we’re going to change the bathroom and I don’t want to have to clean up someone else’s waste before we work on the plumbing.
Interior Repairs
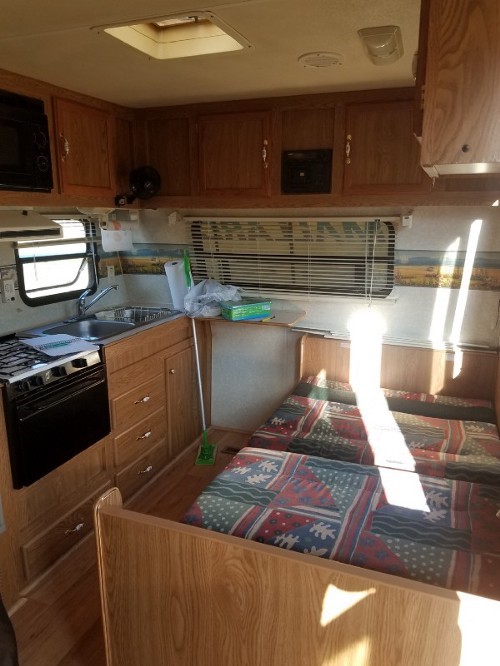
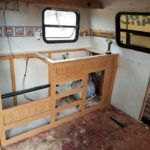
There are a few spots of water damage inside the trailer that need to be addressed apart from my renovation plans. Water damage is a sneaky issue because most of the time the damage you can see if just the tip of the iceberg. In this case, I saw the rippled and bubbled wallpaper with yellow staining that indicates water damage at both front corners of the trailer in the kitchen area. I hope it’s just a small, maybe 2ftx2ft area that needs to be replaced.
However, there’s no way to know without removing the wall paneling and checking the insulation and studs underneath for rot and mold. That’s not a small job, especially because of the cupboards and the dinette in front of those corners. The corners are not accessible without removing the cabinets and the dinette.
Unfortunately, you can’t just ignore water infiltration. There could be mold growing back there, or the studs could be rotted away. So I’ll need to take out the dinette and the kitchen cabinets to remove the paneling and see the state of the water damage. I also need to trace the source of the leak to the entry point in the exterior so I can close it up and prevent it from getting worse.
And that’s not all! I found similar signs of water infiltration in both back corners and a smaller spot under the window behind the couch. Looks like I have some paneling to remove in the bedroom as well. Like with the kitchen, I’ll have to take out some cabinets and the bedside tables to access the water-damaged area. This reno is getting bigger than I thought it would be! I guess I should have known that a 20-year-old trailer wouldn’t be as pristine as it looked.
I’ll detail the results of my hunt for water infiltration and the long, dark path that it led me down in the next post.
https://webuilditourway.com/diy-camper-renovation-part3/